
I built this wine bottle rack for my girlfriend’s sister as a Christmas gift. It uses about 8 board-feet of 3/4" red oak, and cost me about $20 total to build. I designed this in Fusion 360, and every curve is tangent to the adjacent curves, creating something I find quite pleasing to the eye.
| Material | Description | Price | ||
|---|---|---|---|---|

|
Clamp Set for 3D Carving |
Includes bases, boosters, arms and screws to clamp materials up to 1.75" thick |
||

|
HSS Upcut 2 Flute - 1/4 in Cutting x 1/4 in Shank |
Onsrud-brand bit with 1/4" shank and cutting diameter for cutting woods and soft metals |
$14.45 |
|

|
X-Carve |
X-Carve Core Components dont use 2 |
||

|
X-Carve 2015 to 2016 Update Kit |
1000mm Wide MakerSlide, Side Board, and Z-Probe dont use 1 |
||
| This project's Bill of Materials is not complete. Add to Cart |
$14.45 |
|||
15 minutes
Using a band-saw, table-saw or hand-saw, re-saw a piece of 6/4 thick rough-sawed red oak into two 8″ × 24″ × 3/4" pieces.
Repeat this process so that you have 4 pieces total.

15 minutes
Joint one edge of each of the 4 pieces of re-sawed red oak, then plane to 0.70"

240 minutes
Add wood glue to each jointed end of the stock. Then place on clamps, and add pressure making sure to keep each panel as flat as possible.
Wait at least 24-hours before removing from clamps. Use a chisel to remove any glue squeeze out, and then cut each panel down to 13″ × 24″.
Now run each panel through the planer on each side to remove any warpage and misalignment that might have occurred during glue up. In my case I had to take very little material off so that everything was nice and flat.

5 minutes
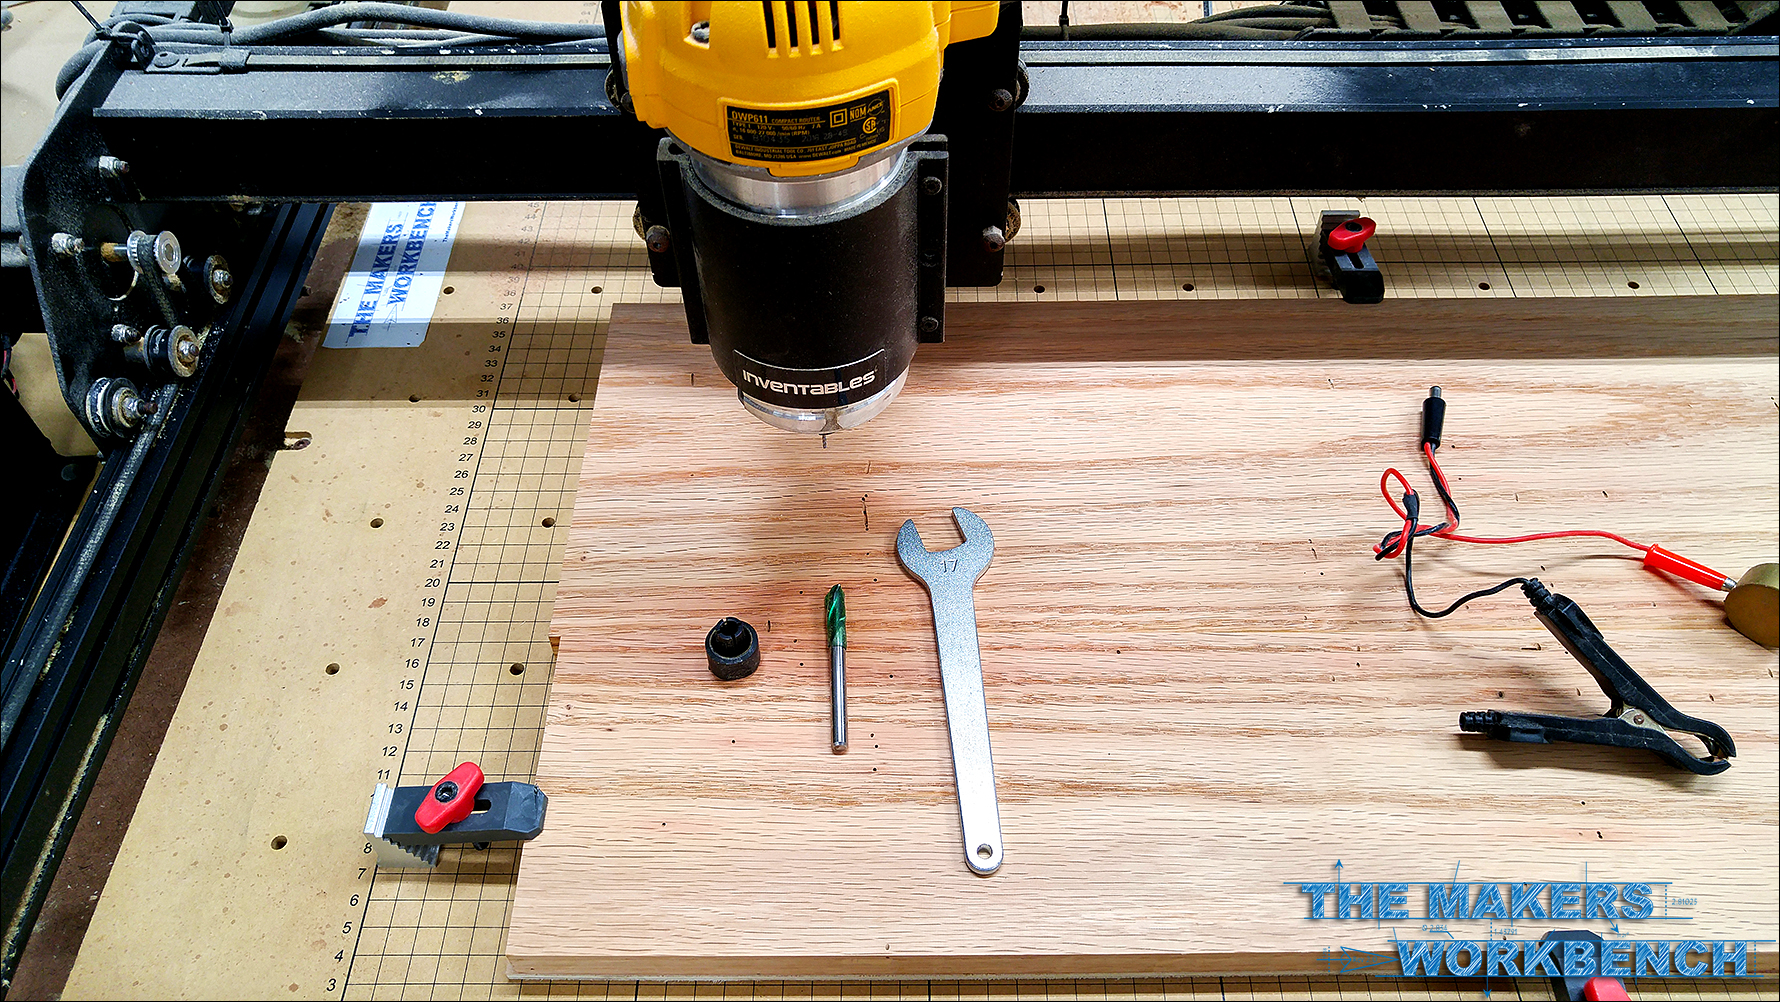
Using some of the strap clamps from the 3D Carving Clamp Kit, secure one panel to the X-Carve’s waste board with a small 1/8" piece of MDF below the panel to avoid scaring the X-Carve waste board.
When setting up the machine for carving, I like to set the Dewalt 611’s speed to somewhere between 1.5 and 2 on the dial. This allows me enough RPM for decent feeds and speeds while keeping a nice surface finish, and not burning up the 1/4" HSS bit.

5 minutes
Install the 1/4" End Mill
When setting up the machine for carving, I like to set the Dewalt 611’s speed to somewhere between 1.5 and 2 on the dial. This allows me enough RPM for decent feeds and speeds while keeping a nice surface finish, and not burning up the 1/4" HSS bit.
5 minutes
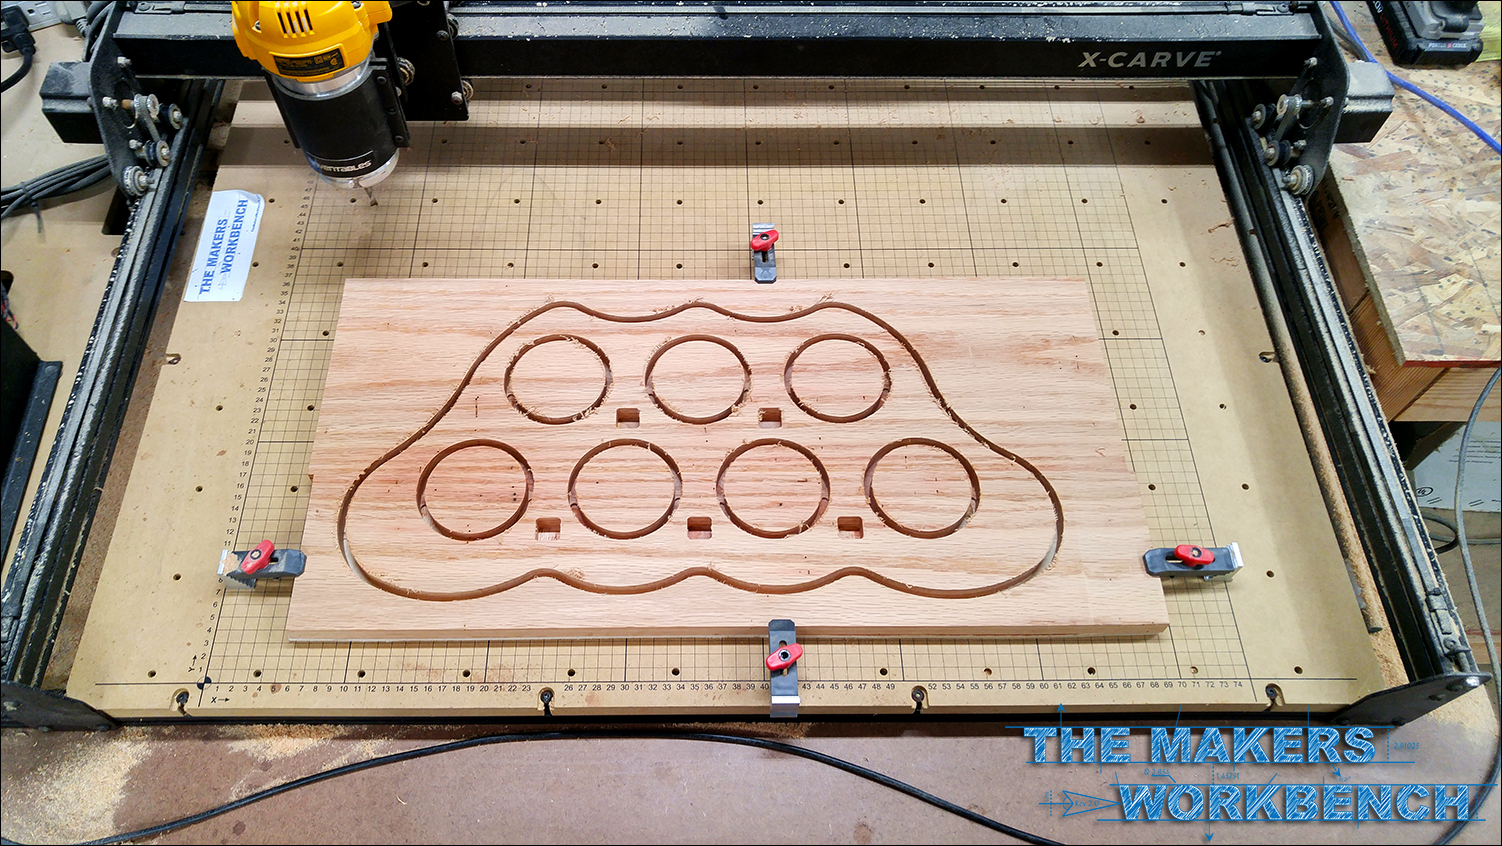
When the machine starts cutting, take some awesome photos to share!

2 minutes
When End Piece #1 finishes, remove it, and secure the second panel and start cutting again.
While the next end piece cuts, work on finishing this one. Use a 1/4" round over bit to round the edges, then sand to 320-grit.
30 minutes
While end piece #2 is finishing up, cut five 1″ × 1″ × 8″ bars from red oak. Then using a dado stack, cut a 1 1/8" long by 3/4" square tenon on each end of the five bars.
Then round over each long edge of these tenons so that they match the mortise’s cut into each end piece.
Now take a thickness measurement of the end pieces and use that measurement to mark each tenon measuring from the shoulder towards the end. This line will be where we locate the edge of the 1/4" hole that will hold the dowel pegs.
Using a drill press drill a 1/4" hole so that the holes edge overlaps the mark you just made by 1/64". This will allow each peg to hold some pressure on the tenon during final assembly.
I also like to kiss each end-grain edge of the tenon on the belt sander and I purposely make them uneven to add a bit of that “hand-made” look and feel to the project.

240 minutes
Sand each end piece and each spreader bar to 320-grit sandpaper, then pop the grain by wiping down with a wet towel. Sand the raised grain with 320-grit paper again, and then apply the stain of your choice to all pieces. Once the desired color has been achieved, seal with your favorite sealer. I used wipe-on polyurethane.
Now is also the time to cut your 1/4" dowels to 1 1/4" long each, and then chamfer the ends on a belt sander. Stain these to the desired color as well. Let everything dry overnight, and come back the next day to assemble.

10 minutes
While this is pretty straight forward, I will describe it anyway.
Add a little glue to each surface inside the five mortises, and then do the same to each spreader bar, keeping the glue between the tenon’s shoulder and the line you drew earlier.
With every mating surface glued up, slide each spreader bar into a mortise on one of the end pieces. Then place the other end piece on to the other side of the spreader bar and use clamps to pull everything together tight. Take a moment to wipe up any glue squeeze out with a wet rag.
When the glue is cleaned up, add a little glue to the middle of each dowel, and then slide them in place. Feel free to gently tap them in with a hammer as a tight fit is preferred. Clean up any glue squeeze out, and then let things dry for 24-hours.

1 minute
Its Finished!

1 minute
Take a photo!


Troy Stoneking
Charles Gantt
John Choate