
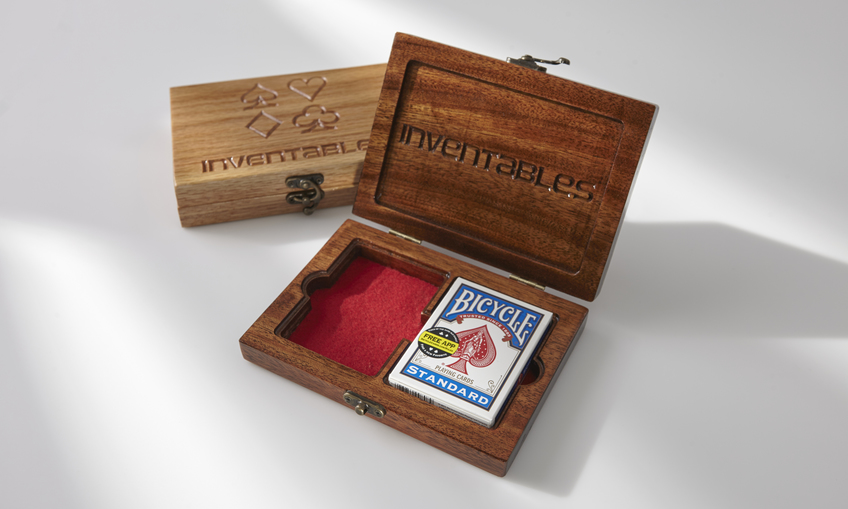
Here are the steps to build a holder for two decks of standard playing cards. Customize the lid with a family name or neat graphics!
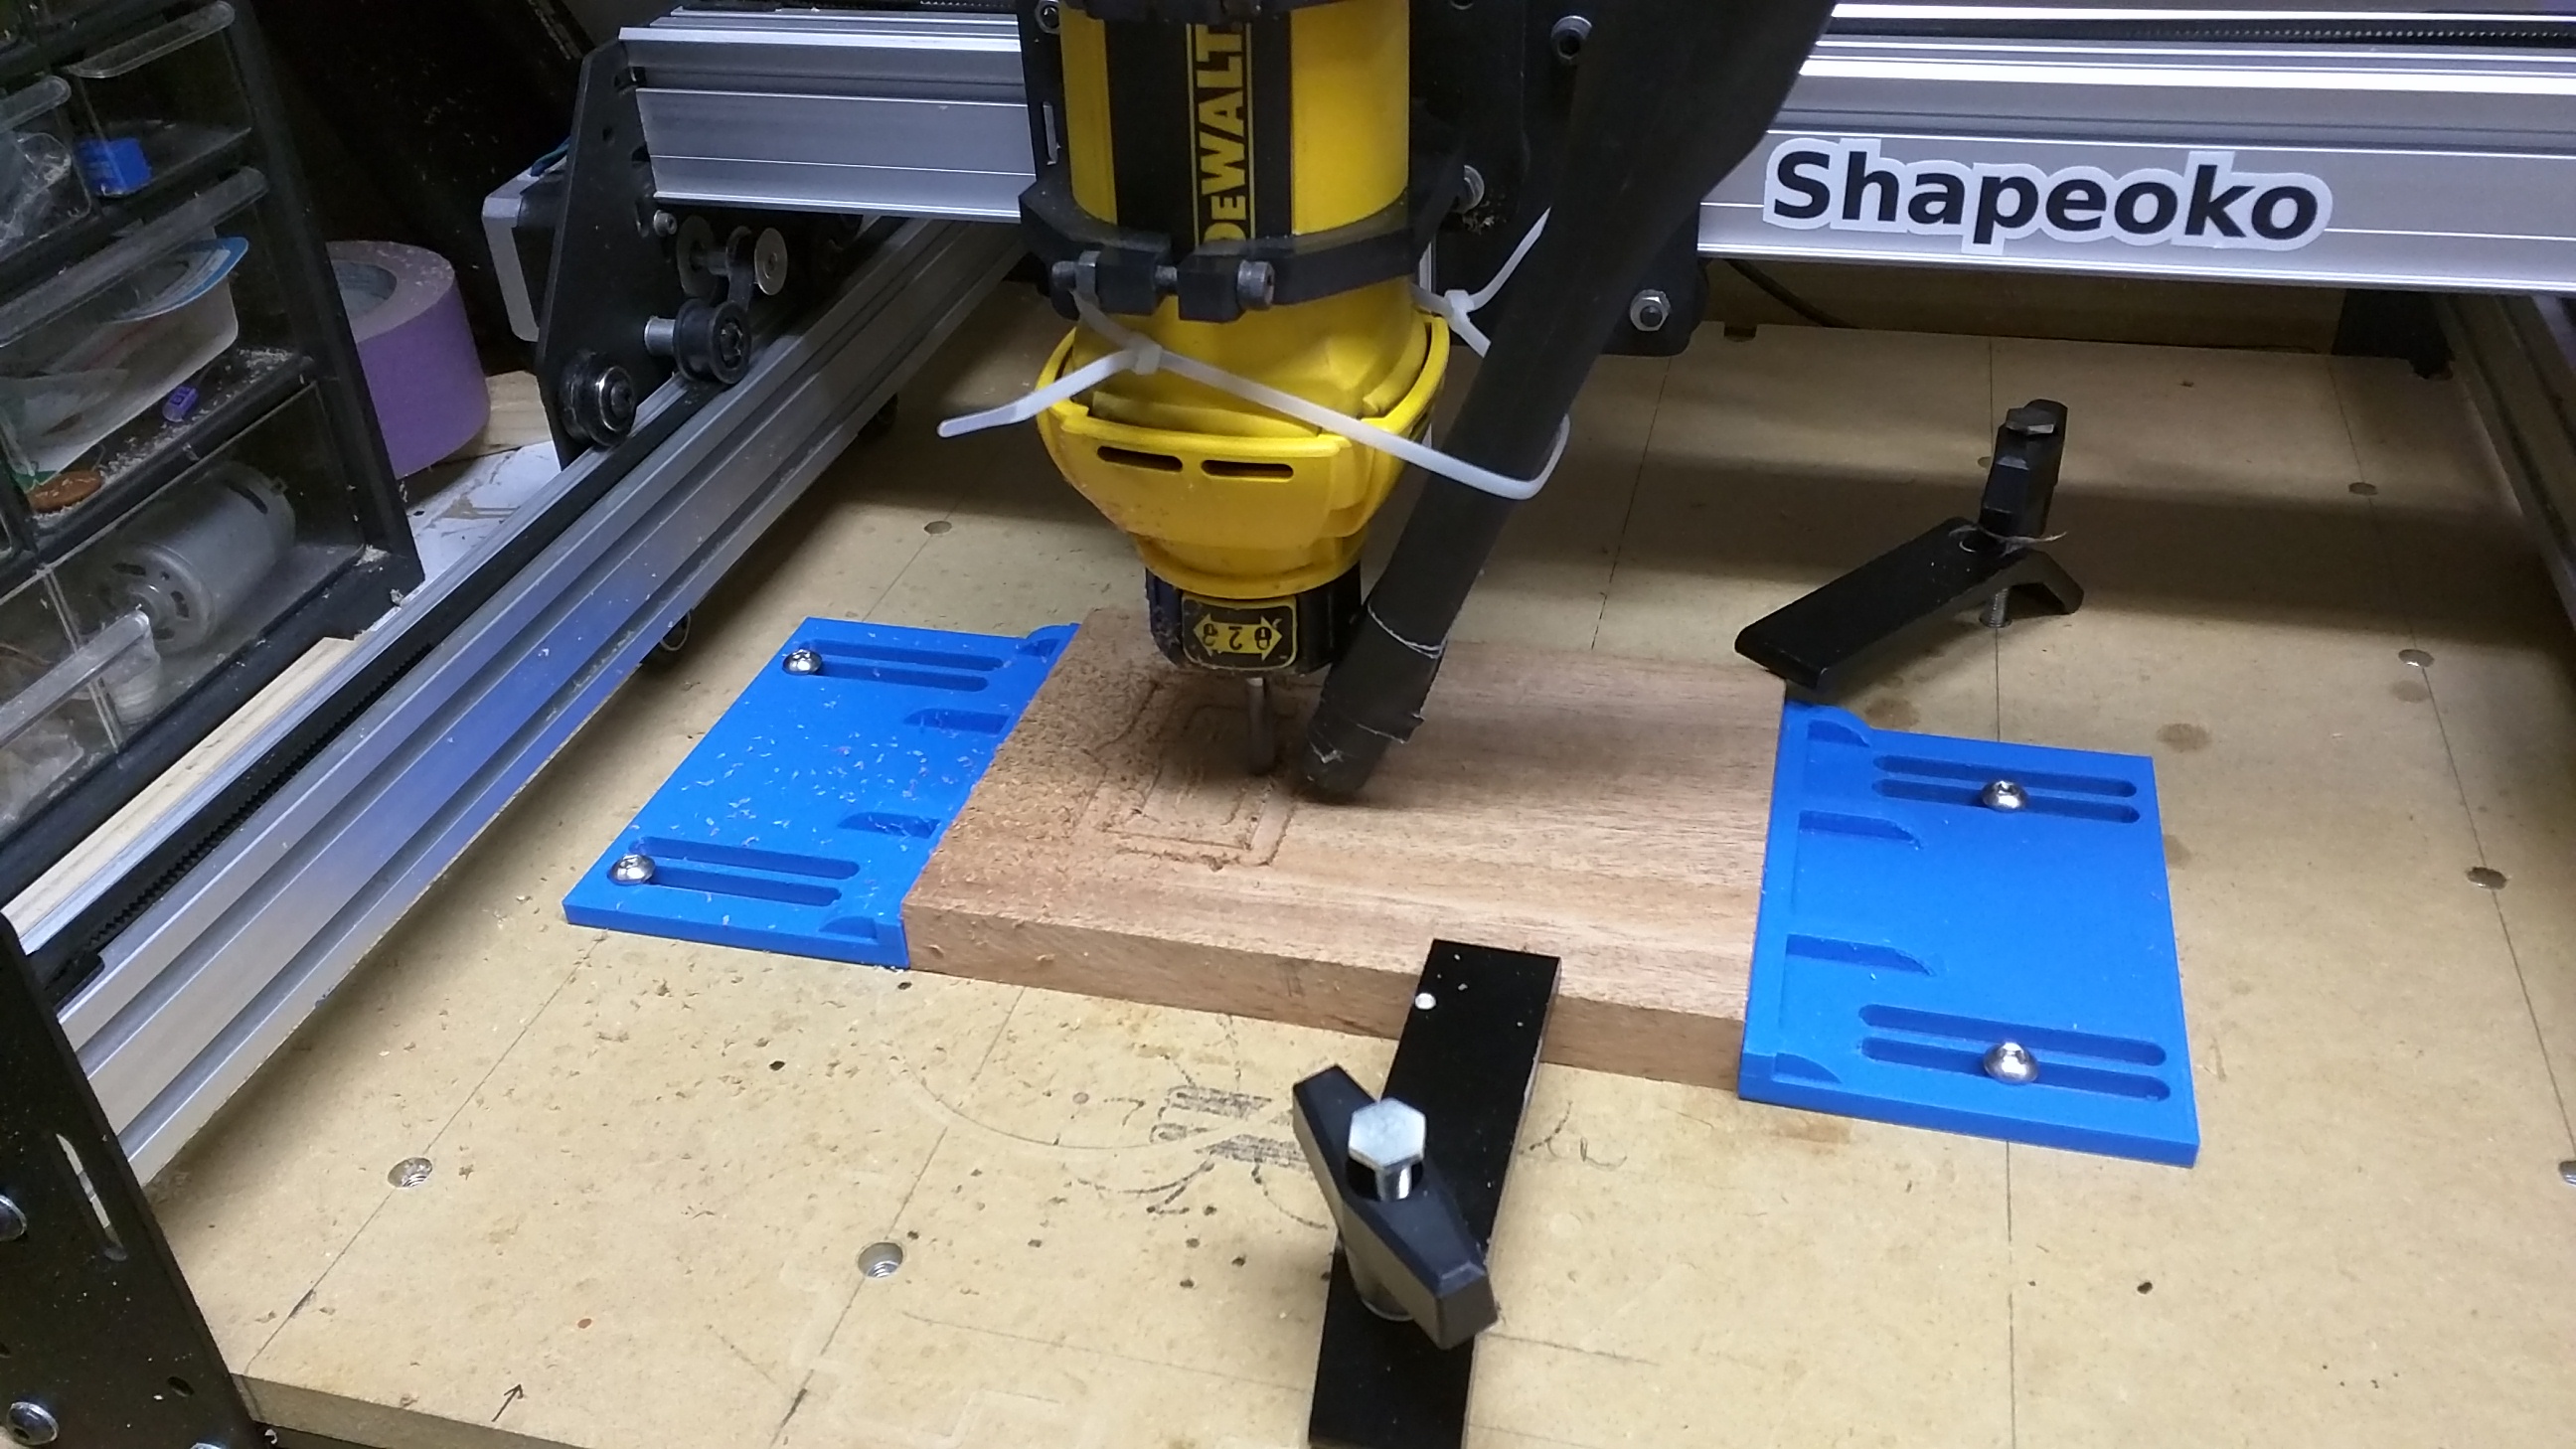
Multiple cuts are required on easel: 1 for the main pocket, 1 (optional) outline cut around the pocket, and 1 cut for a pocket on the inside of the lid.
| Material | Description | Price | ||
|---|---|---|---|---|

|
African Mahogany Wood (×2) |
6" × 12" × 3/4" African Mahogany |
||
1 minute
Here’s an overview video of the project and the steps.
Cut two pieces of wood that are at least 3/4" thick (such as the African Mahogany from Inventables) to 5″ × 7″. I like to cut the pieces together if possible, but you will be sanding them together to get them to match later.

90 minutes
The main pocket to hold the cards is 16mm deep. This will leave some of the card deck sticking above the wood, which means another pocket of 4mm is required on the lid to allow clearance. Also, these depths allow for a felt lining below the card decks to be added.
This can be a long operation. Using a 1/4" milling bit will help speed things up considerably.
30 minutes
To make the main pocket for the card decks more pleasing to the eye and also easier to grab that cards, we will mill out around the outside of the pocket to a depth of 4mm. I used a ball-nose bit to give a bit of rounded edge to this outline, but that isn’t required. You can open up this cut in Easel directly with this link
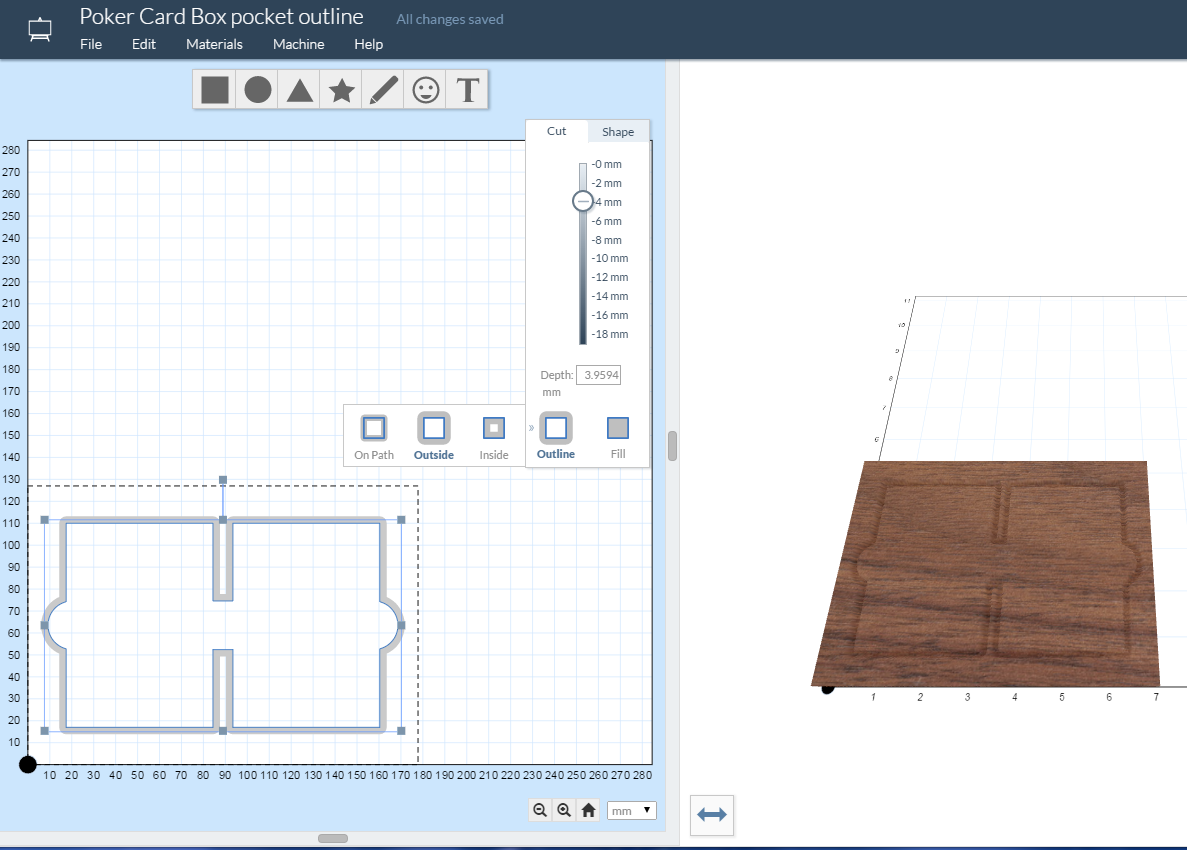
Switch over to the lid piece and mill out a rectangle on the underside to a depth of 4mm. This gives the clearance for the card deck so that the box can close fully. You can open up this pocket operation for the lid underside in Easel directly with this link

30 minutes
This step is completely optional, but with a great machine like the X-Carve or a ShapeOko, why wouldn’t you do some nice customization? Use Easel to mill out shapes or a name, or use software such as F-Engrave to do v-carving as shown in the video. Be sure and test this out on scrap wood first so that you don’t waste the work you put into the piece in the previous steps!

30 minutes
You may have your own preferred method on finishing the wood. For mine, I stained it and then wiped it off after just a minute or two. Then, after drying, I sanded away most of the stain, just leaving the darker stain inside my writing so as to make it stand out more. Then, I finished with 3 or 4 cycles of coats of polyurethane, then sanding with 220 grit sandpaper. Then, one final coat of polyurethane.
20 minutes
Add on your favorite hinges and clasp hardware. Keep in mind your screws in the hinges will need to be flat and close to flush in order for the box to open all the way and lay flat.

30 minutes
Print out the main pocket outline and lay it over some felt on a scrap piece of wood. Using an X-ACTO razor knife, cut through the paper and felt at the same time to get a felt outline that should fit perfectly into the box. Use some Gem-Tac fabric glue to glue the felt into the box. Be sure and put some around all of the edges. Use something with a flat rounded edge to push the felt into all of the corners and edge. It will stretch nicely and allow everything to make a perfect fit. Wipe away any excess glue and allow to dry.


Warren Downes
Frank Graffagnino
Jesse Schmidt
Frank Graffagnino