
Dominik kleine Kalvelage
Germany
A small box, that can be permanently attached to the X-Carriage to stow the Z-Probe (puck and alligator clip), while the plug of the Z-Probe can stay plugged in.
| Material | Description | Price | ||
|---|---|---|---|---|

|
Baltic Birch Plywood |
8" × 12" × 1/8" Baltic Birch Plywood |
||
1 minute
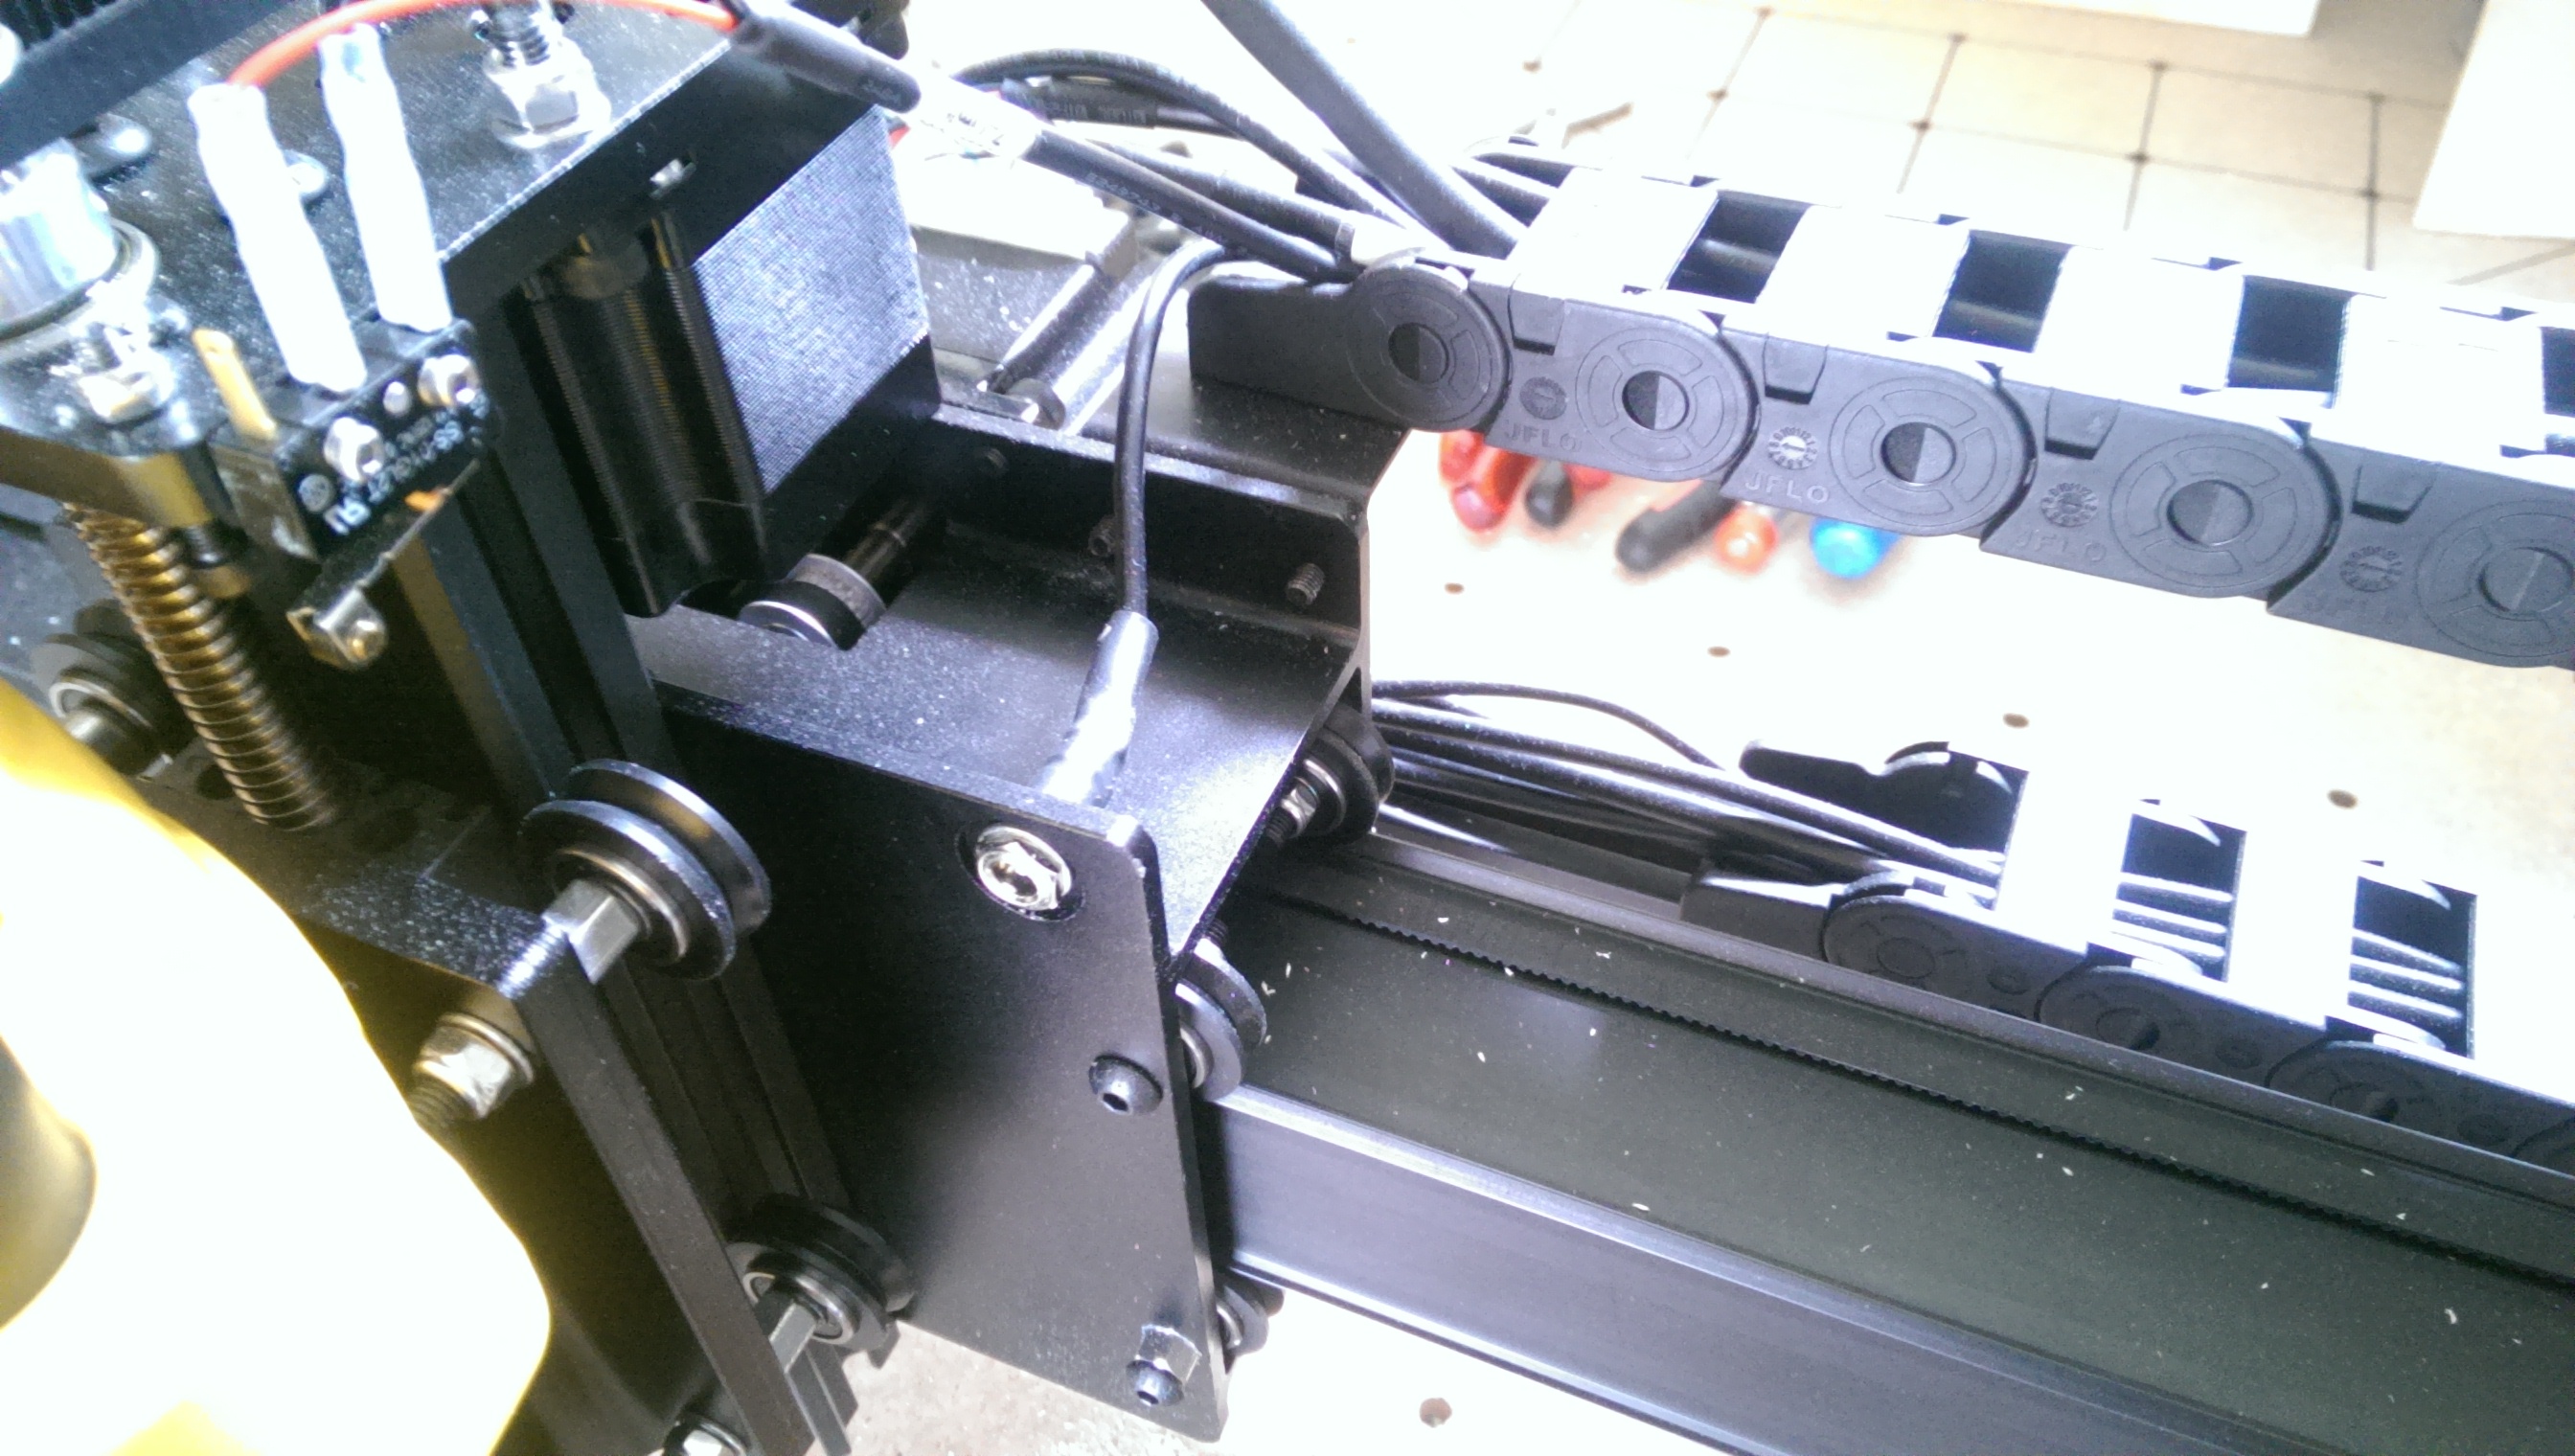
After a few carves on my brand new X-Carve it quickly bothered me to always plug and unplug the Z-Probe into the X-Carriage. I planned to build a small box, that should attach to the free space on the X-Carriage right next to the barrel connector port for the Z-Probe, so I can keep the Z-Probe plugged in and the X-Carriage will carry the Z-Probe during the carves.
The box should be held in place by the two screws of the drag chain bracket, which stick from the back into the center of the X-Carriage and the barrel connector port for the Z-Probe, which is attached to the front side of the X-Carriage.
11 minutes
Designing in Easel took me a while, but you can just open the project in Easel and carve. I used Birch plywood with 1/8’’ thickness, but I think you can also use any other wood/plastic with the same thickness.
You have two options, which possibly requires you to modify the scetch before carving:
a) Lead the cable for the barrel connector port through the back wall of the box. This is what I did and what is shown on the pictures. This is a cleaner solution, requires no modification of the scetches, but requires a bit more work during the assembly step (last step).
b) Lead the cable for the barrel connector port over the back wall of the box. This is a more simple solution and requires less assembly effort. However, before carving, remove the topmost hole in the topmost shape.
FYI:
For the measurements I used the technical drawings of the X-Carriage as reference. Of special interest were the diameter and position of the three holes, that will hold the box in place and the width (or depth) of the box to fit between the front plate and the back plate of the X-Carriage. See picture of CAD file (three holes highlighted in blue) and GrabCAD file here: X-Carriage on GrabCAD


30 minutes
After carving, lightly sand all edges and file all inside corners to be more rectangular (as the carving bit left a small round corner). Then assemble the box with wood glue. I painted the box with black varnish. Of course painting is optional, but I think it fits the overall (black) look of the X-Carve perfectly. After the paint is dry, it might be necessary to clean the four (or three) holes from any excess paint.
To attach the box to the X-Carriage follow these steps:
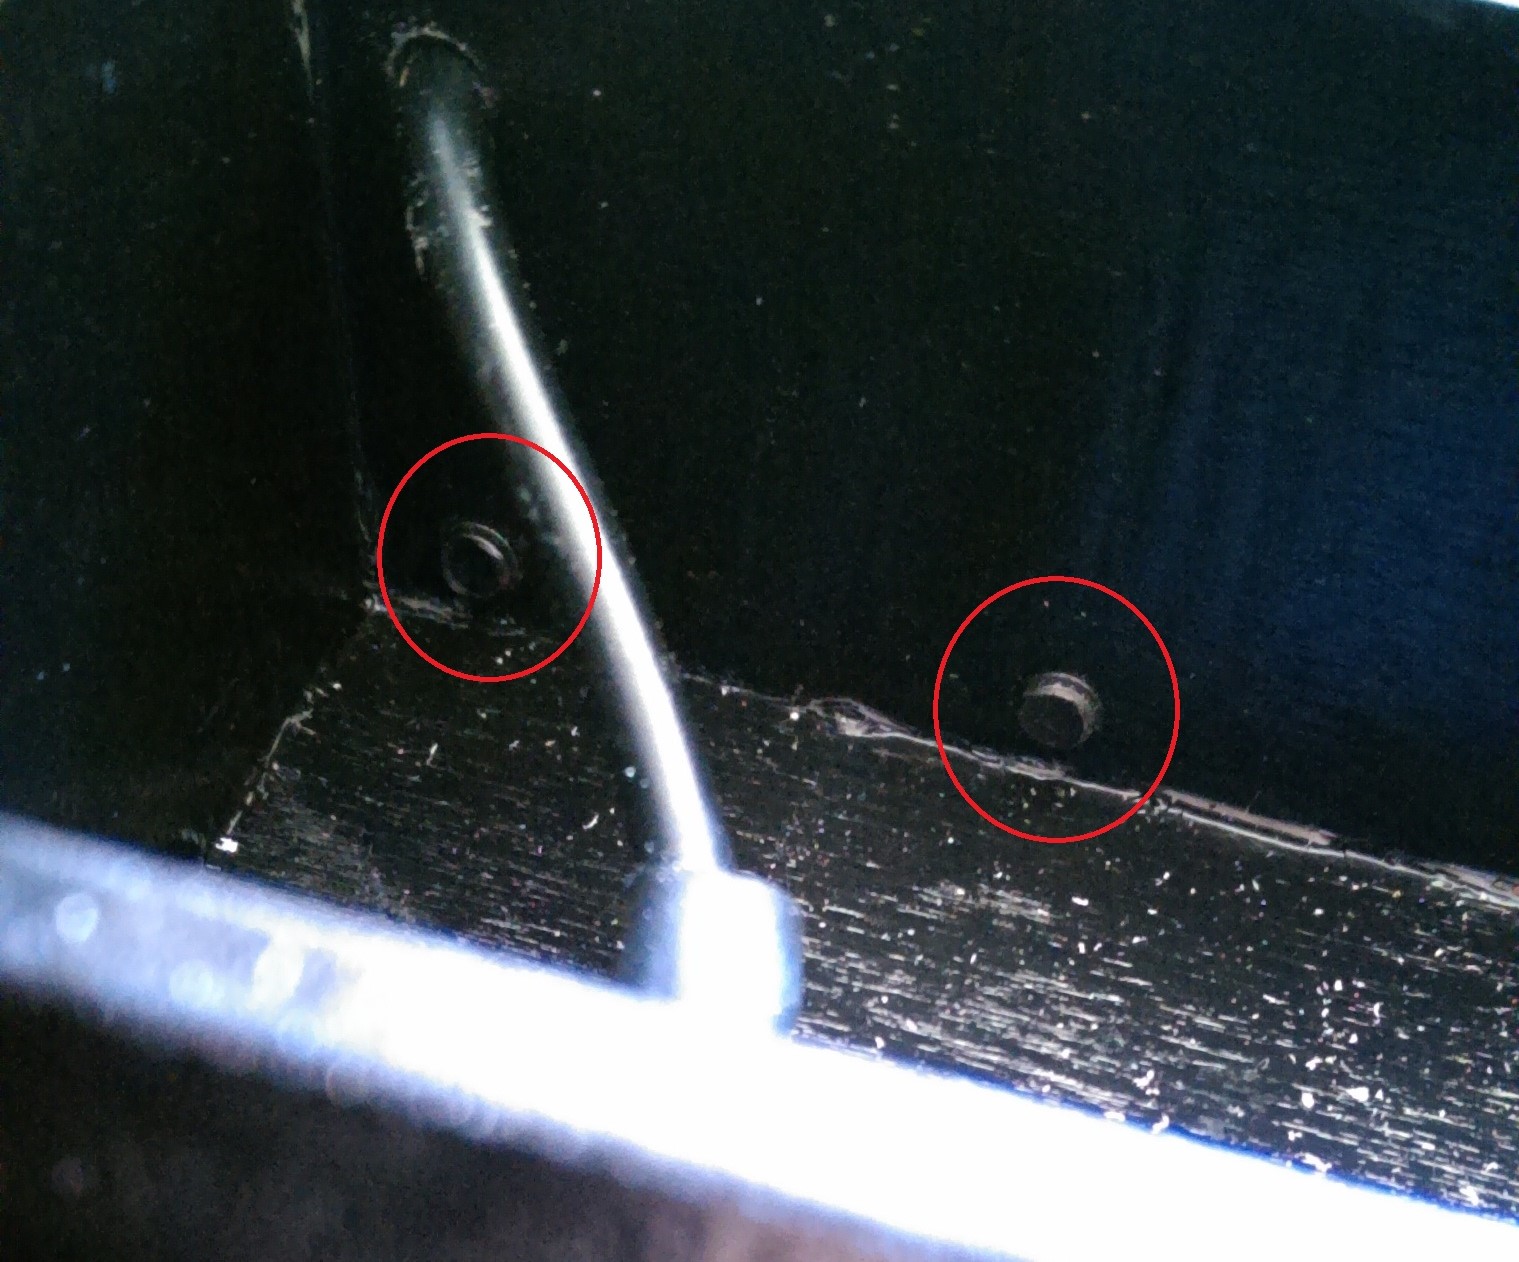
1. Unscrew the two screws of the drag chain bracket just enough, so they don’t stick into the center of the X-Carriage. The drag chain bracket should still (loosely) hold on to the X-Carriage. You don’t need to unscrew the screws completely.
2. Detach the barrel connector port from the X-Carriage with a 10mm wrench. Keep the lock washer and the hex nut for later reassembly.
3. (for option a)) In case you chose to lead the barrel connector port cable through the back wall of the box, you need to disconnect the cable from the X-Controller. Then get the cable out of both drag chains by partially opening the hinges and pulling the cable out.
4. Place the box in/on the X-Carriage, so the two bottom holes in the back of the box line up with the screws of the drag chain bracket.
5. Screw the two screws of the drag chain bracket back in until their ends stick into the box and hold the box in place.
6. Push the barrel connector port from inside the box through the hole in the front of the box until it lines up with the original hole in the front of the X-Carriage. Like during the original assembly of the X-Carve, use a 10mm wrench to secure the port in place, placing first the lock washer and then the hex nut over the port.
7. (for option a)) In case you chose to lead the barrel connector port cable through the back wall of the box, do this now from the inside of the box through the back of the box. Then place the cable back into the drag chain, close all hinges and reconnect the cable to the X-Controller.
Done.


Drew Kasel
Edward Boston
Bryce Snyder
Dominik kleine Kalvelage