Matt Slaga
Jacksonville, USA
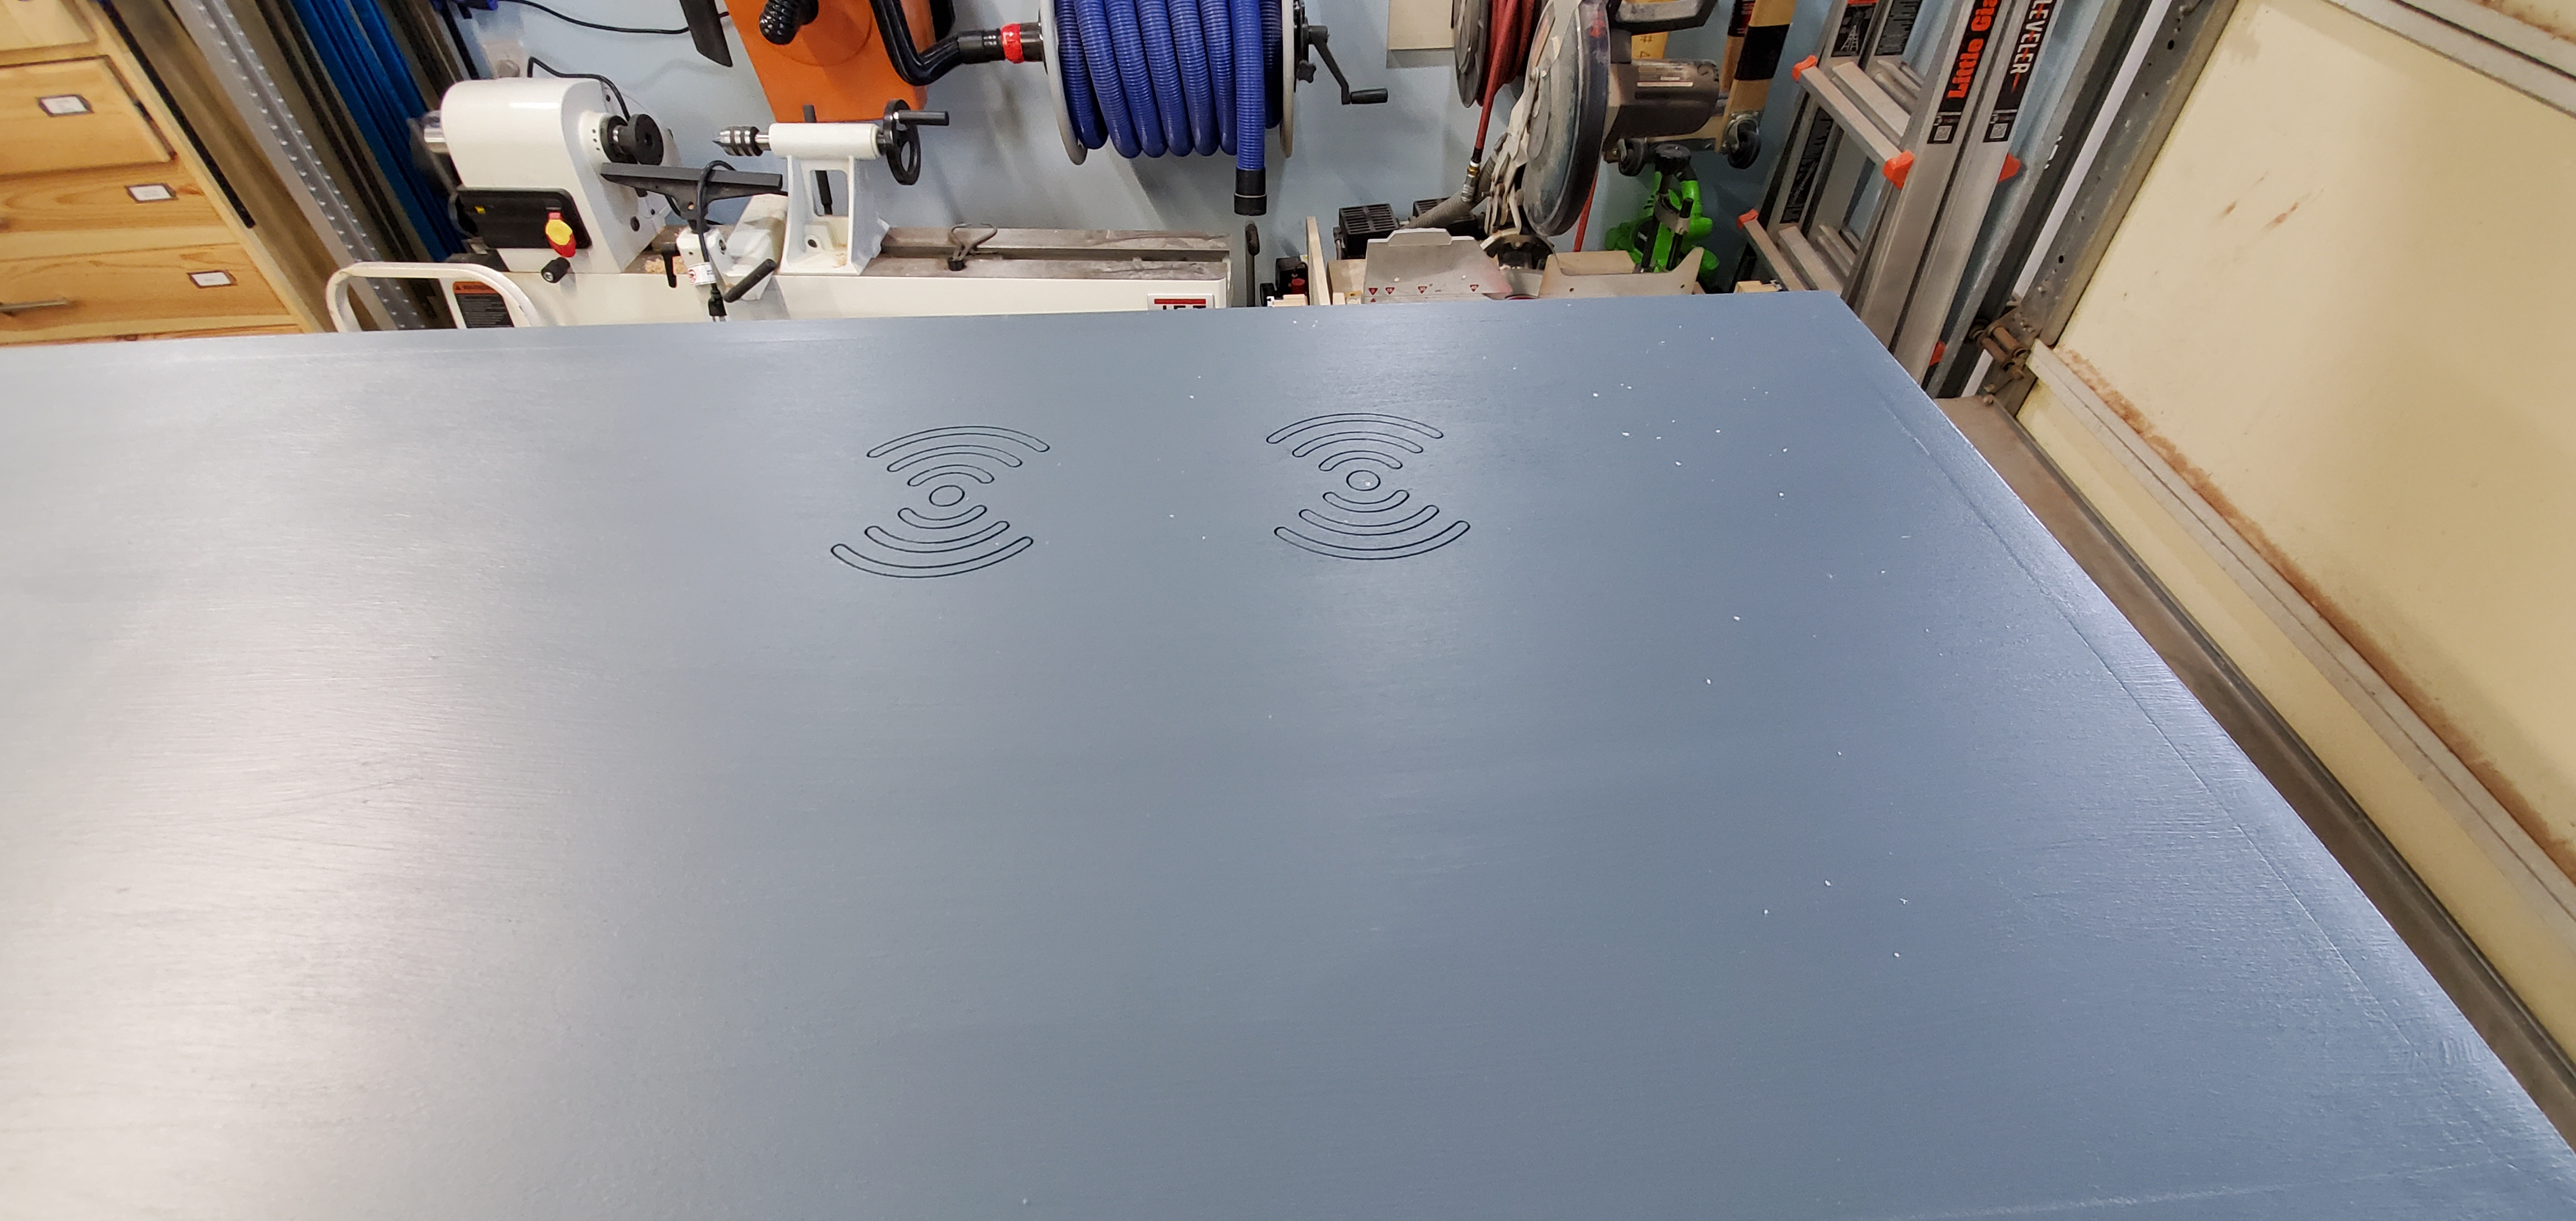
I was building a new console table for our kitchen, in a place where we typically drop our phones and kids charge their phones/tablets. I wanted to embed wireless chargers onto the top and provide drawers to keep all the wires and devices out of site (wife’s request). This is what I came up with.
5 minutes
For this, you will want your charger of choice (I used and the project carve sizes are for a Seneo charger), your phone with it’s case on, and several thin thicknesses of wood.
The exact charger is used is from the link below. Note – the links here are affiliate, tied to my 501c3 nonprofit organization, IT4Nonprofit.org. Using this link provides a small part that goes to the organization. If you want to learn more of what we do, check out our site or reach out.
To test, I simply plugged in the charger, laid a wood piece on top of the charger and my phone (in it’s case) on top of that. I tried different thicknesses until I got a steady charge.
In my case, my phone would still charge through 1/4" of plywood (which is what my top is made from). Based on this, I set my measurements to be ~3/16" to give a little room for error, paint, finish, etc. In hindsight, I’d probably go down to 1/8" on my next project just to be on the safe side. You can adjust the depths as needed for your particular wood/phone/charger device.
The other equipment used in this build:
1/4" Compression bit – my first time using a compression bit with the CNC, I was really impressed with the difference.
Compression bit 1
1/8" Compression bit (for 1/4" collet)
Compression bit 2
Drawer Charging Station
Hercules Charger
For the furniture I build this for (these files should be easily editable to fit any build you have in mind), I used two 3/4" plywood pieces laminated/glued together. In the Easel project, you will notice workpieces for ‘UpperLayerTop’, and ‘LowerLayerTop’. To ensure my two layers would carve accurately, I used a fixed L clamp on my X-Carve, and the same XY Zero location for both pieces. See the pictures for how I positioned these. My pieces were 14.5" wide x 54.5" long, so I had to overhang the X-Carve and add a little extra clamping power.
There are tabs and cable slots carved along both workpieces to allow for cable management and future access. See the short YouTube video for a view on what some of these are for.
The tab covers and sliders are a separate workpiece. These were carved from ~5mm plywood.


For this test fit carve, I made sure to use a scrap piece of plywood from the same type of plywood used for my furniture top.
The workpiece ‘TestCarve’ is just one charger pocket taken from the ‘UpperLayerTop’.
I carved this using only the 1/4" compression bit.
This test piece ensured a snug fit for the wireless charger, and ensured the cables wouldn’t be hampered for it to lay flat. It also allowed me to test wireless charging through the 3/16" leftover wood before carving on my actual top pieces.

120 minutes
If the prior step was a success, then you just need to carve our your final furniture top pieces.


Keeping the same L clamp used before, I flipped over the board ensuring my project workpiece alignment was correct. I used a 1/32 bit. I’d suggest altering the depth here depending on how much you want this to appear. I did .08, which I think ended up a little too deep for the obscure look I was going for. It also made painting these a bit tedious, as I needed a very small nail to clean out the grooves when the paint attempted to fill these completely.