
Here is my take for a Ridgid R4512 Table Saw Zero Clearance Insert. Why spend 40 bucks when you can make one in 30 Mins. Best part is you can use your riving knife with this insert!
1 minute
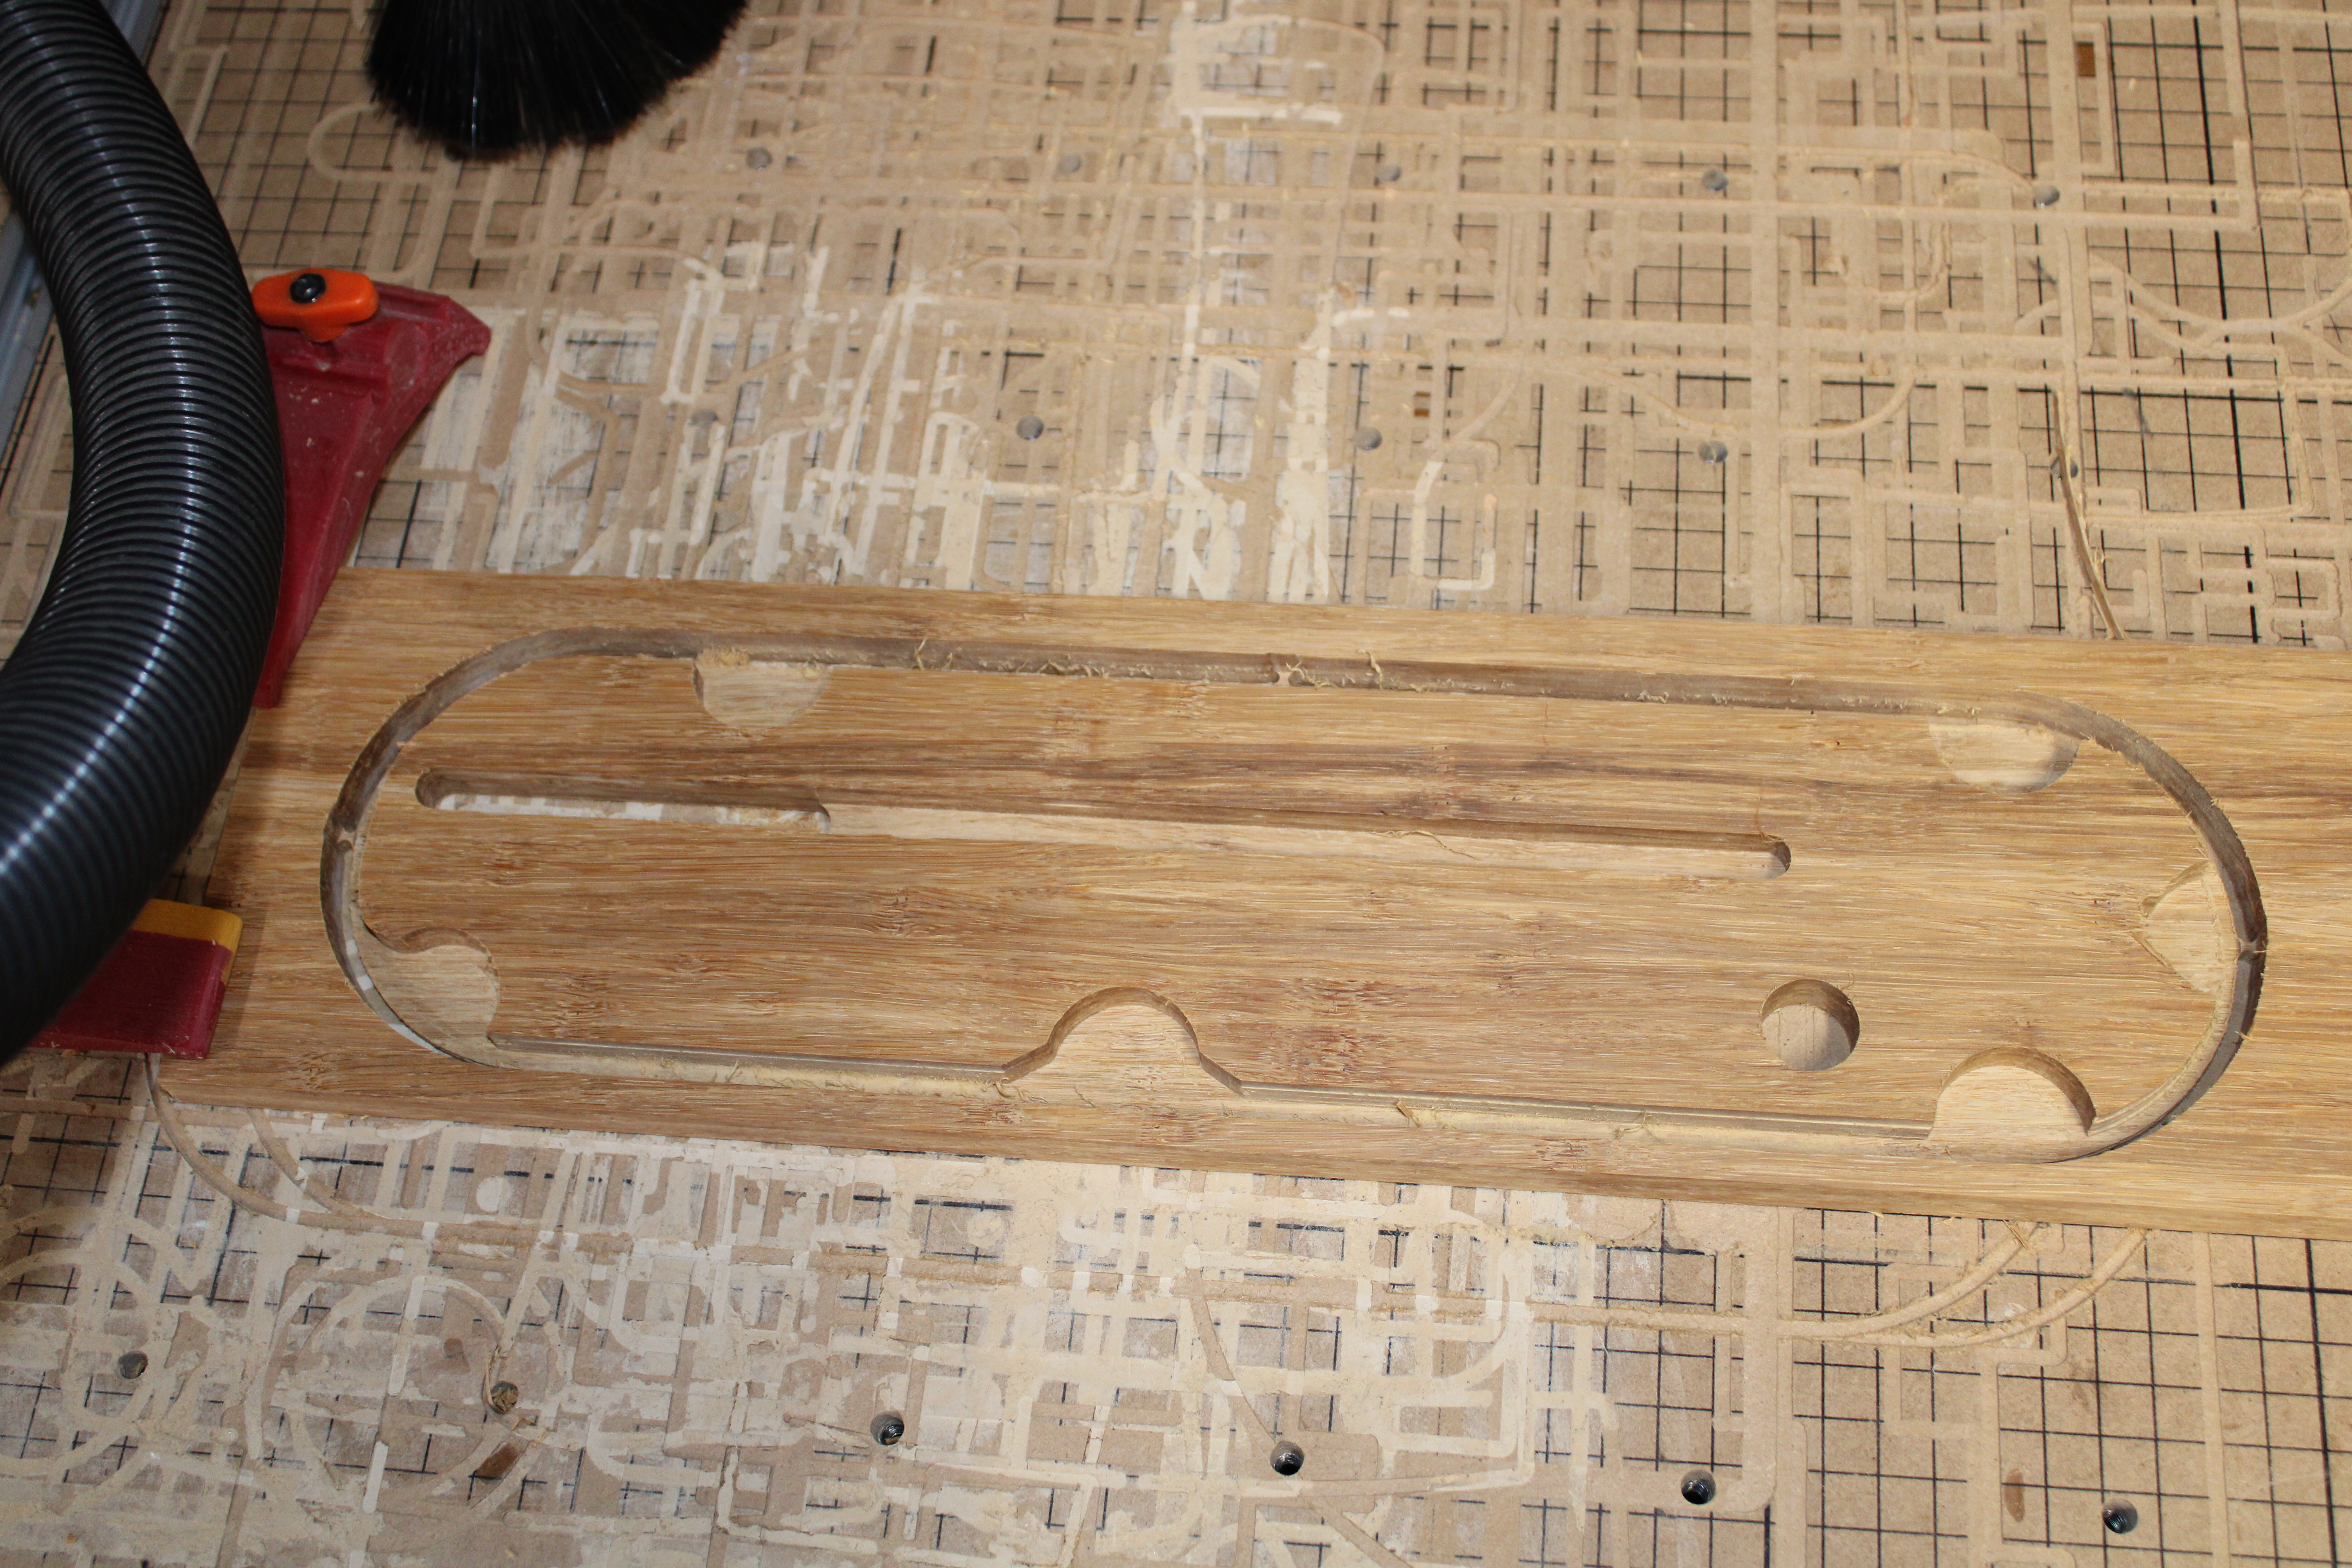
I used Bamboo Flooring for my inserts, Its hard as nails and solid wood. You can use pretty much anything as long as it 1/2" thick. The best part is once its installed you can use your riving knife.
30 minutes
Granted I didn’t use Easel to cut my inserts out, but I set it up on Easel for your use.
I used an 1/8" upcut bit running at .1 depth per pass 50 in/min feed rate. Tabs on the outer cut only. All others I made “FILL” cuts. This should take about 30 mins. Your fees and speeds will depend on your material.
10 minutes
After its cut out, just sand the tabs flush with the sides. I also had to clean some of the burs that were left. A card scraper worked great here.
2 minutes
This is optional, but I added a magnet to the end. The cutout will be already done. Its just a cheap .5 round by .125 thick. Got them at home depot in a 20 pack for a few dollars. I used CA glue to hold it in.

5 minutes
To make it fit very snug I added two screws to the end as seen in photo. First I drilled a hole smaller than the screw then one larger than the screw head. If you use a counter sink here you can skip the second drilling. These make it very easy to get a very snug fit. I used stainless steel, but anything would work here. Just make sure they do not protrude further than the sides until you adjust them.

5 minutes
I cut a piece of scrap aluminum (you can use any metal you have) for the tongue. Again I used CA glue to hold it then added two screws. No need to counter sink here there is plenty of room. Then I used my sander to round the corners.

5 minutes
As in the photo I adjusted the screws for a tight fit,

5 minutes
Once I had a tight fit I removed my riving knife to make the blade cut. Then I re-installed the insert, moved over my fence. Then turned on my saw slowly cranking the blade up. The blade slowly rises and cuts its kerf in the insert. If you are not comfortable holding down the plate use a scrap piece of wood. Keep your hands clear of course.

1 minute
And that’s it! Works like a charm. Good luck and happy Woodworking!

