Fernando Romero
Houston, USA
Added a 405nM 500mW blue laser to my Shapeoko 2 for laser engraving.
1 minute
I have seen a lot of DIY laser projects for CNCs on the internet.
I went for something I could purchase out of amazon that had decent reviews.
https://www.amazon.com/gp/product/B0152FU35Y/ref=oh_aui_detailpage_o09_s00?ie=UTF8&psc=1
I purchased a 405nM 500mW blue laser with a heatsink and a fan.
It does not have a fancy power control, basically its on or off.
So far its worked very well.
UPDATE: The laser burned out after a couple of hours of use!! :(
At least it was a good proof of concept, just need to get a better laser.
UPDATE: PUrchased a 3.8 W Jtech laser and it works awesome!!!!!

15 minutes
I wanted the laser to be controlled by easel through spindle control.
For this I purchased a 5V relay from inventables and wired it to the spindle PWM output.
My laser can only come ON or OFF, no power control since I don’t have a laser control module.
Right now my intention is only to engrave simple graphics (bitmaps) onto wood, I am not interested in grayscale picture engraving.

5 minutes
I enable “automatic” spindle control in Easel and specify the max RPM to be 12,000 RPM.
I generate work files the same way I would to work on the router.
The only difference is I set the depth of cut to 0.0001 in.
I also set the safety height to 0.0001 in.
I basically do not want the Z axis to move at all during an engraving job.
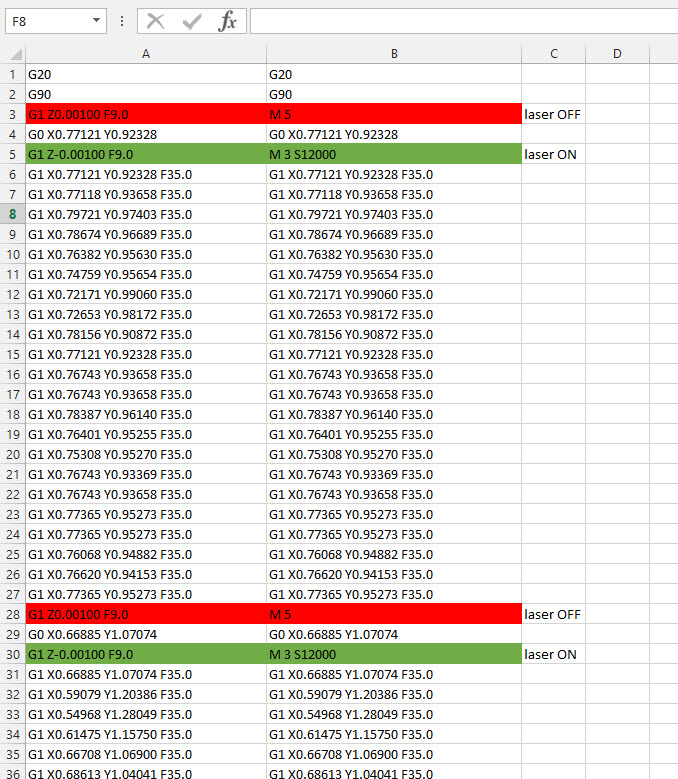
For the laser to turn on and off the G-code has to be modified to contain M3 (turn laser ON) and M5 (turn laser off) commands every time the z “moves” down and up respectively.
For this I export the g-code from easel, drop it into excel and use the following formula to change all the Z movements to M3 or M5 commands.
Once all the M3 and M5 commands are inserted, I copy the the new column to a txt file and turn that into the g-code file.
I then import the g-code file back into easel and send it to the cnc.
Works really well.