
My Entry for the #easelpowerhour
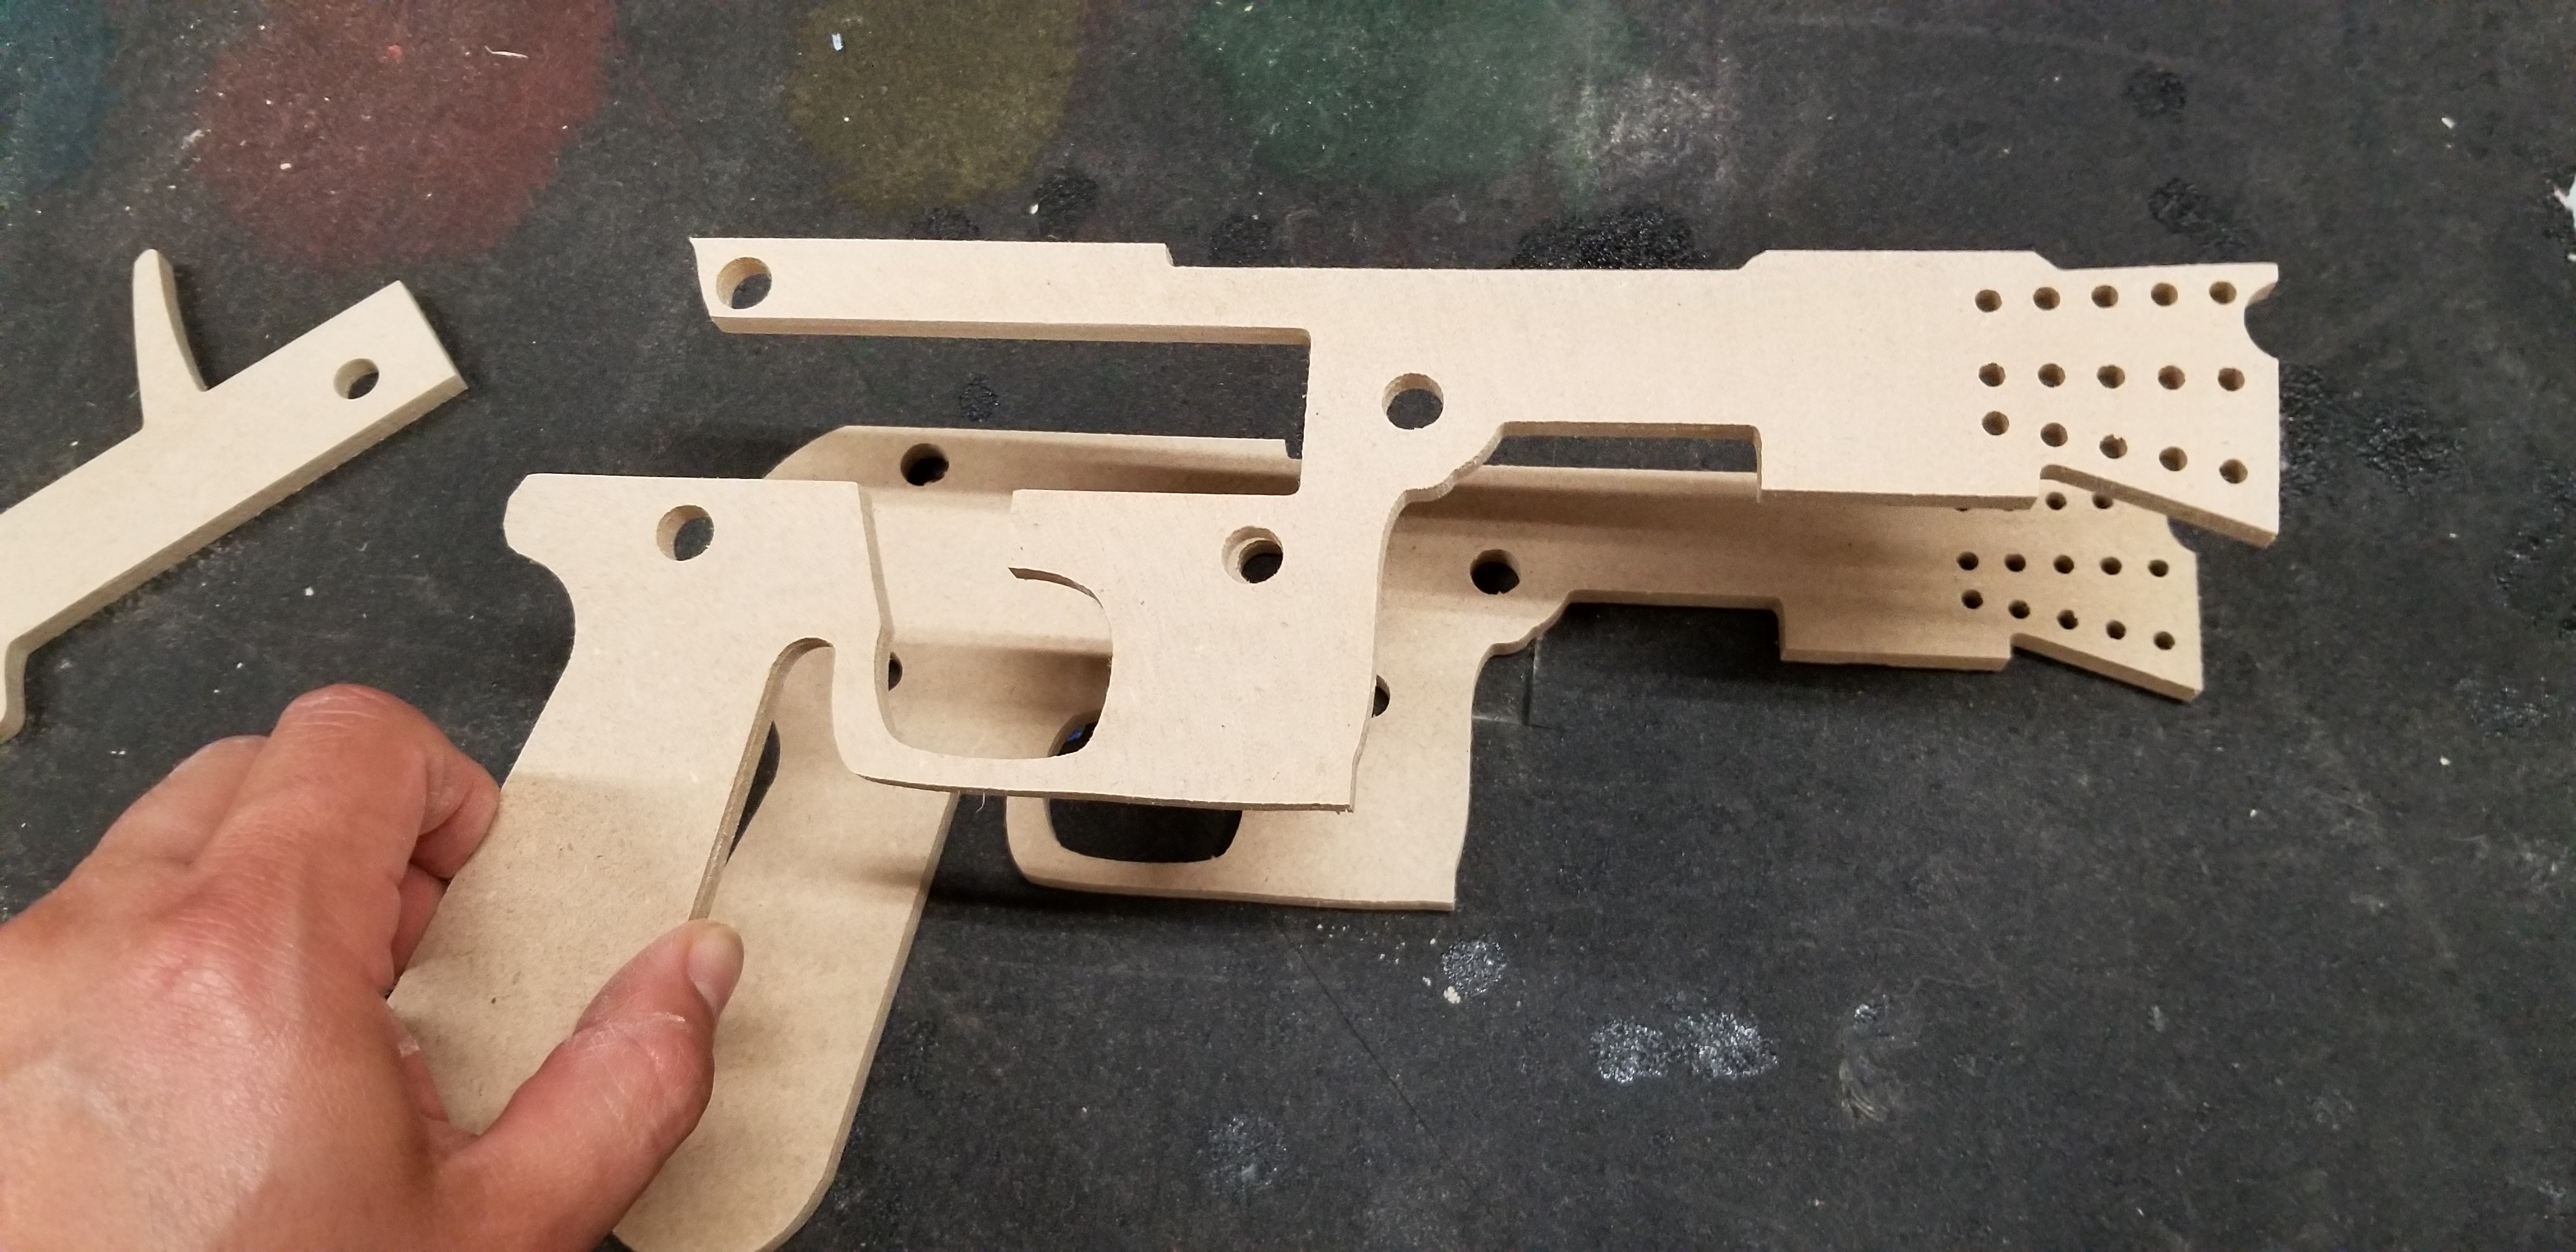
This is a 3 shot rubber band gun in the shape of a DL-44 blaster (Han Solo’s trusty side arm).
I used 1/4 MDF and a 3/8 wood dowel. Easel Quotes 41 minutes of Carve time. Also included is a target in the shape of Greedo, the bounty hunter that didn’t make it.
| Material | Description | Price | ||
|---|---|---|---|---|

|
HSS Upcut 2 Flute - 1/4 in Cutting x 1/4 in Shank |
|||

|
MDF Wood |
|||
45 minutes
Fire up the project on a piece of 1/4 inch MDF (14 inches tall by 18 inches wide).
PLEASE BE AWARE, I DID NOT USE TABS
Sand the pieces to knock off any burs or defects from the carve. Spend a little extra time on the trigger piece so that it will slide easily.5 minutes
Take a side piece and place it on the table and put the middle layer with the slide trigger. Use the dowel holes to line them up. Begin placing a few 3/8 inch dowels in the holes to keep things lined up.


1 minute
Add the top layer using the dowels to keep alignment. Add a dowel that is roughly 1 1/8 inches long in the top rear hole of the layers (the top-back of the blaster)

3 minutes
Add a rubber band to connect the two dowels that operate the trigger. This will create a spring action for the slide trigger.


4 minutes
Locate a pair of the smaller rings and a pair of the larger rings. Place a pair on either side of the long down towards the rear of the blaster. Small ring on the inside, larger on the outside.


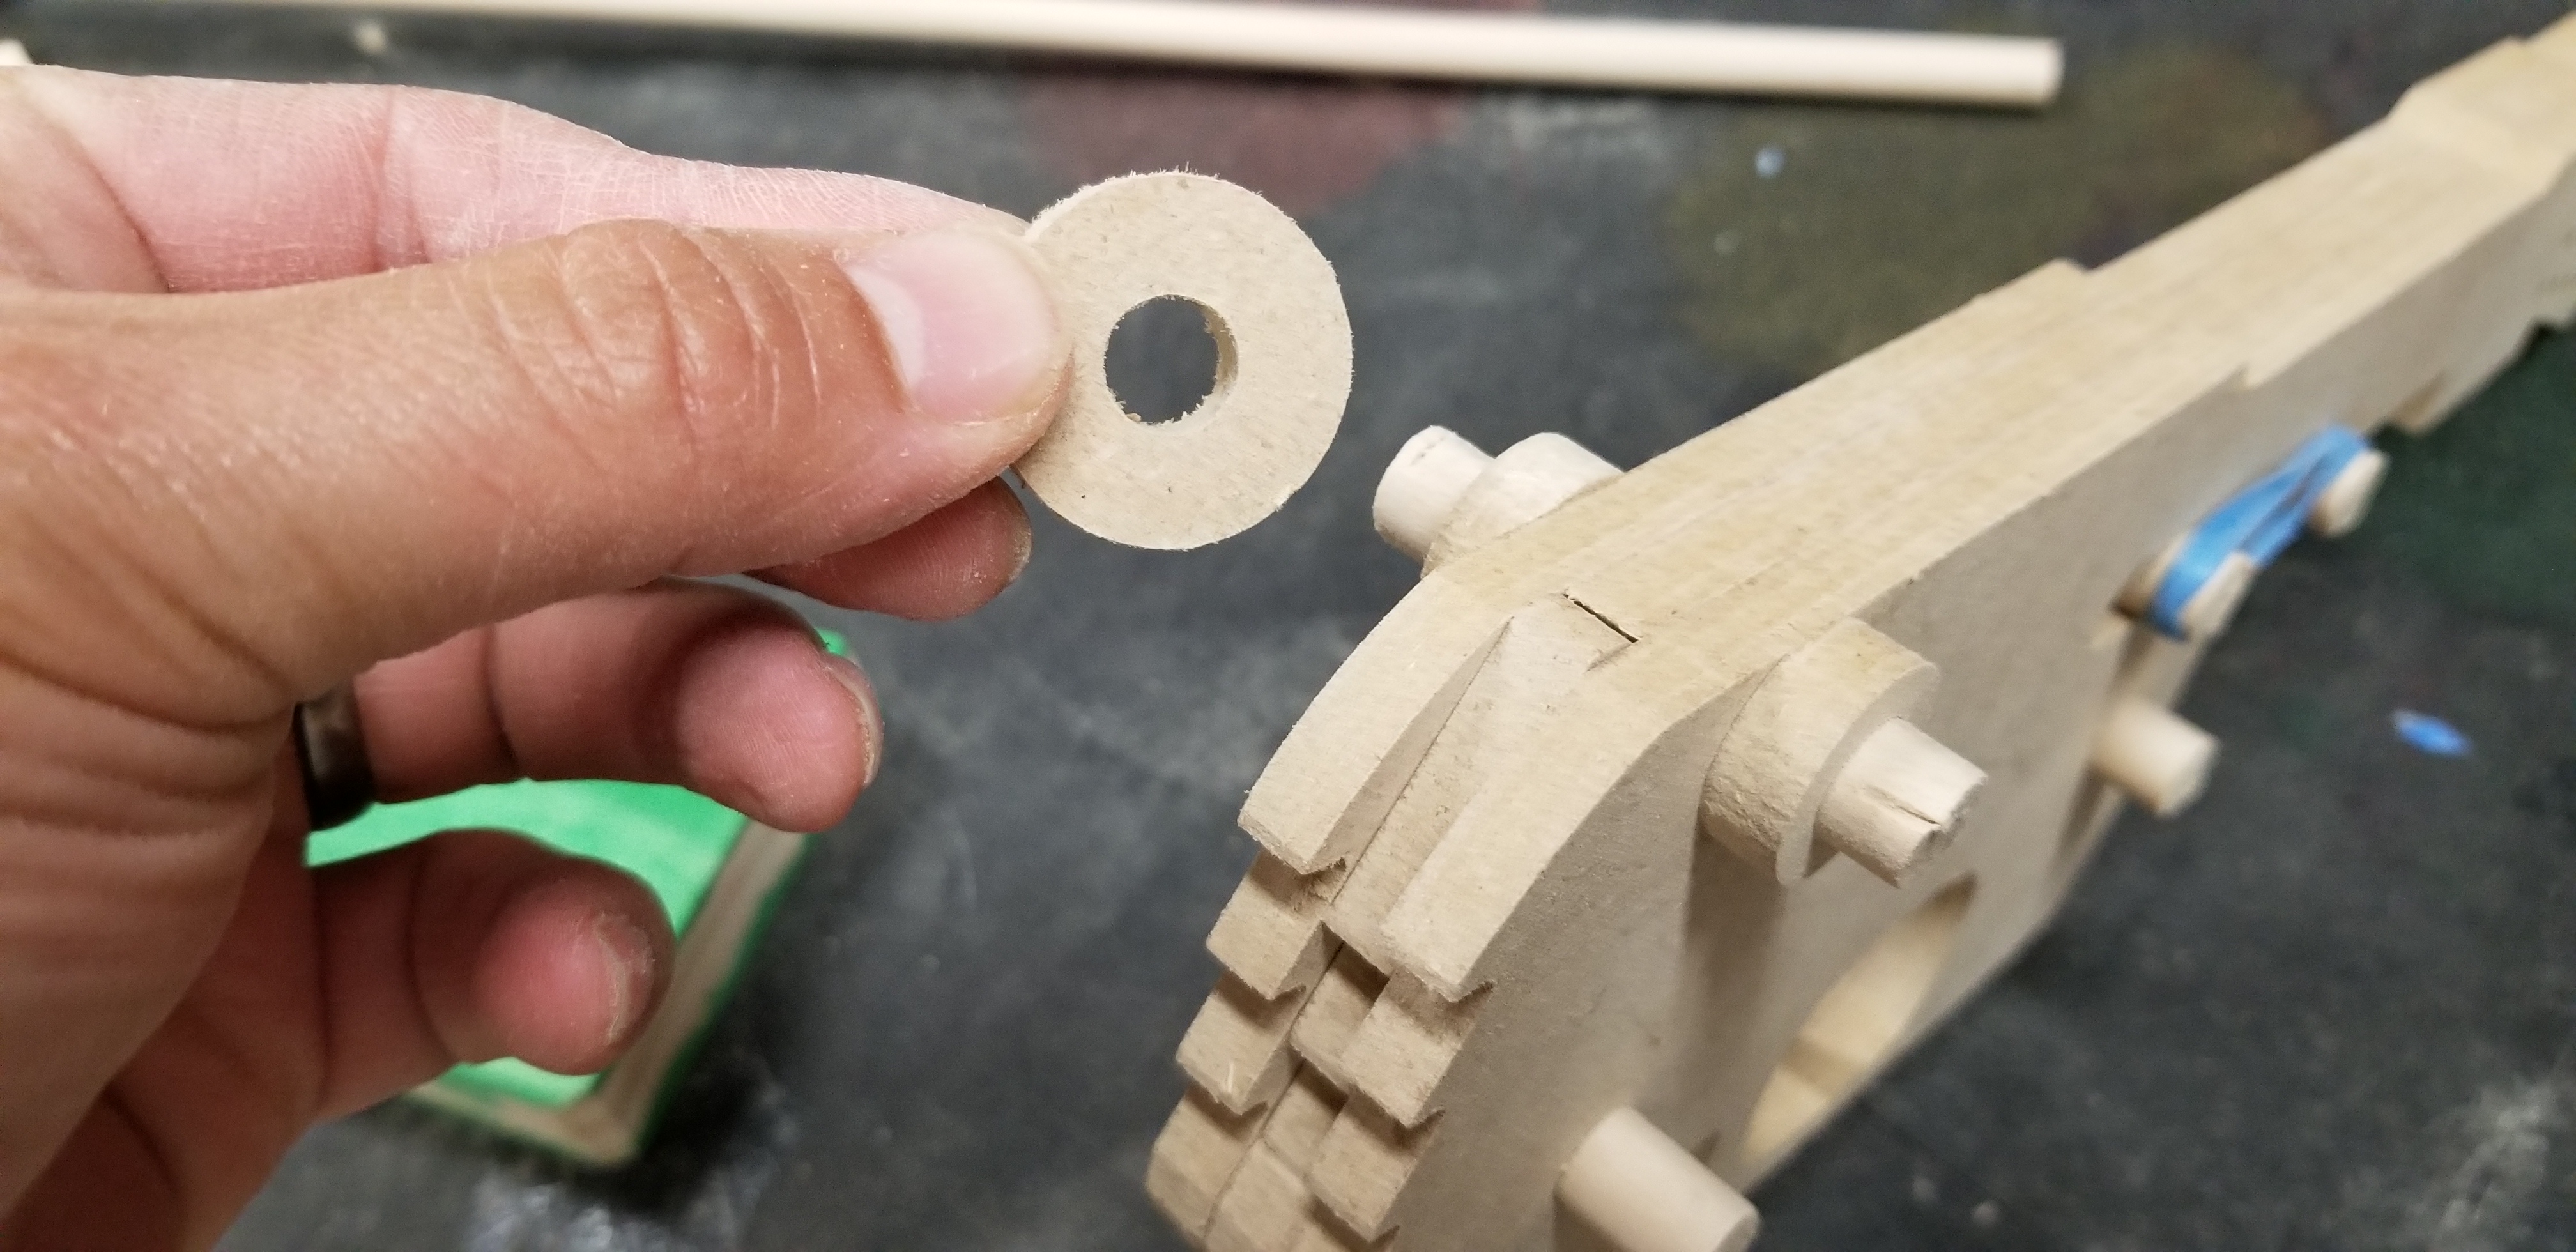

10 minutes
Locate the scope and bracket piece (four dowel holes). With the bracket on the table place the scope on top of the two inner holes. Glue these two pieces together. Place to clamp on the two pieces and set them aside. I leave the dowels long so they are easier to fit. After the glue dries you can flush cut the dowels.


5 minutes
In order for the rubber bands to properly leave the blaster the hard edges of the teeth will need to be eased over so they don’t catch. You may need to fine tune this area a little but the tooth design is pretty forgiving.

1 minute
locate the greedo head and his base and fit the two together. You can use glue or leave as is. You may need to sand down the edge if the fit isn’t correct.

1 minute
Once the glue is dry on the scope you can add it to the blaster using the dowels. For fun you can skip glue and make the scope detachable.

1 minute
Load some rubber bands and have at it!

The bare wood design is great and you can stop here. OR you can apply your paint of choice and sand as needed. I rounded the handle and trigger a bit more and used a combination of acrylic paint, spray paint, and spray poly.
PLEASE REMEMBER to highlight the end of the blaster with a high visibility color.


