Steve Carmichael
Lawrenceville, USA
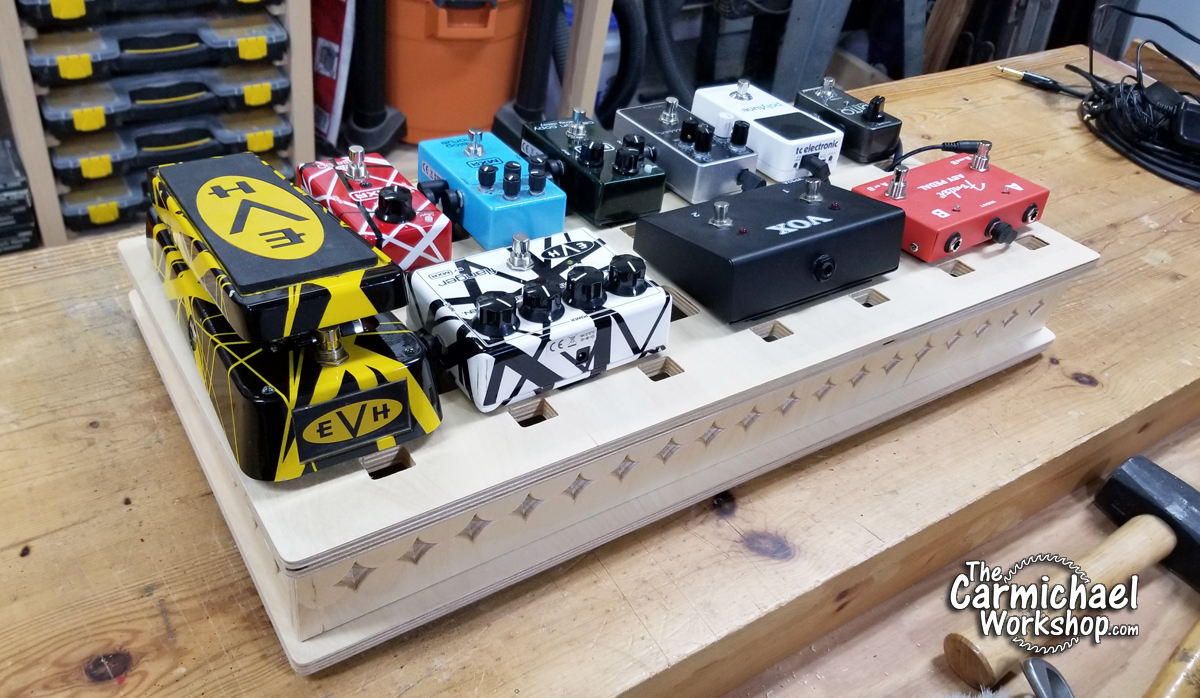
This pedal board is made from Baltic Birch plywood and carved with the X-Carve CNC machine.
10 minutes
Watch my build video of this Guitar Effect Pedal Board for a good overview of the entire project. I talk about my Easel Pro design process and describe how the parts are cut and assembled. I also show how I attached my pedals and routed the cables underneath the board for a clean look.
This project can be made with three 24″×12″ sheets of 1/2" Baltic Birch plywood, which is available in the Inventables shop. Both the top and bottom boards are 24″×12″. The 4 sides can be cut from the third sheet. Sand the plywood and soften any sharp edges. Plywood corners are easily damaged, so I recommend rounding off the corners to prevent chipping.

90 minutes
Pick out your best looking board for the top. Double-check the thickness of the plywood to make sure the setting is correct in Easel, then mount it on the X-Carve. I like to put a piece of 1/8" hardboard underneath when carving through holes, so I don’t cut into the pretty waste board. Carve the holes into the top, remove tabs, and sand. At this point, the top and bottom boards are ready for assembly.

60 minutes
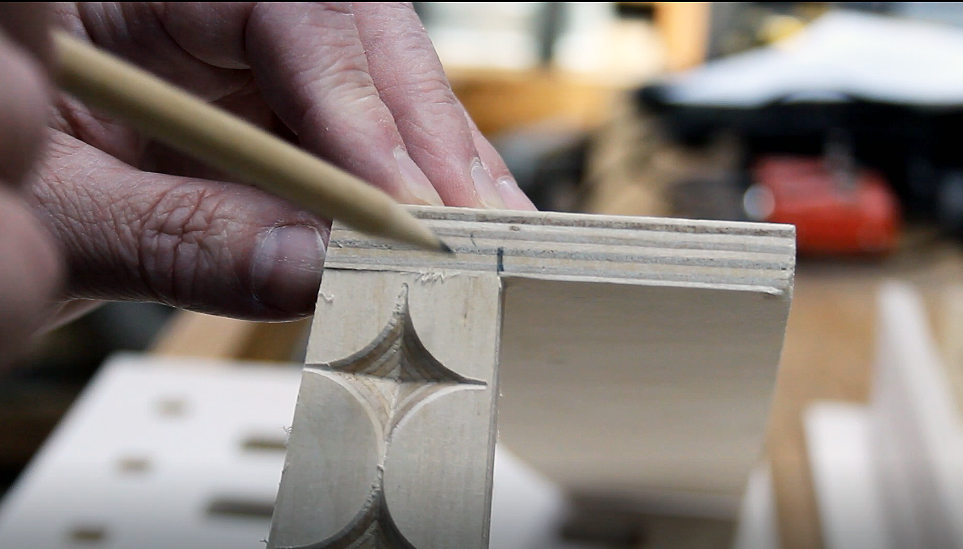
I designed the two angled side pieces to be cut using the X-Carve with an 1/8" straight bit. To make it look cool, I added a diamond pattern from the Easel design library that can be carved using a 90 degree v-bit. Feel free to choose a different pattern from the library or remove it if desired.
Position the side pieces on the workspace so that you will have enough plywood left over to make the Front and Back panels (about a 24″×6″ board). Carve the diamond pattern with the v-bit first, then change bits to cut out the two sides. Remove tabs and sand.

30 minutes
Cut the leftover piece of plywood to 23.5" long. This will result in the top and bottom boards having a nice overhang around the sides. I wanted to continue the diamond pattern across the front of the pedal board. If you changed the pattern on the sides, you might want to change it on the front as well so it matches. If you decide to remove the design, then you just need to cut the panels to fit.
Use the 90 degree v-bit to carve the design, if applicable, then cut the front and back panels to size. Use the side pieces to mark where the panels need to be cut. The side pieces have a 7 degree angle, so I tilted my table saw blade to make the angled rip cut on the front and back panels. Sand the two panels.


60 minutes
Use wood glue to glue together the four sides on a flat surface. Make sure all joints are flush and check the corners to make sure they are square. Make a mark on the underside of the top board, then make a mark on the top of the glued frame that should be glued to the top. *It is really easy to make a mistake and glue them together the wrong way.* Once the frame is dry, glue the frame to the underside of the top board so it is centered and there is an even overhang the sides.
After the glue has dried, do any required finish sanding, then finish/paint the pedal board as desired. I sprayed mine with Satin Deft Clear Wood Finish spray lacquer. It’s quick and easy and dries fast, plus provides a little protection from spilled drinks.


Once the top assembly is dry, position the bottom board on the bottom of the pedal board. Make sure it is centered and the overhangs are even on all sides. Drill and countersink pilot holes for screws to attach the bottom. I recommend adding non-skid rubber feet to the bottom of the board to keep it from sliding on the floor.

30 minutes
Now for the fun part…setting up your pedals. Remove the bottom to make routing cables underneath the top easier. I highly recommend these Flat Guitar Pedal Patch Cables that are great for reducing the space between pedals to make your pedal board more compact. Route the patch cables and power cables to the pedals through the holes in the top. I used small pieces of industrial strength Velcro to attach the pedals to the board.
Enjoy your new pedal board!
Thanks for checking out my Pedal Board project! For more fun projects like this one, visit my YouTube channel The Carmichael Workshop where I have hundreds of different project videos. Click here to visit my website for FREE project plans.. Thanks to Inventables for sponsoring this project and supporting my channel.