
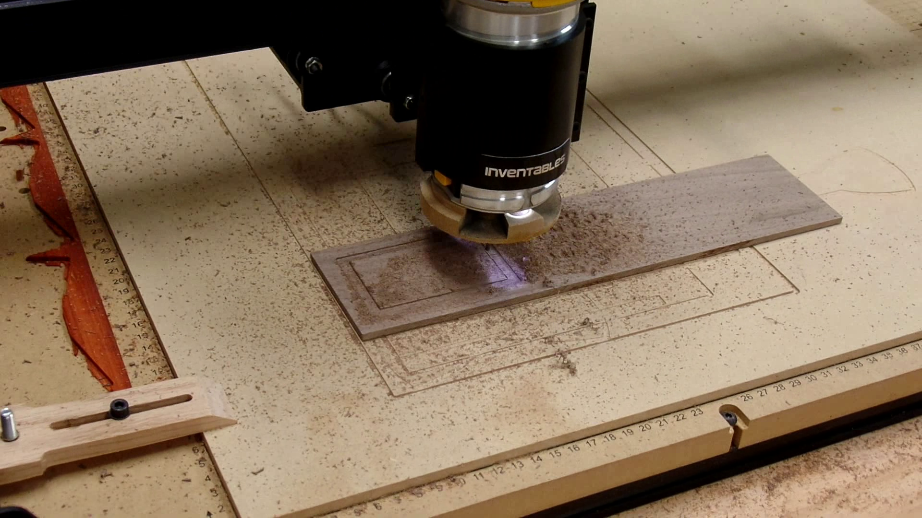
A walnut gift card holder milled in two parts on the x-carve, custom made for this specific gift card.
| Material | Description | Price | ||
|---|---|---|---|---|

|
Walnut |
6" × 12" × 1/8" Walnut |
$9.09 |
|
| Add to Cart |
$9.09 |
|||
7 minutes
First, watch the video. I take you from beginning to end.
Check out the Easel design. If you are making this, you need to check a few things. First, the thickness of your material. My “Eighth-inch Walnut” was much closer to 3/16". Because this file cuts through, you need to adjust for the real thickness of what you are using.
Next, the size of your gift card. You want the pocket to be a little larger in length and width, and just maybe a few thousands deeper than the thickness of the gift card you want to put in there. Keep in mind if your gift card has raised numbers on it (like a credit card), you need to leave room for that! Do your measuring with a digital measurer.
Next, the engraving. I used a simple snowflake. If you want some other holiday image there, switch it out now. Engrave shallow.

5 minutes
Mount your wood. The file doesn’t use tabs, so if you are following that, make sure you have secured both cut parts of the wood to your work surface so they don’t move after being cut out. Then, let your X-Carve do its thing.
10 minutes
After carving, sand out the inside of your gift card pocket, and sand around the edges of everything so you can get a good glue joint. It might also be easier to sand your snowflake engraving now as well to clean up that cut.
Then, glue the two pieces together. A few things to remember:
1. Try to keep the glue around the outside edges. You don’t want squeeze-out into the inside of your gift card slot when all is done, because then your gift card might now fit.
2. The card-pull notches. There is a semi-circle on each piece that will allow your thumb and forefinger to grasp the gift card to pull it out of the holder. So, glue it up so that the notch on each piece lines up as well as possible.
3. Clamp with even pressure, all the way around. This is the best way to make your glue line disappear as much as possible.

Now that the pieces are glued together and the glue has dried, get the outside into shape. Likely, your two pieces don’t line up perfectly when the finger pull notch is lined up. No big deal – now is the time to take it to the belt sander or other tools to smooth over the edges, sand the corners round, generally make it look great on the outside. After shaping on a belt sander, I hand-sanded to refine it and get up to a 220 grit sandpaper.

5 minutes
I used simple rattle can of spray lacquer as a finish. I went through 3 coats on each side, then sanded lightly with 400 grit sandpaper, then gave the whole thing a light finishing coat. The outside is very nice to hold at this point, and the wood looks beautiful.
Now, when the finish is all set up, stick in your gift card and send it to your recipient!


