
Flex Chess is a redesigned chess set made from Dragon-Skin, a platinum grade silicone used for prosthetics and special effects. The combination of the material, color and piece design promotes a more playful, less serious feel to the traditional game of chess.
As an upfront note, this was an expensive project and also my final project of the year as an Industrial Design student. Here is a list of what I used and where I got it;
Dragon skin shore 10, gallon unit – Smooth-on.com
Blue silicone tint – Smooth-on.com
Universal mold release – Smooth-on.com
24×24×1/2" HDPE sheet – Amazon.com
2 spools of Hatchbox PLA – Amazon.com (can be substituted with 18×18×3/4" HDPE sheet if carving the piece molds instead of printing them)
Sand paper, 220, 320, 420 – Hardware store
1 minute
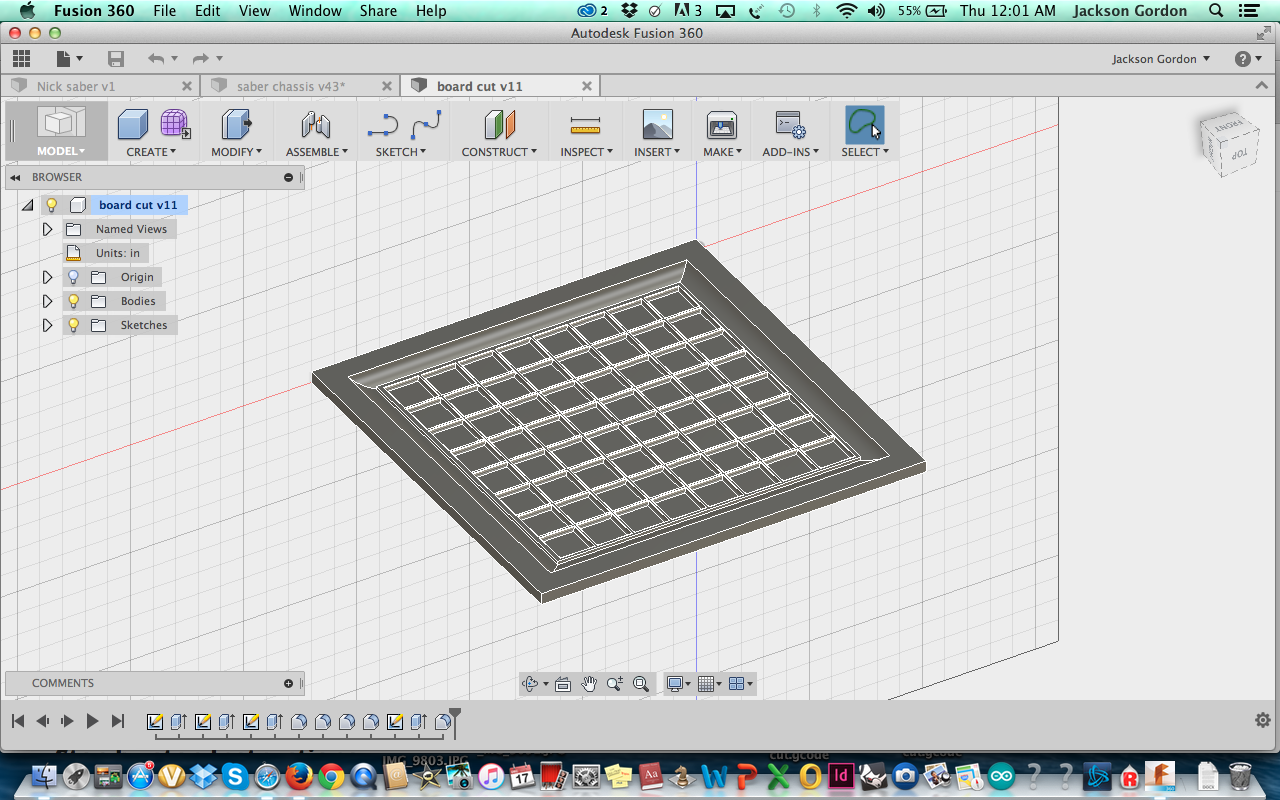
Firstly, this is not an easel project. Easel is great for what it is as a 2d modeling/carving program, but as a design student who’s used to 3d modeling there are better programs out there for designing parts and controlling this kind of machine if you’re willing to invest the time into learning how to use them. All the modeling for this project was done in Fusion 360, so if you don’t already have a copy, I’d suggest downloading it from Autodesk, it’s a free modeling program and very powerful/intuitive. The attached files are the ones I made for this project, which will open and run in Fusion 360.
I used Universal G-code Sender to send the g-code CAM instructions to the X-Carve, so you’ll also need to download that, which is free as well.
720 minutes
Every finished piece for the board is made from silicone, so what actually needs to be carved out is the negatives of each piece, which can then be used as a mold to pour the silicone into to create the correct shape. I started by carving the board negative first, as it’s the largest part and would take the longest. I choose to use HDPE as the stock material because it’s very durable and is easy to sand to a smooth finish.
Using Fusion 360 CAM, I generated the g-code to send to the machine by setting a rough pocket cut for the entire carve to rough out the general shape, then a tight contour cut to make all the radiused edges smooth, then a tight horizontal cut to smooth out all the flat surfaces. This was over a 12 hour carve, but it came out pretty well. I used a standard 1/8" ball end for the whole carve, which had to be cleaned every once in a while to clear the HDPE which had a tendency to string and wrap around the bit on the radius cuts.

The board carve was pretty good, but it wasn’t quite smooth everywhere and there was a lot of HDPE threading to clean up. Silicone is a very unforgiving casting material, so the mold used for it should be as clean and smooth as possible. I started by giving the whole board a sanding of 220 grit to take off all the burs and smooth most of the lines, then wet sanded at 320 and 420 until the board had a relatively uniform finish with minimal machine lines left over.
4320 minutes
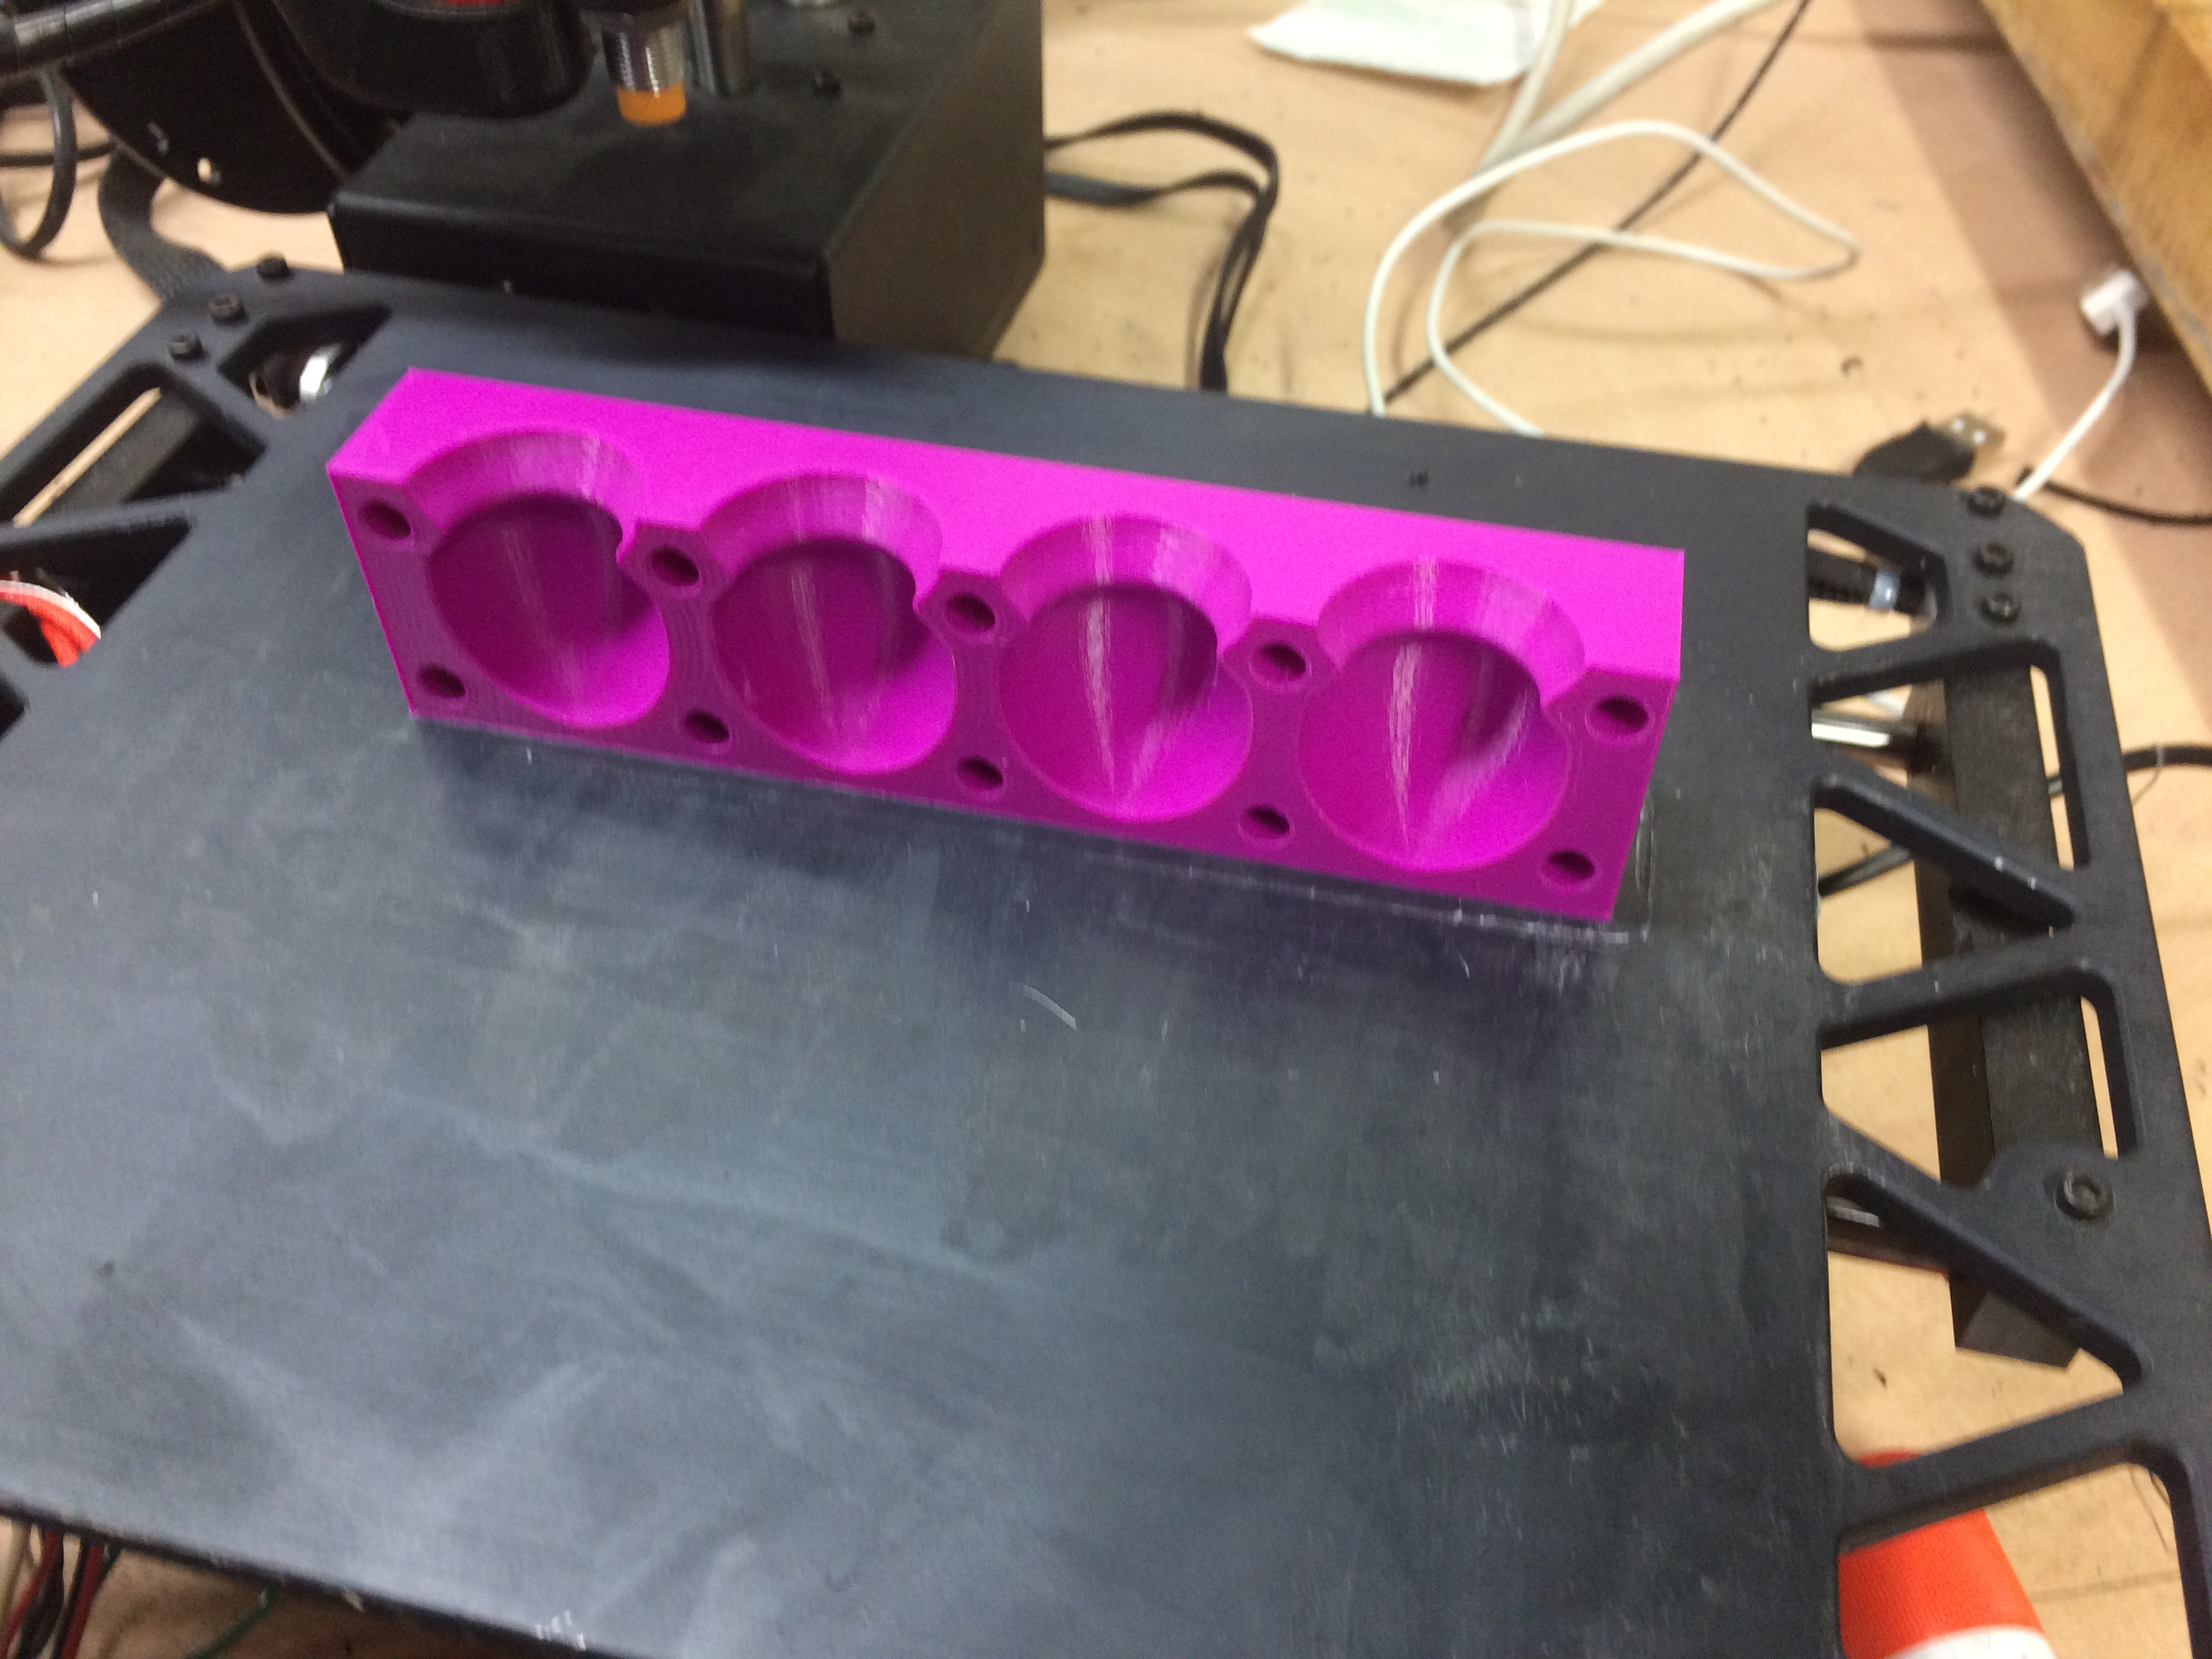
Next on the to-do list was to create the molds for the individual pieces. I chose to do this by making gang-molds rather then individual piece molds, as it would make it easier to pour the silicone into and de-mold everything. I actually 3d printed the piece molds, as I have a 3d printer, but there’s no reason you couldn’t carve them using the same files, 3d printing was just easier for this particular set of parts. The layer height was set to 200 microns, so it printed with a nice subtle ribbed texture which added to the feel of the finished pieces. If I were to have carved the pieces instead I’d simply use a thicker HDPE sheet as stock and had to do some sanding and clean up to the finished carve, just like for the board.
960 minutes
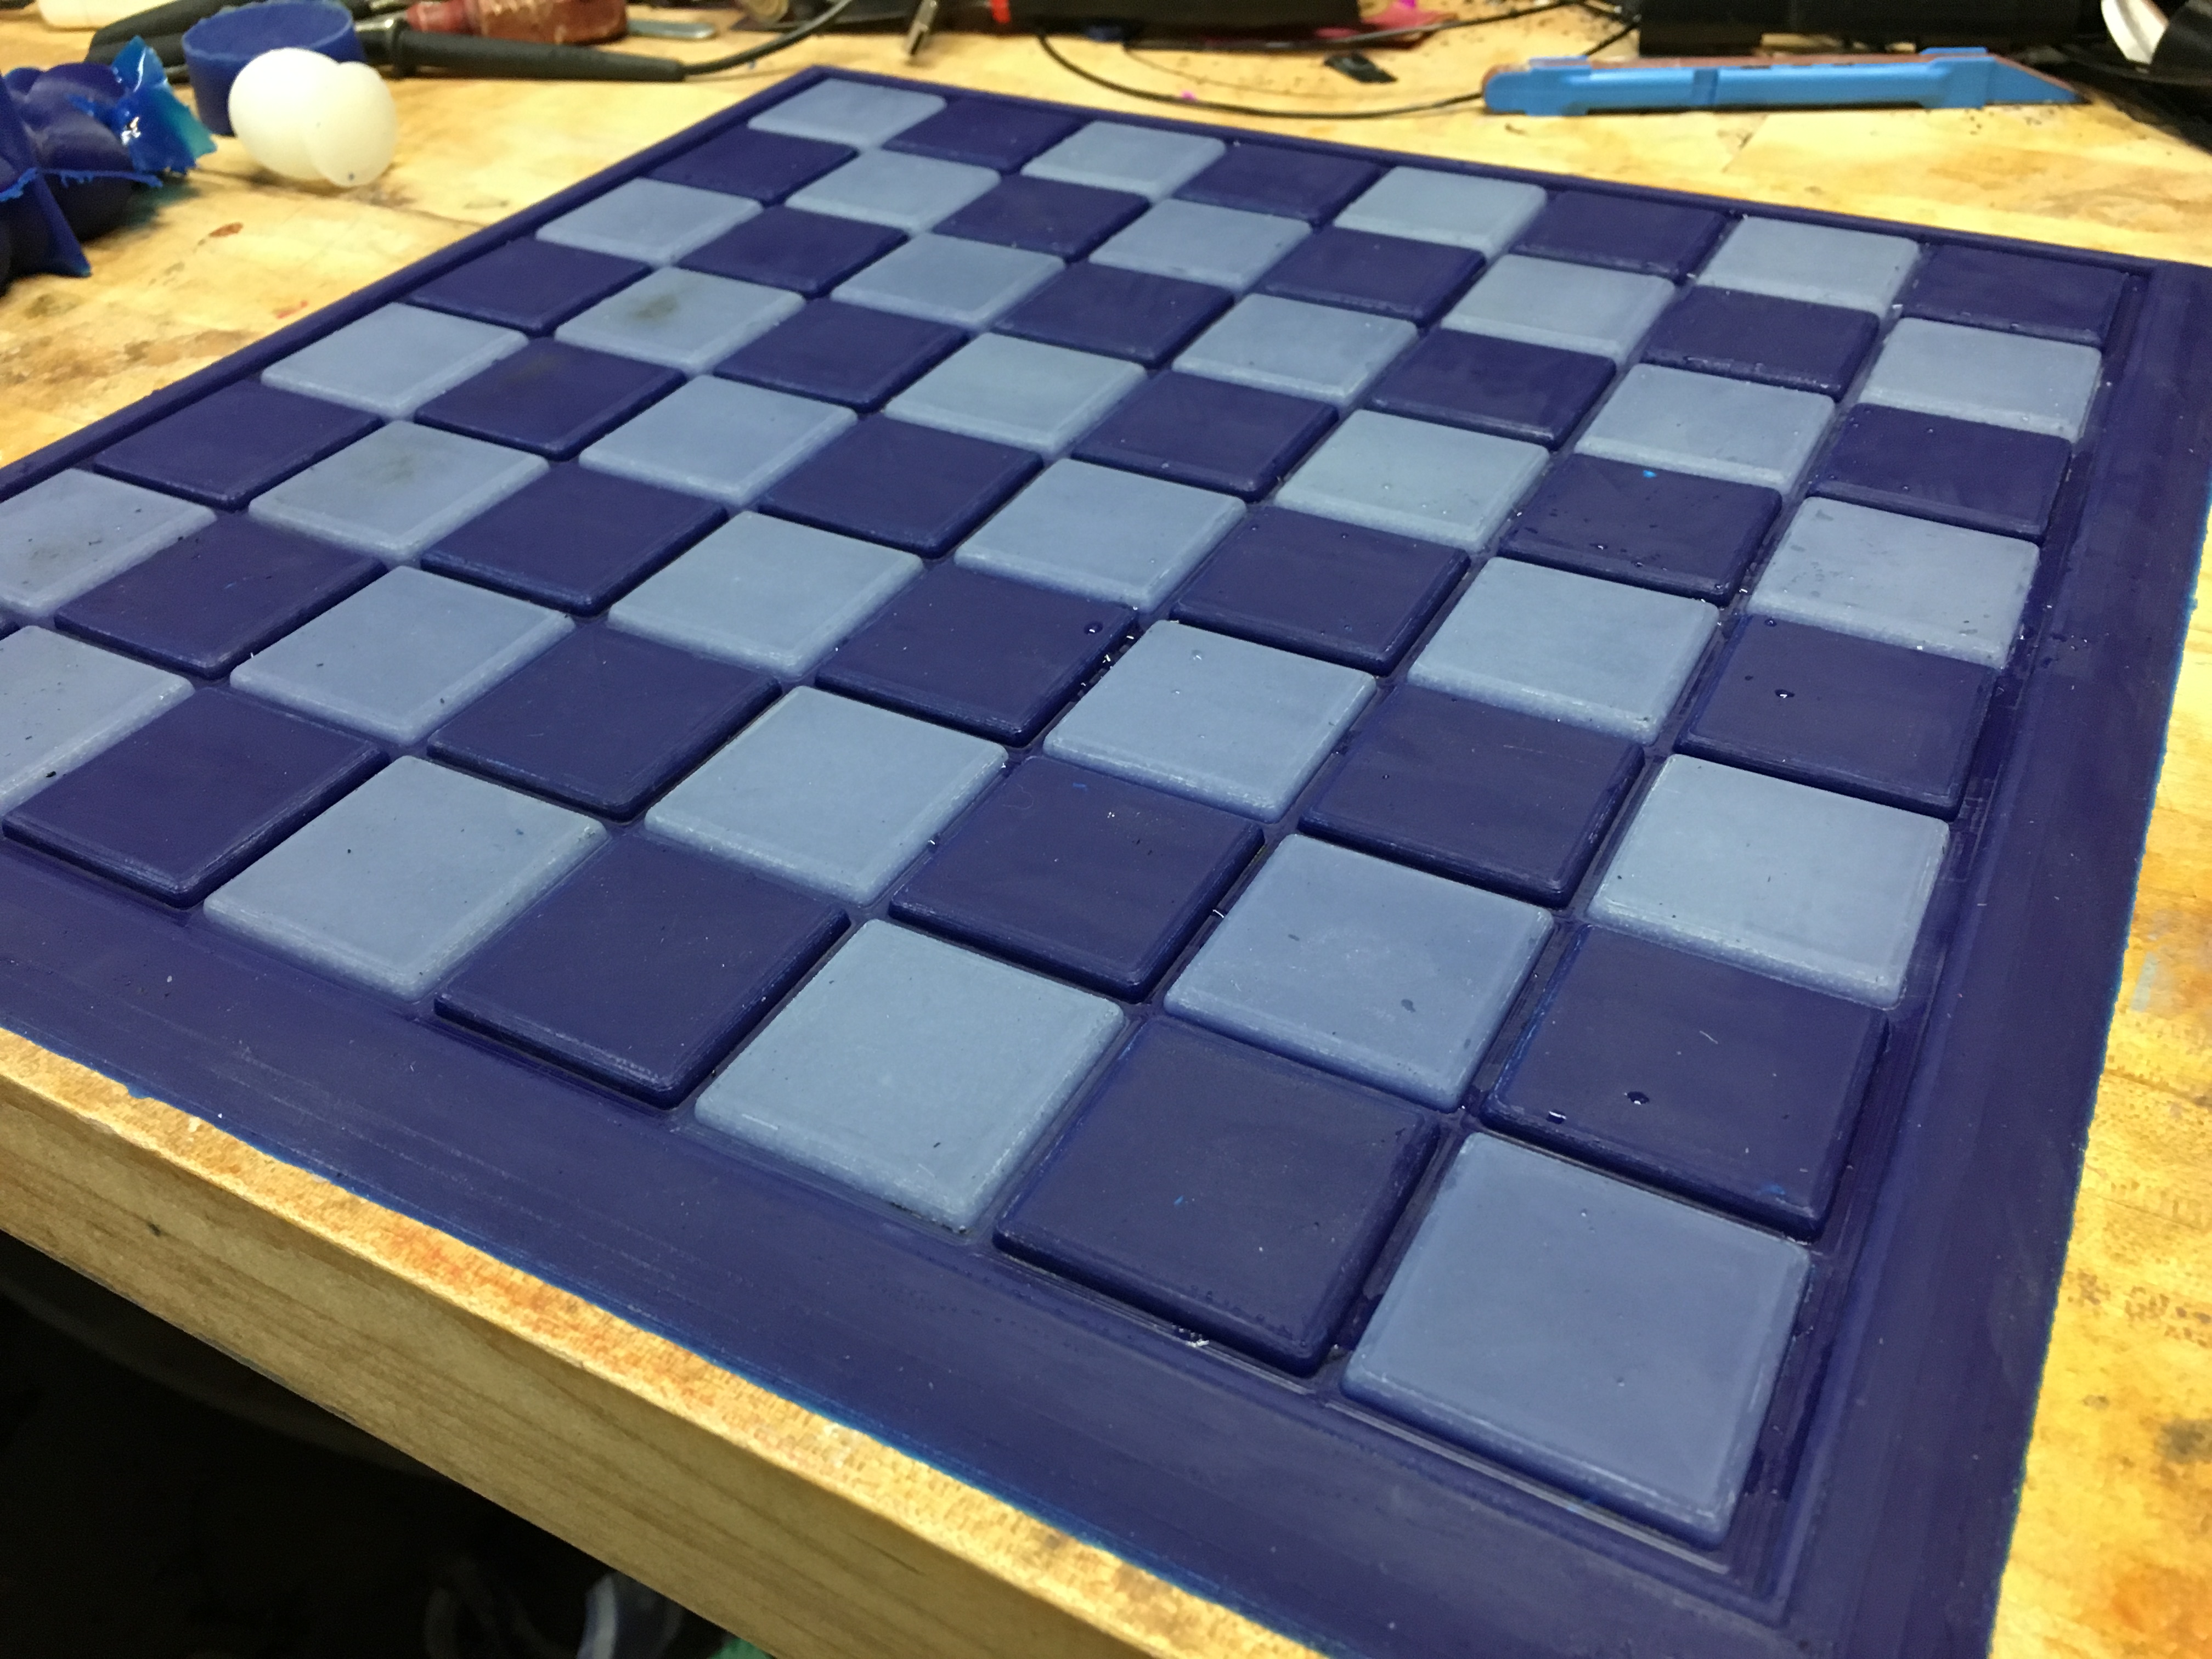
Next it was time to start pouring silicone to make the final model, I started with the board to get it out of the way. As with any chess board, the squares need to 2 colors in a checkered pattern, which would require two separate pours into alternating squares. The board was designed with a raised square gird pattern for exactly this reason, to be able to pour each one individually and avoid the colors mixing together. I mixed up the first batch of Dragon-Skin (50/50 by volume) without a color additive and poured it into the correct squares. This proved to be a bit messier then I thought, with a good bit of material slopping into squares it shouldn’t be in. Once the silicone set (about 2 hours), I peeled away the material in all the undesired squares and then mixed up a much larger batch of Dragon-Skin with a blue tint additive to pour for the rest of the board. Silicone bonds to itself when uncured, so the finished board is all one piece.
After waiting overnight for everything to cure, the board was de-molded and given a wet-sanding of 420 grit to clean it up and create a smooth finish.

3840 minutes
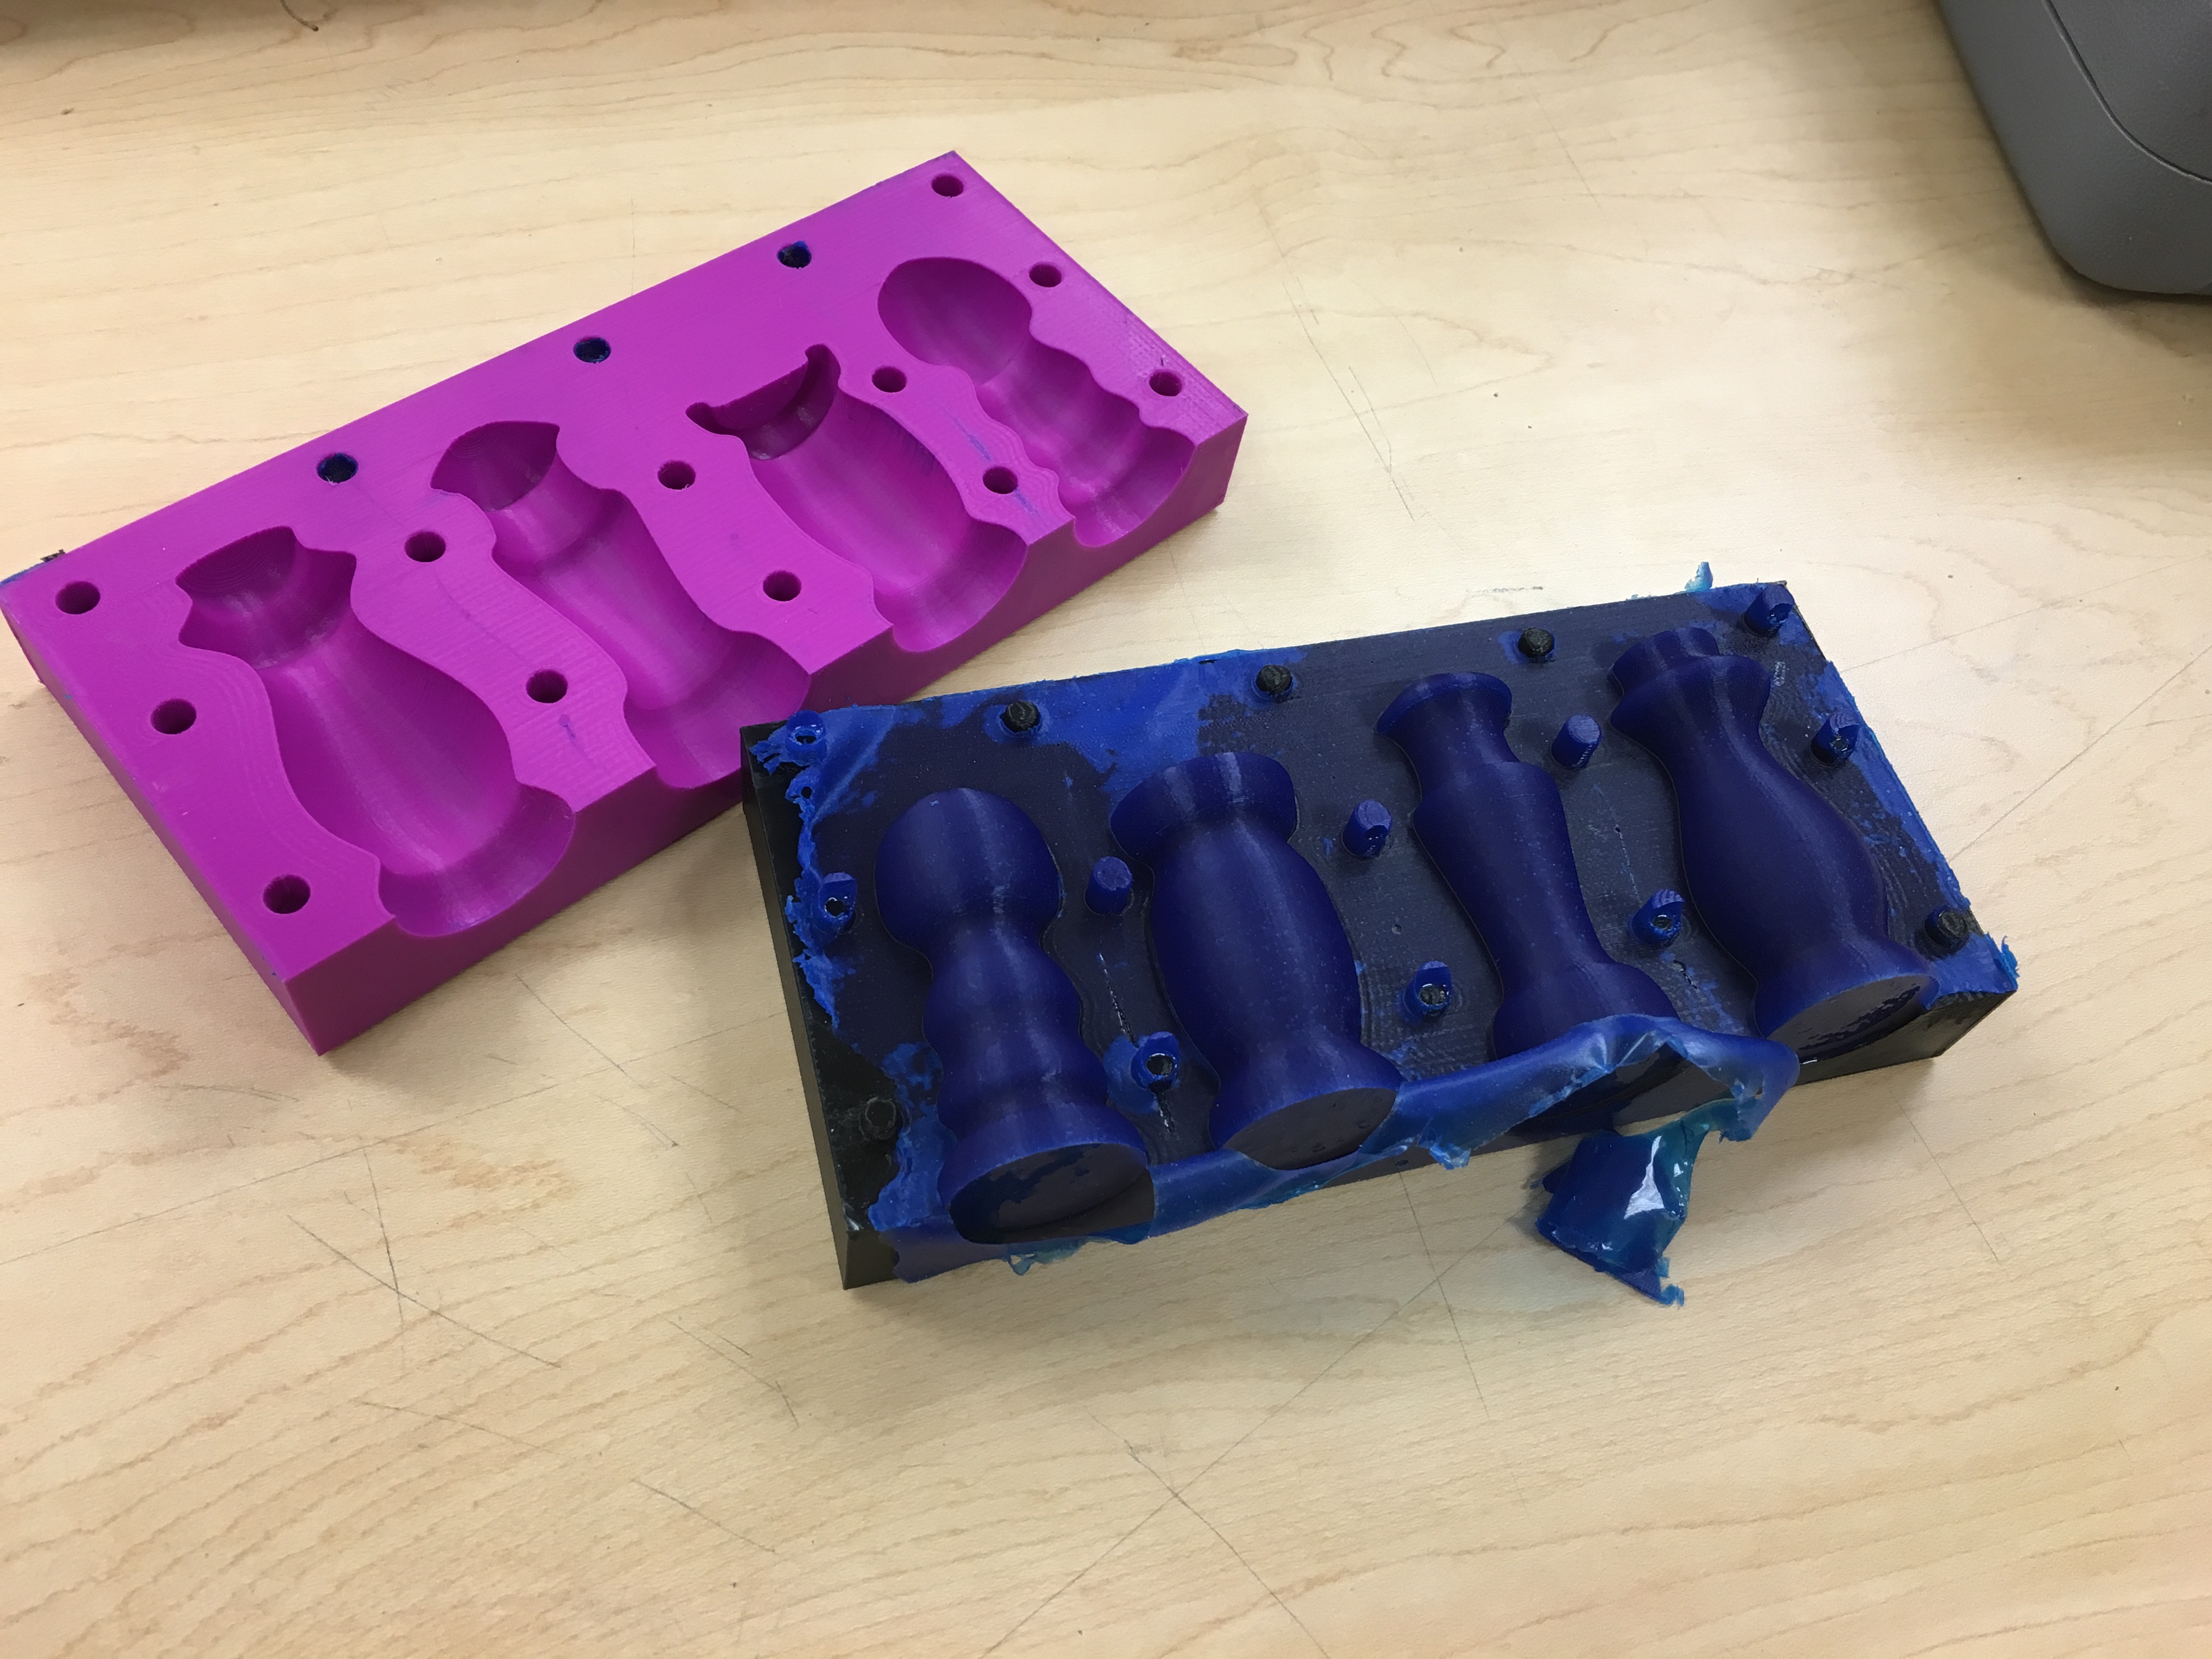
To make the pieces, each side of the molds were prepped with mold release, then clamped together and taped shut so no silicone would leak out. Then it was just a matter of mixing up silicone to pour into the molds, adding color if needed, waiting for them to cure, de-molding and cleaning up the castings and repeating until both sets of pieces where finished. This took a couple days, as the cure time for each batch is 16 hours and it has to be done 4 times to complete the set.

Once all the castings where trimmed and cleaned up, all that’s left to do is use it for it’s intended purpose and have fun playing chess. Happy hunting :)


Michael Blair
Jackson Gordon
Andrew Perkins