
This is a toy robotic arm powered by hobby servos. It’s my entry for the Easel Power Hour Challenge
| Material | Description | Price | ||
|---|---|---|---|---|

|
Birch Plywood (×2) |
|||
1 minute
This is a desktop robotic arm powered by hobby servos. It’s quite powerful, it can lift up to 500g and is relatively precise, depending on the quality of the servos used. It’s a fun project to try for about $100. The picture has a list of materials ued and some orientative prices. The may vary on your region.

60 minutes
Cur the parts in the X-Carve as per the linked Easel project. I used a straight bit and increased the recommend pass depth from 1.3 to 2.5mm, leaving the suggested feed rate of 1016mm/min. Being soft plywood, the machine should handle it without issue (I usually cut mine at 5mm per pass, but my CNC is not X-Carve). After cutting, clear and sand the tabs on all parts, move to assembling.

20 minutes
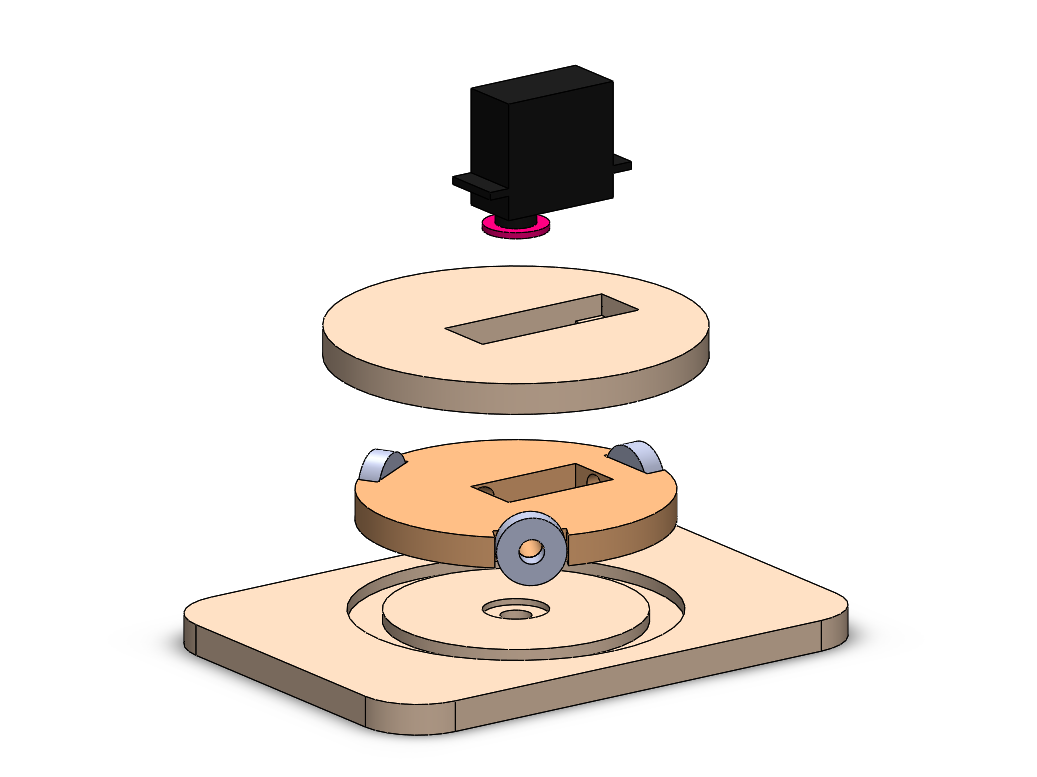
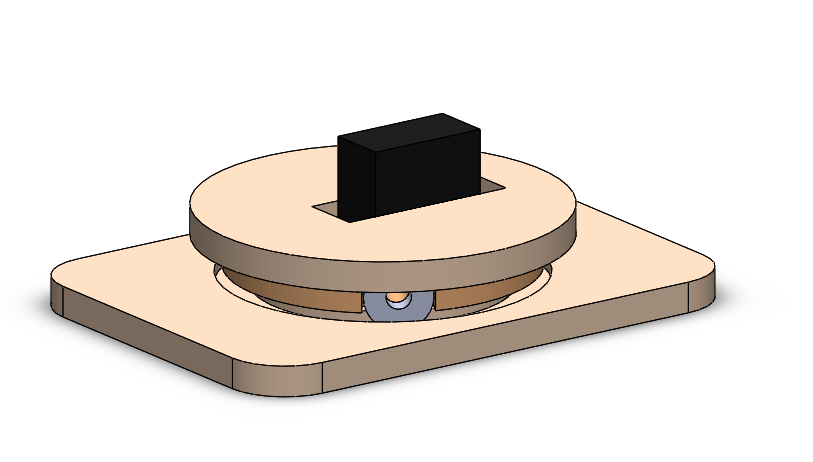
Look at the pictures for parts involved. The servo will hold everything together. Remove the servo output wheel from the motor, then screw it to the bottom piece. Now screw the motor to the top part. Finally, put everything together like in the picture, and add the screw that attaches the servo output wheel with the motor.
The 8×22mm bearings are just put in place and can move freely within the wooden channels. If you feel like so, you can use some 8mm screws to attach them to the middle part, but it may require some tweaking of the channels in the top and bottom pieces.
20 minutes
TBD


30 minutes
TBD
20 minutes
TBD
30 minutes
For the electronics, you can use any Arduino servo shield. I have also included a Fritzing file (ArduinoNanoShield-31mm.fzz) with a smaller board that fits with an Arduino Nano inside the robotic arm itself, but you can use just any servo shield. Milling the board in your X-Carve is definitelly possible and should be an easy project, it’s just a one-sided board with few tracks and holes.
The default firmware comes configured to connect the servos to these pins:
Left motor (looking from behind the robot): pin 10
Right Motor: pin 11
Rotation (base) motor: pin 3
Effector (tip) motor: pin 5
You can also use “hacked” servos to read of the servo potentiometer and connect them to analog pins in the arduino (google “servo read potentiometer arduino”). These pins would be:
Left motor: analog pin 3
Right motor: analog pin 1
Rotation motor: analog pin 2
All these pins can be configured in the Firmware before deploying to the arduino in the file MyArm.cpp, check the instructions in the Github repo in the next step.
30 minutes
The software to control the robot can be found on GitHub:
https://github.com/dsuarezv/myarmui
thre you can find all the details to install theArduino firmware and control the robot with the included GUI.


Mark Hall
David Suarez
Drew
David Suarez