
We set out to create a fun, illuminated sign out of Expanded PVC and LED Strip Lights. After a bit of painting and sanding, we had a cool finished product.
| Material | Description | Price | ||
|---|---|---|---|---|

|
Powered LED Strip - White |
|||

|
White Expanded PVC Sheet (×2) |
|||
60 minutes
This may have been one of the longer setup processes to the project, because of what we were trying to do with the sign. In the sign, we wanted to have the letters illuminate in a halo, around the outside, using the expanded PVC. To do so, we first had to take the image, and mirror it, so the letters were all backwards. This would allow us to use the X-carve and cut out the inside, so the LED strip could be embedded inside without seeing the pixels from the side. One trick we found out is it’s really easy to do a carved inset, but the Easel software wants to carve out either the entire letter, or the outline. A trick around that is to basically make a circle, and use the adjustment tools to wrap the circle you create around the inside border of the letters. If you look at the carving picture, you’ll notice at the top left, we left that small section untouched, then just sanded off with a dremel after.

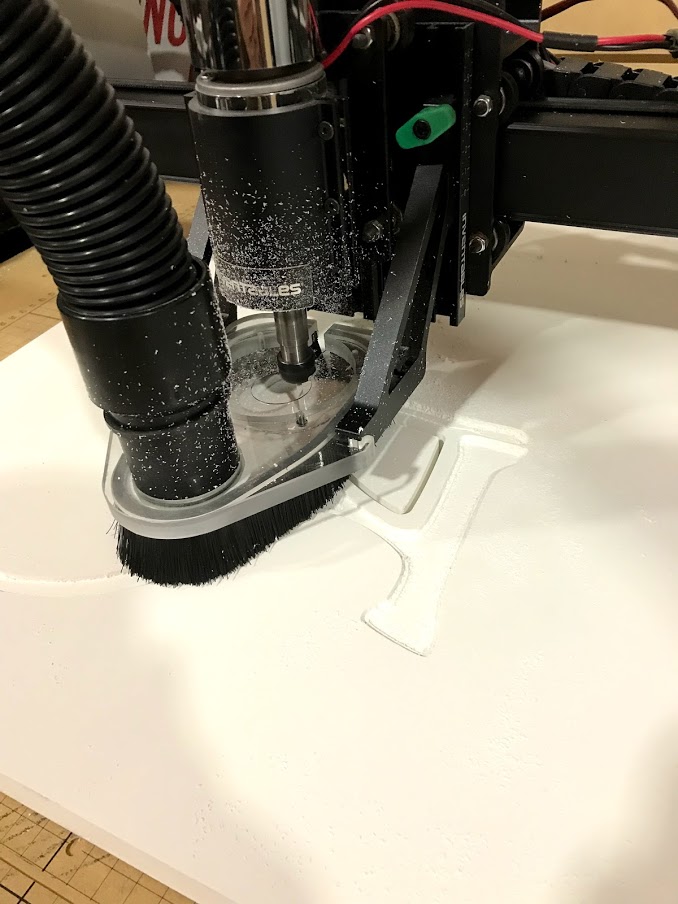
When the letters are done being carved, they will look something like this. Notice that small section at the top of the R just needs to be hollowed out so the LED strip can go all the way around the letter. We took a small router bit and carved the front of the letters to make it slightly rounded. This step is optional, but makes for a nice touch. When they’re finished routing, take some 120g sandpaper and smooth out the surface. This will help the paint stick, and also give a little texture to the material. When you do this, it makes it look just like wood. We applied an off-white paint to the letters to match the wall a bit better.


After everything was painted, we ran the LEDs through the channel. We used a thin (only 5mm wide) LED Strip (link below) to run the LEDs, which made them hide a little easier. Each letter was wired separately, because it was mounted to a false wall. All the wiring was then connected in the back.
We used a small standoff which was embedded inside the channel, and then screwed the other part to the wall. As you can see, the finished product turned out pretty cool!


Mo Stych