
Dylan Cook
Long Island, USA
My first ever project on my x-carve. Made for the Holiday Contest. This is best made using .25" material, because that is how it was designed.
| Material | Description | Price | ||
|---|---|---|---|---|

|
Baltic Birch Plywood |
12" × 24" × 1/4" Baltic Birch Plywood |
||
60 minutes
Open the Easel file, and position the parts to fit your size material. If you have a 500mm x-carve (like me) you will need to do do multiple cuts.

20 minutes
sand the edges of the pieces to de-burr and smooth the edges. For the +’s inside the circles, I found the best way sand them is to fold up a piece of sandpaper and slide it inside the + as shown in the picture

10 minutes
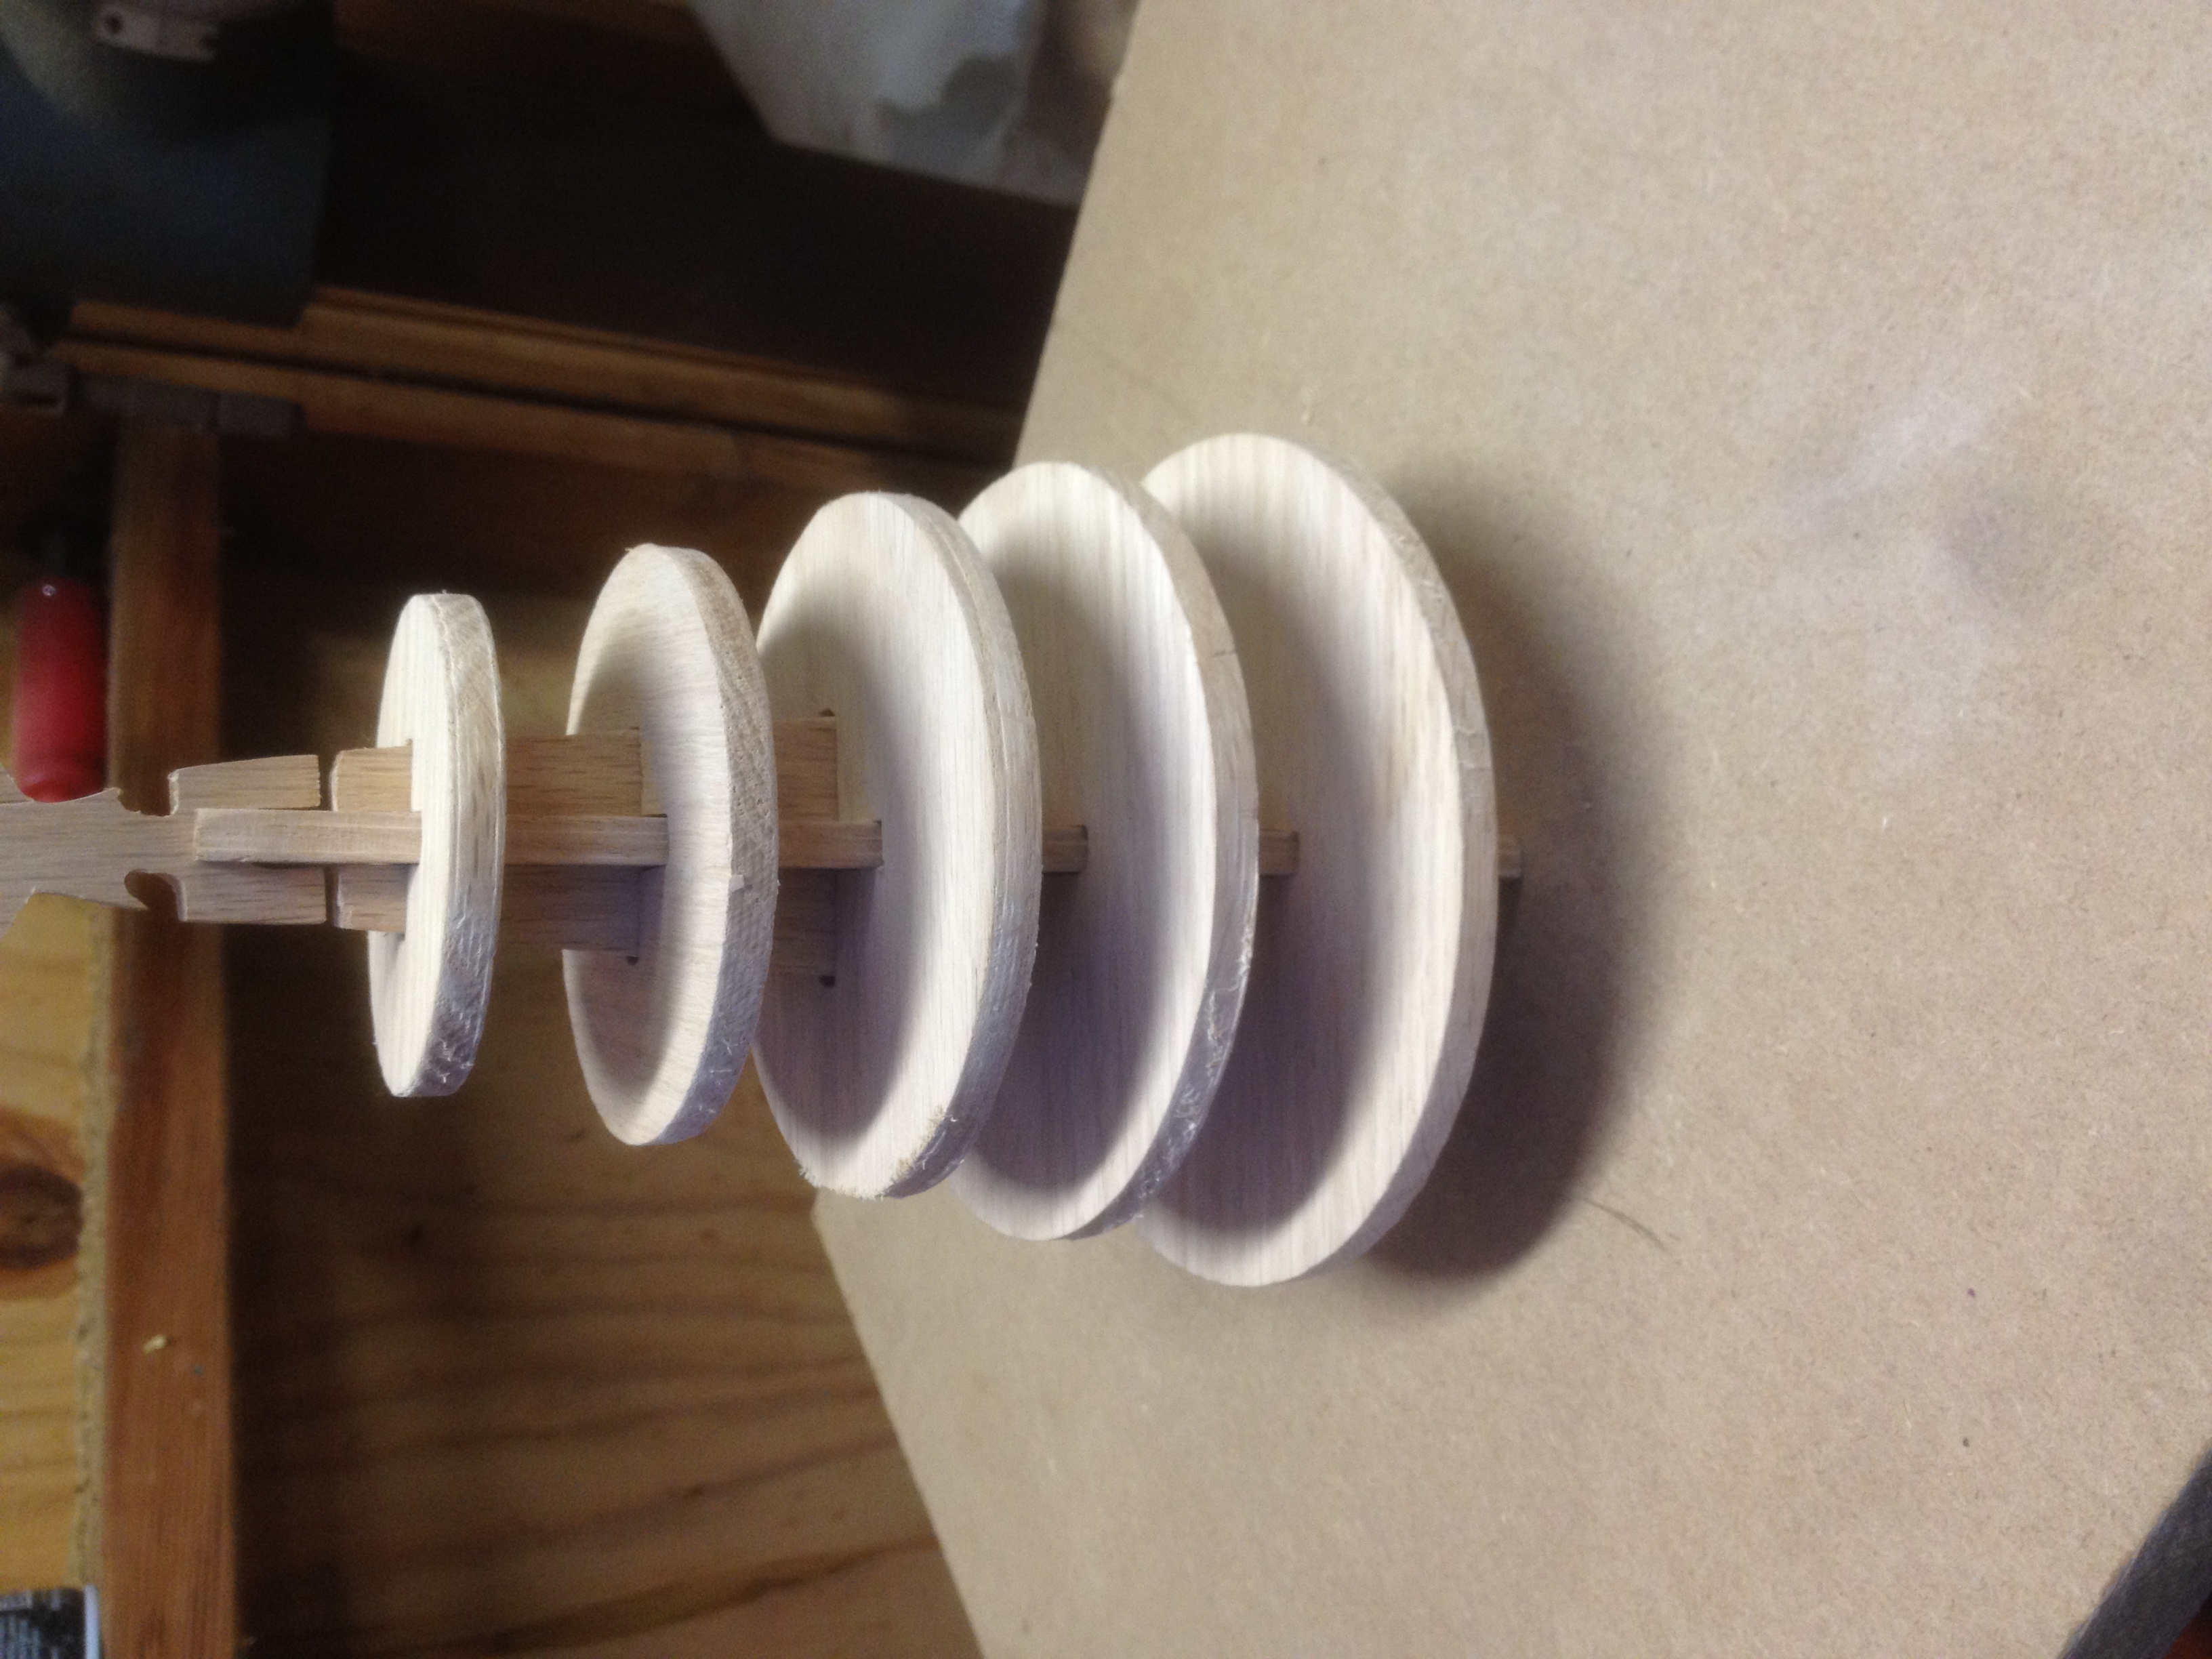
Assemble the tree to test fit the pieces to make sure it all fits together. Then, take apart the tree and lay the pieces out.
10 minutes
This step is not necessary, but if you would like to, you can stain or paint your tree. Let it dry.
5 minutes
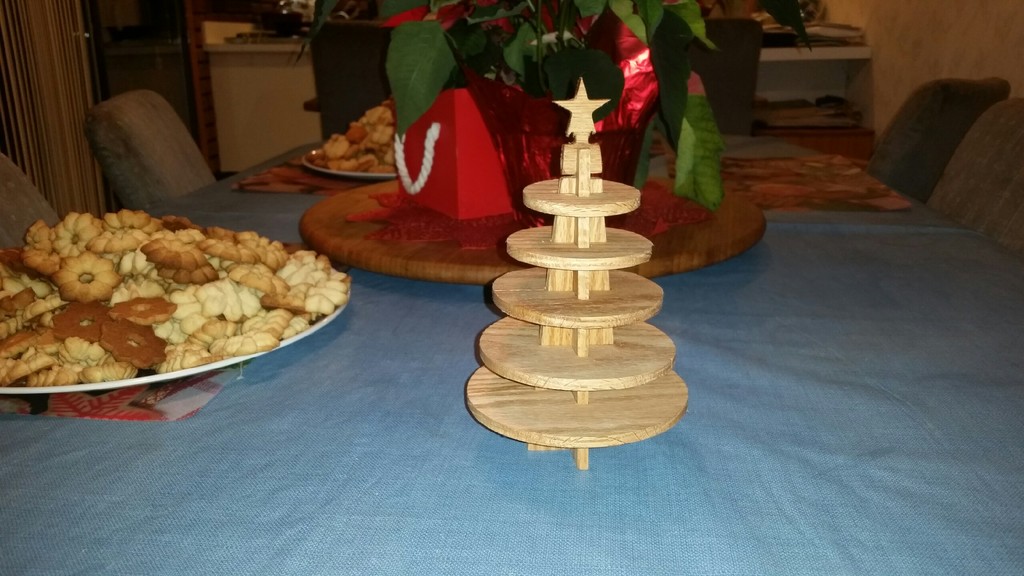
Re-assemble the tree, and display it for all to see!

Eddie J Sanchez
Brandon Jones
Billy McGee