
Mike Merzke
Raeford, USA
Here I built an American Flag coin rack and used the Shapeoko 2 to cut out the stars. You can also watch me built it at https://youtu.be/bAQvJZEG4bk
10 minutes
Video where I show how I made my American Flag Coin Rack!
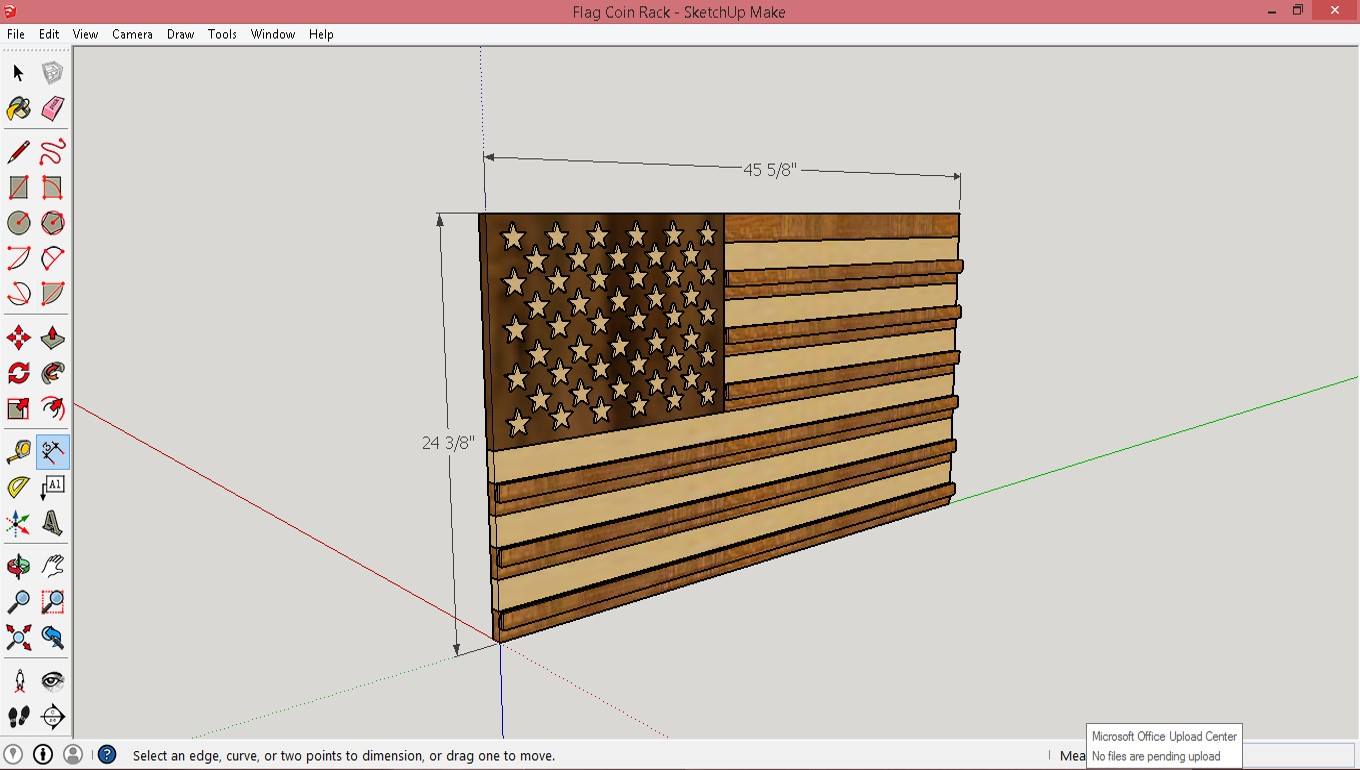
Just like the first step in any project the best place to start is at the beginning. To determine the size and to make sure my flag was going to be to scale of an actual American Flag I used the rations provided at http://www.usflag.org/flagspecs.html. To try and replicate the colors of the flag while using natural wood I chose Walnut for the blue, Sapele for the red, and maple for the white. From there I drew it up using SketchUp to help visualize the project and to plan for the amounts of each type of wood.
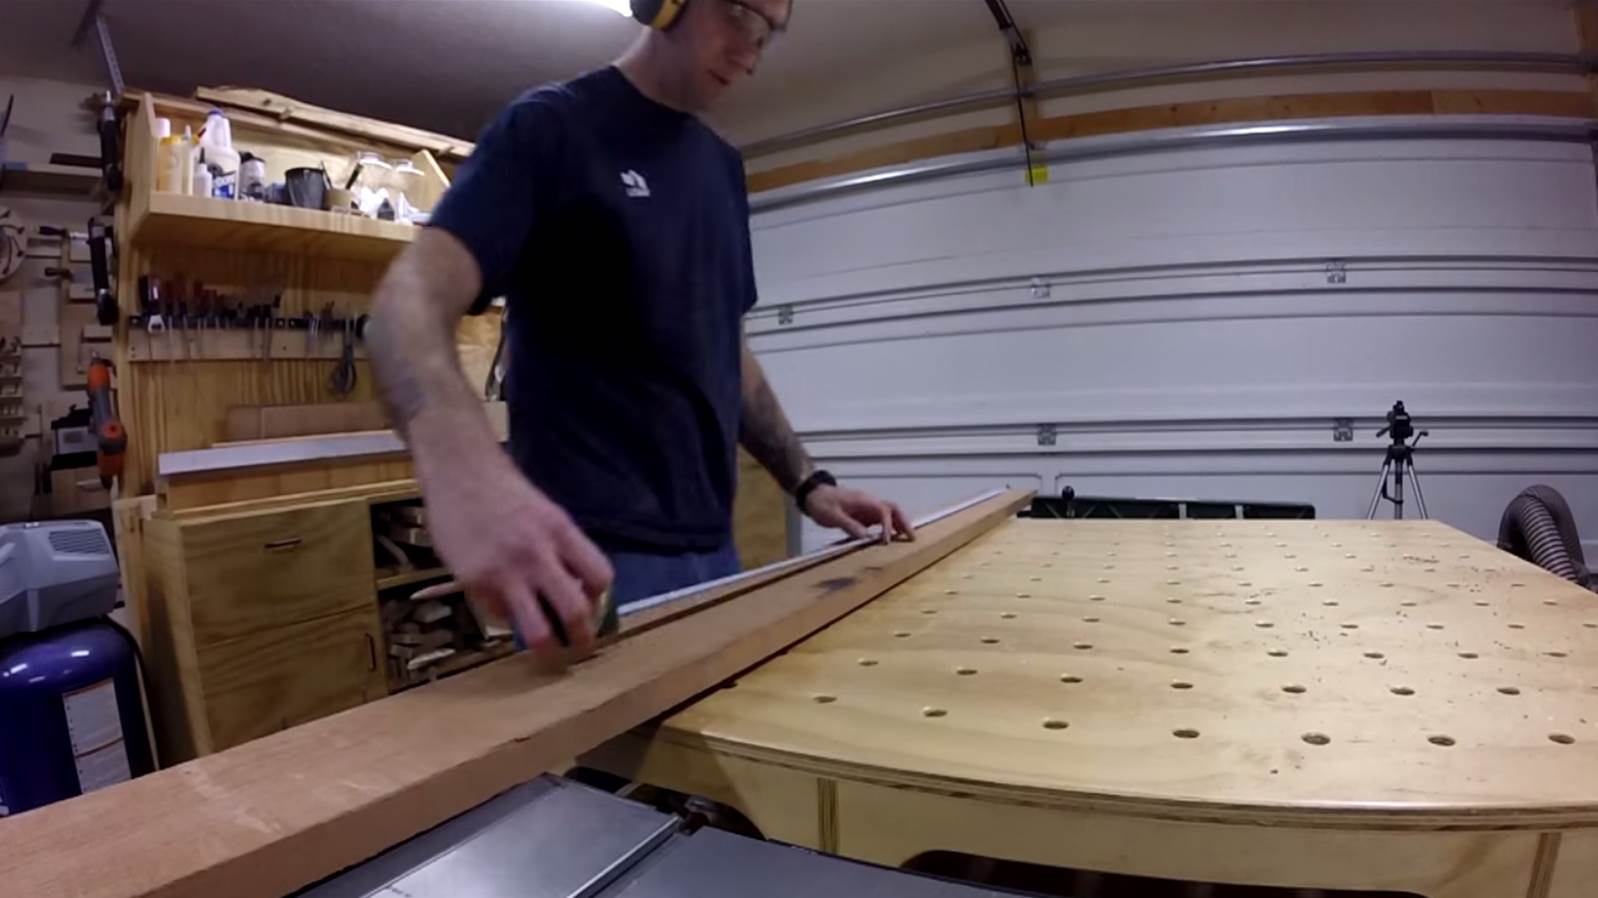
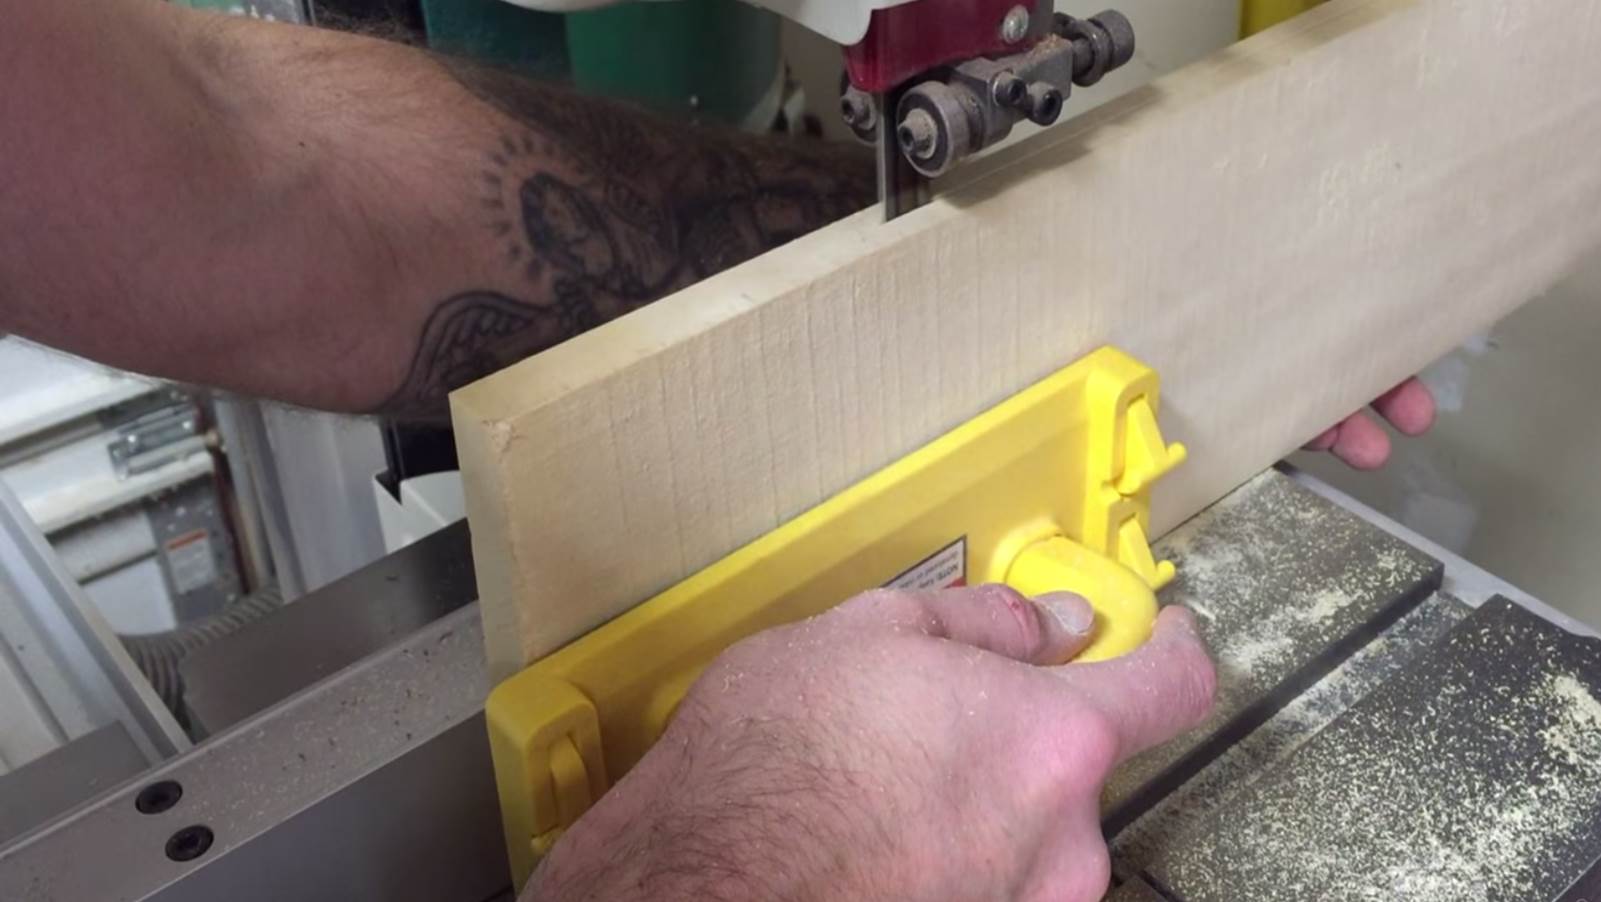
Now depending on if your using rough cut lumber as I did or material that has already been milled to smooth on four sides (S4S) like you would buy from most retail lumber stores, this step might not be required. But since I have the equipment available to me I try and source my lumber rough cut to save money. In this step I use the jointer, thickness planer, and table saw to get them to there final dimensions.


To make assembly of the flag a little more manageable I first made three separate panels and then glued them together. The first of these panels is made from three walnut boards glued together. Once the glue was dried I sanded it to ensure the panel was flat and any excess glue was removed.
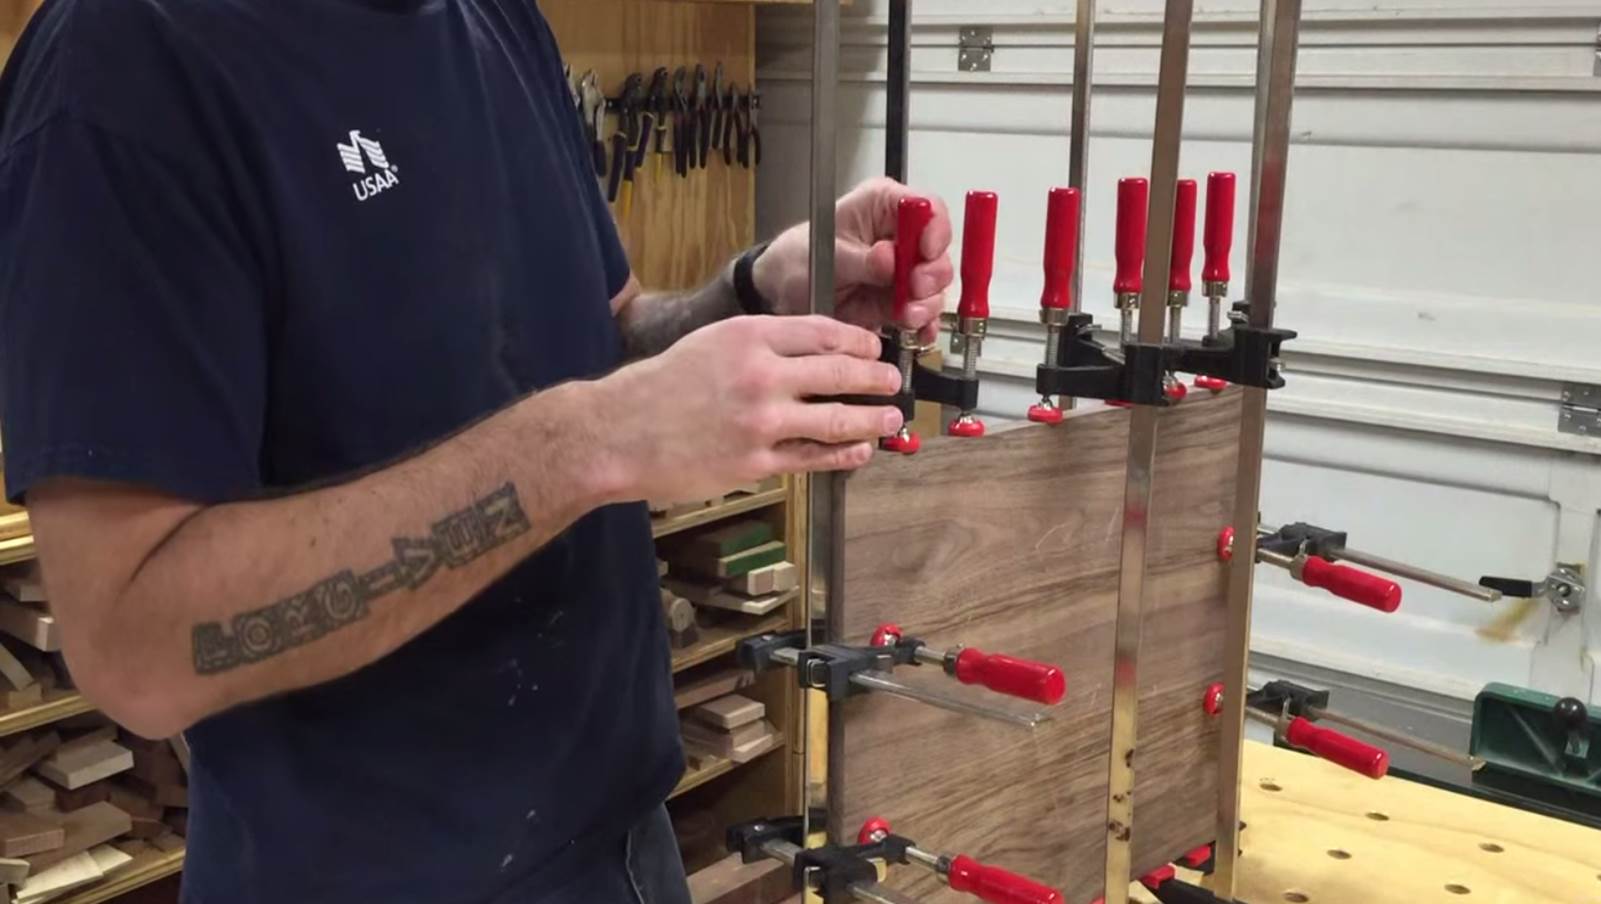
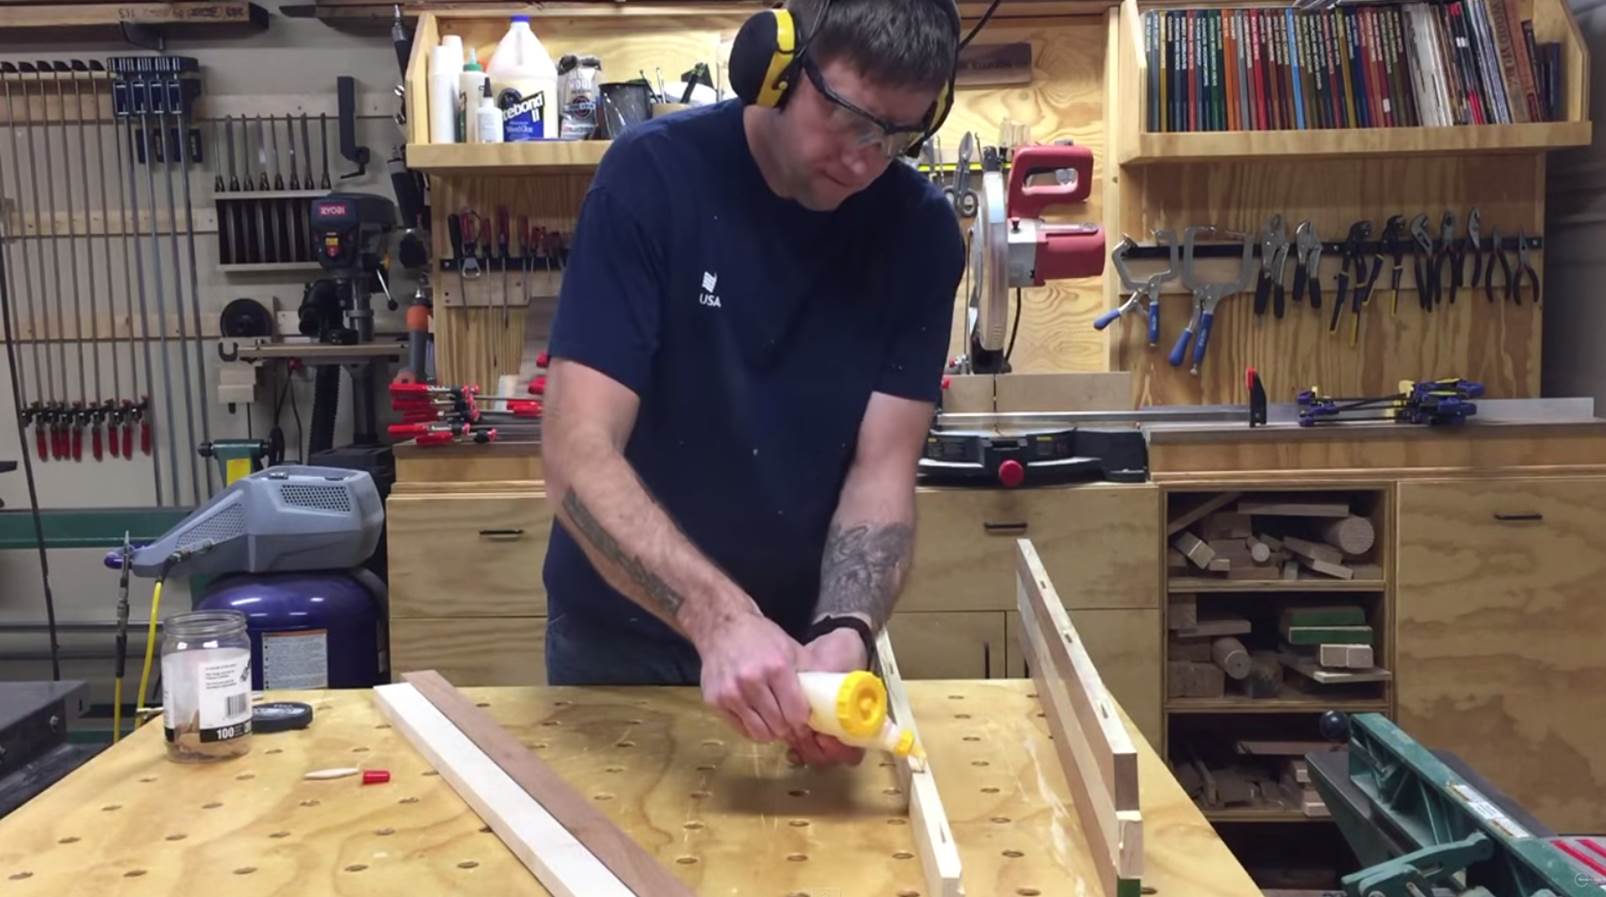
The second panel is the longest of the three and makes up the bottom part of the flag. This panel is made up from alternating Sapele and Maple boards to replicate the red and white stripes. To help align the boards during the glue up I used a biscuit joiner which cuts a small slot in the board that then fits a small piece of compressed birch which is referred to as a biscuit. To make sure the boards are first aligned properly it is important to line them up and then mark the location for the slots on each opposing side of the boards. I then glued the faces of each board and inserted a biscuit in each slot. I then clamped them together and moved on to prep the next panel.
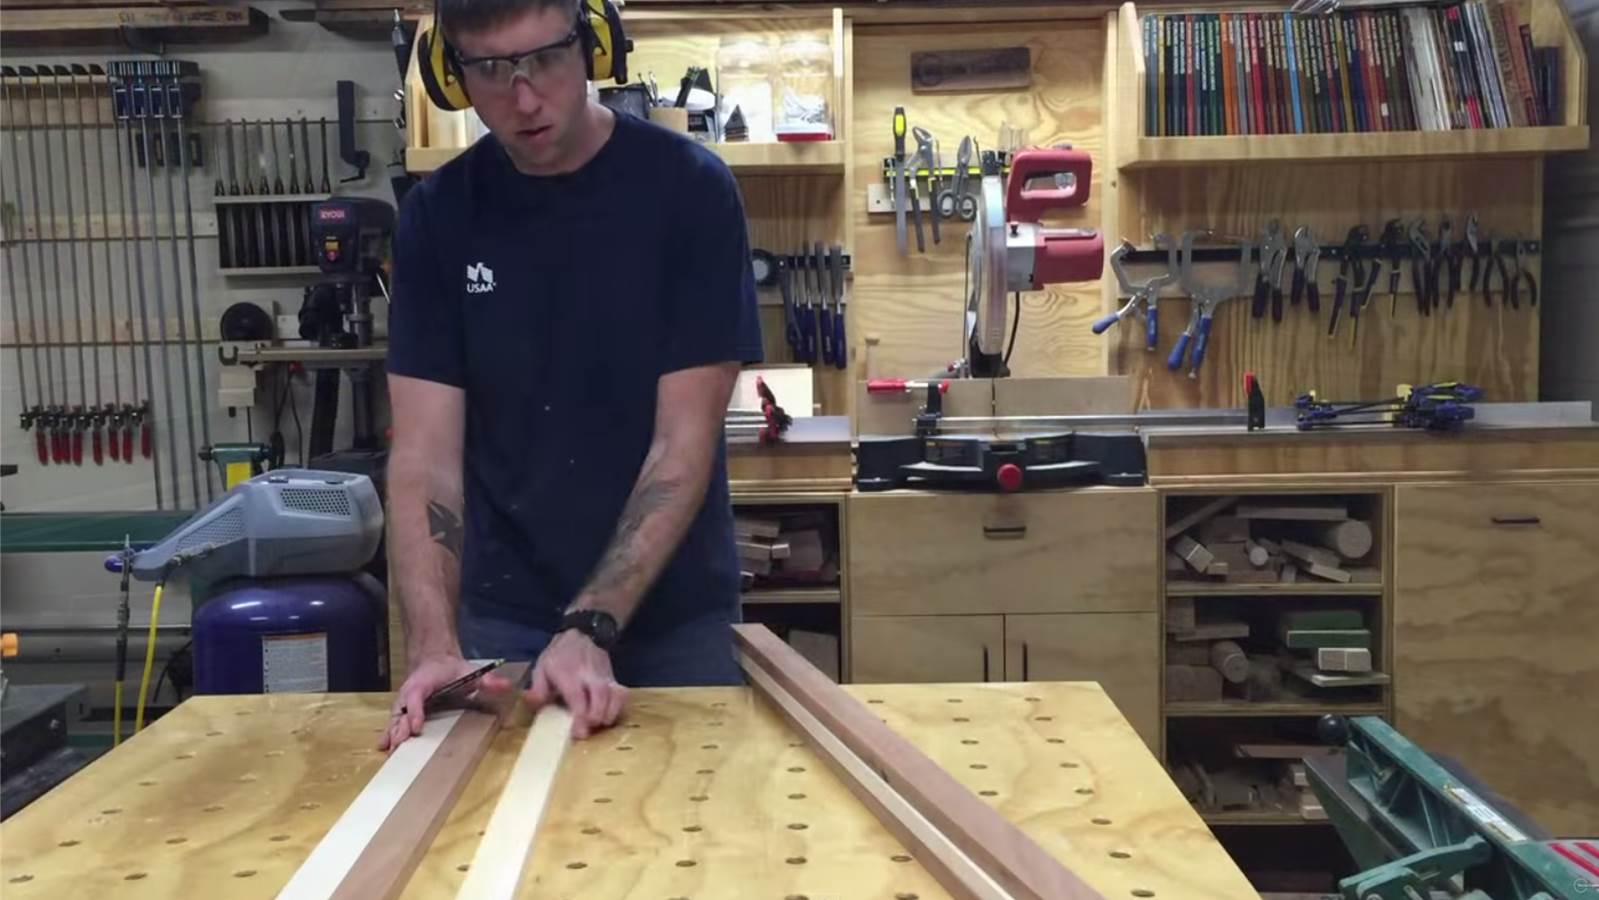


The third and final panel is constructed the same as the second.


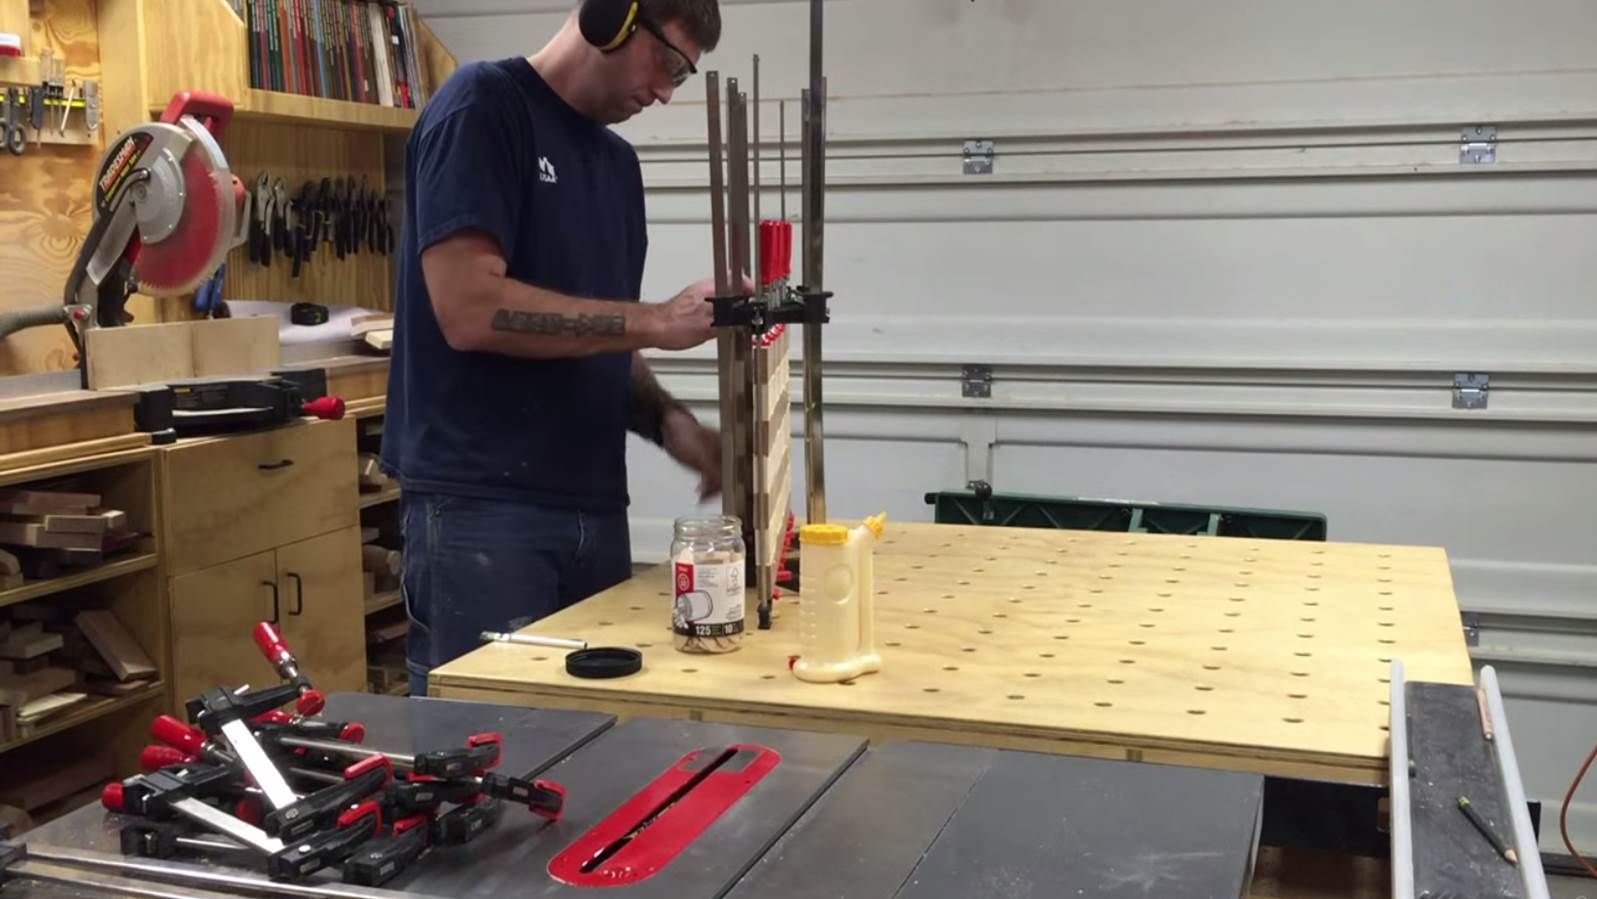

Unfortunately I lost all the footage of me assembling the three panels together to make one. The most important thing is to make sure all the joints are square and there is even clamping pressure along all of them. Using a biscuit joiner really helped since there was not only joints parallel to each other but also one that was perpendicular.
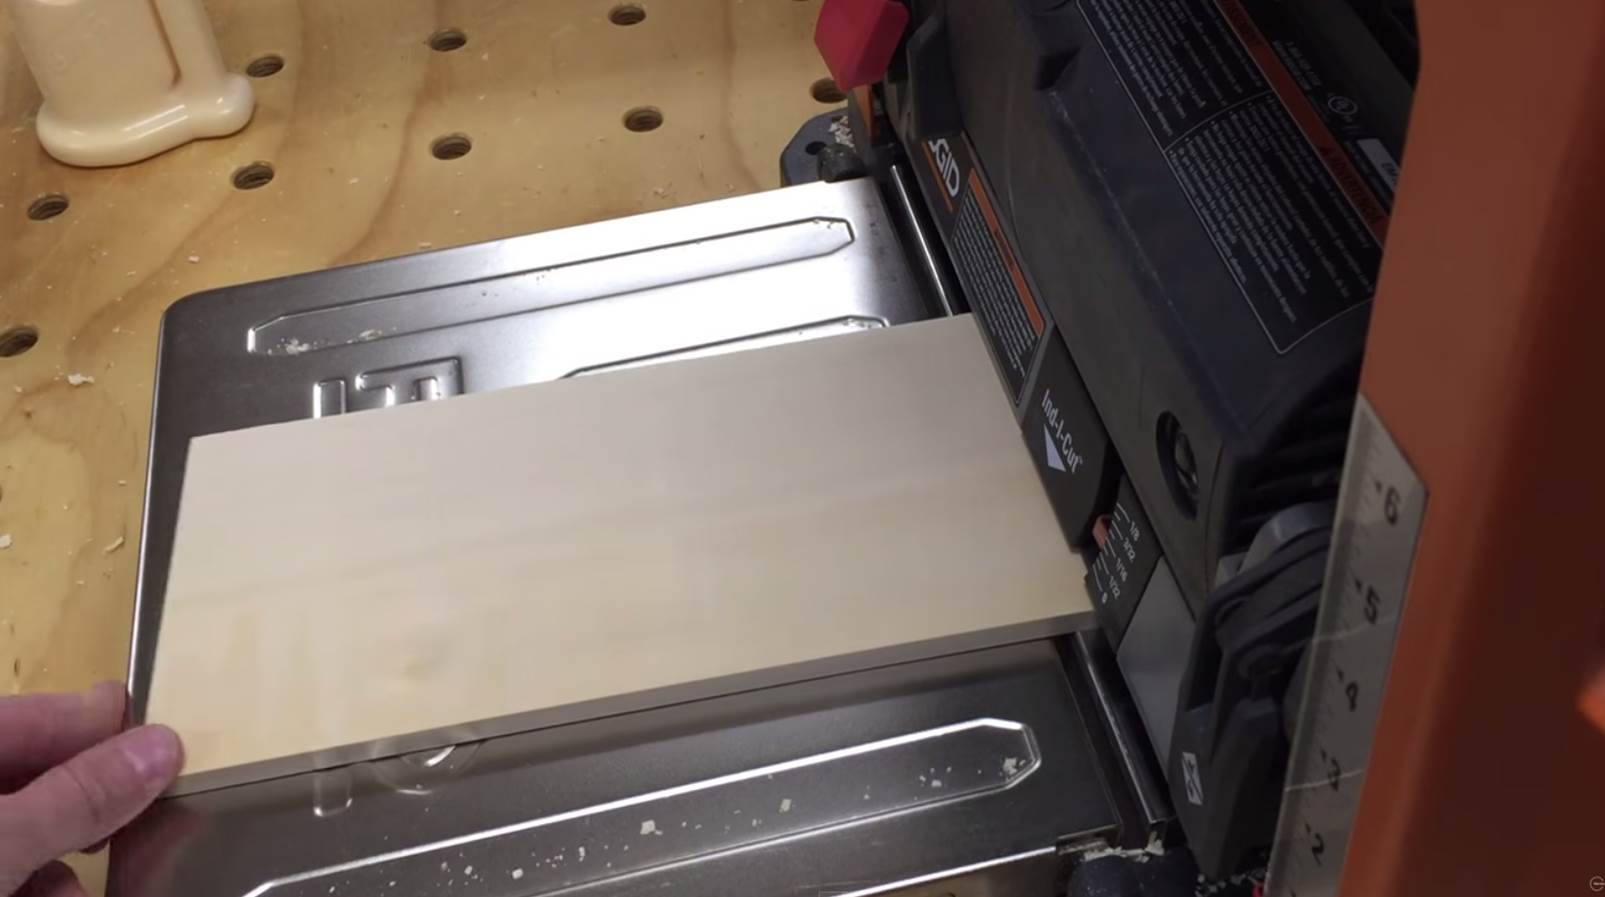
The stars are also made from maple and since there were 50 of them I chose to use my CNC to cut them out. First I planed one face of the board and then resawed it on the band saw. Resawing lumber is simply slicing the board to make two thinner boards. This is a great way to get more from your material. Then I ran the boards through the thickness planner to get them to 1/4 inch. To make the stars I used Easel to draw them up and then copied as many stars as I could fit on the work piece and used my Shapeoko 2 to cut them out.
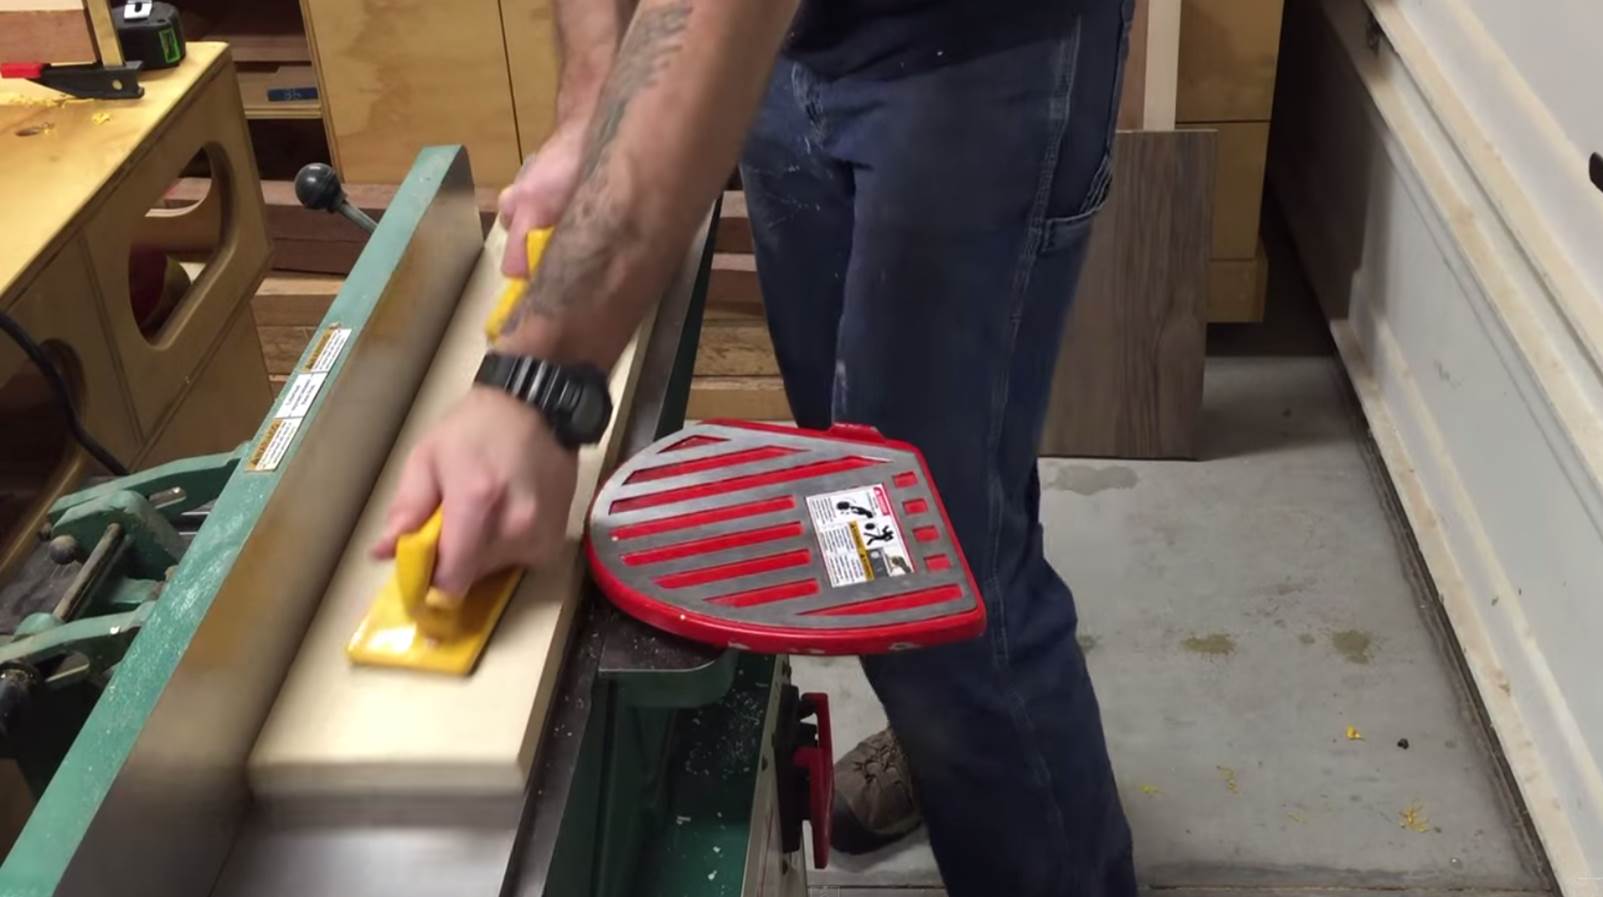


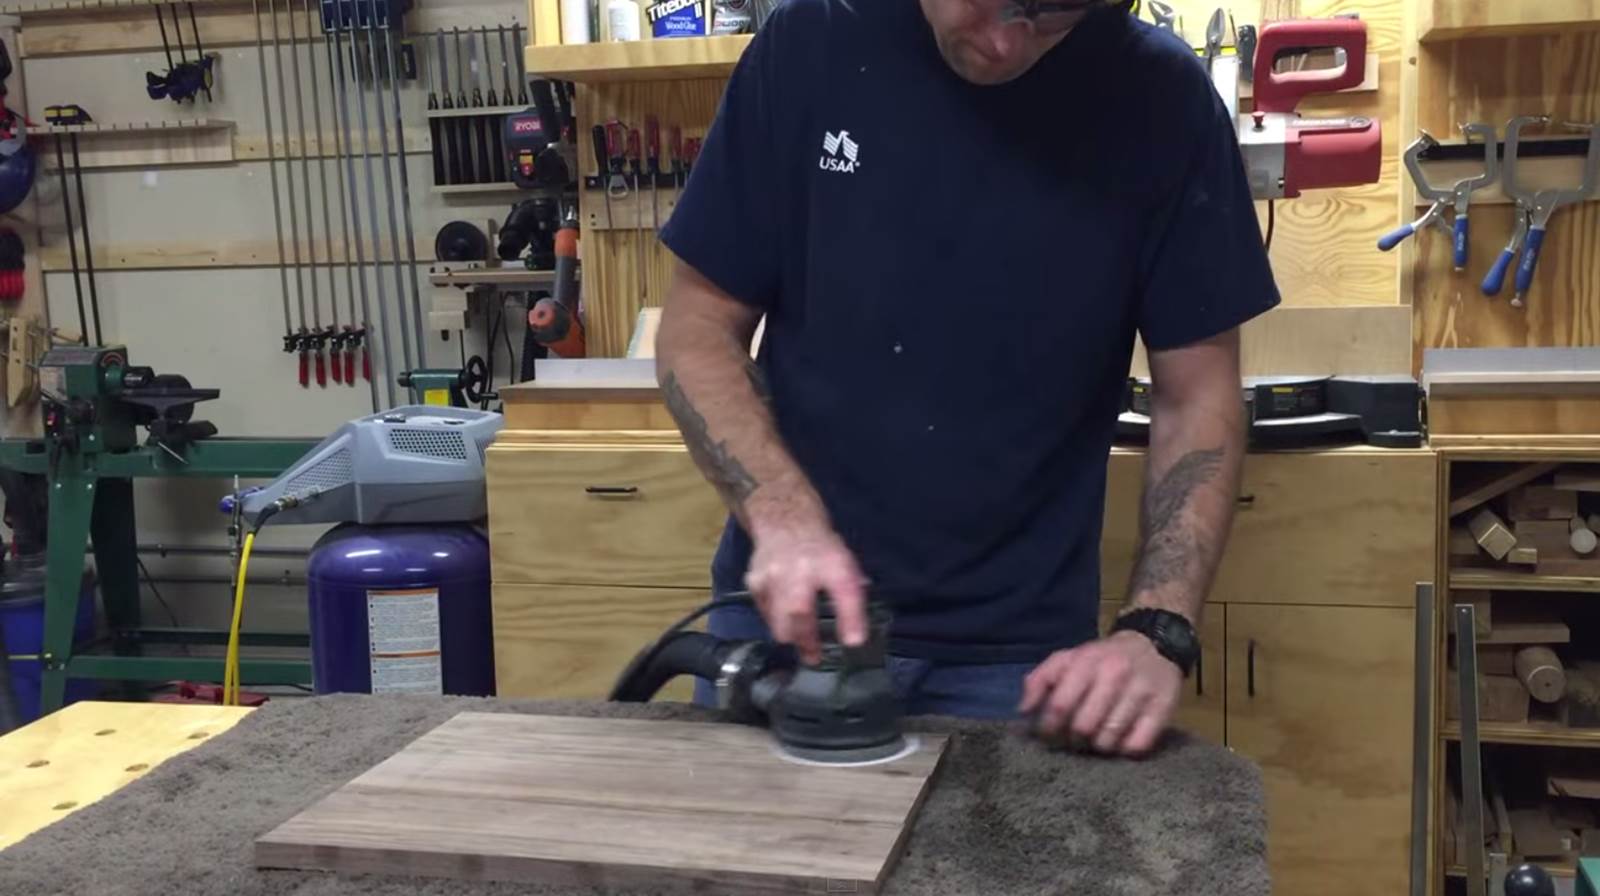
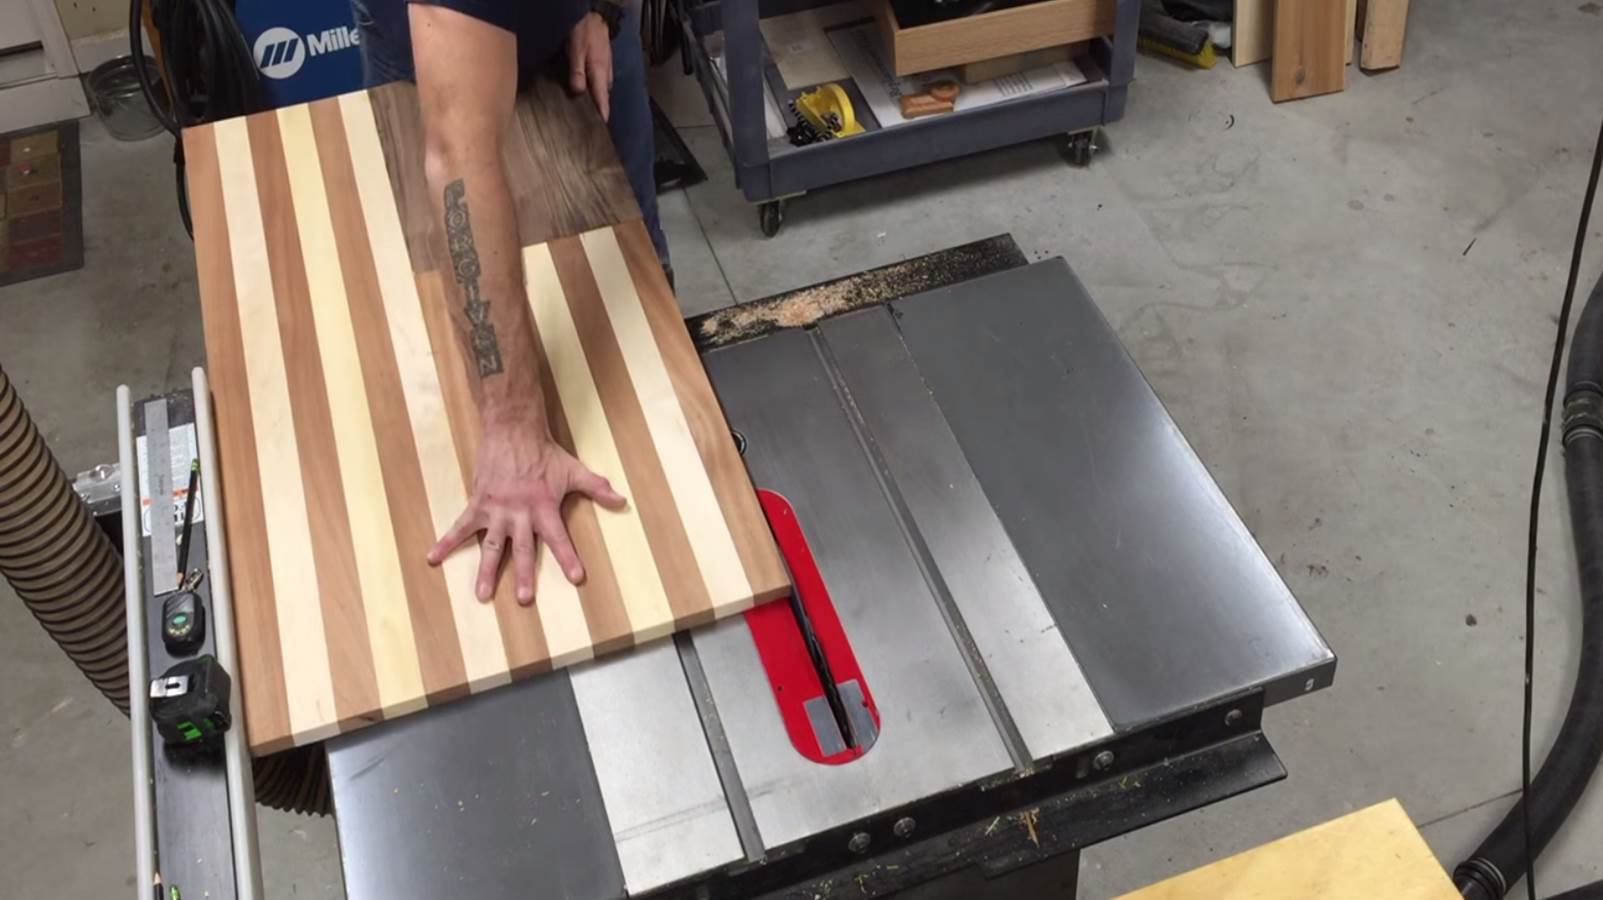
Once the glue has dried on the three panels that now make up the flag it is time to cut it to its final dimension. To cut the panel to length I use my crosscut sled I made for my table saw. This allows me to get a good clean and square cut since the panel is to wide to use my rip fence. For cutting the height of the flag I just set my rip fence on the table saw and cleaned up the edge. Of course once that was done it was time for some final sanding.


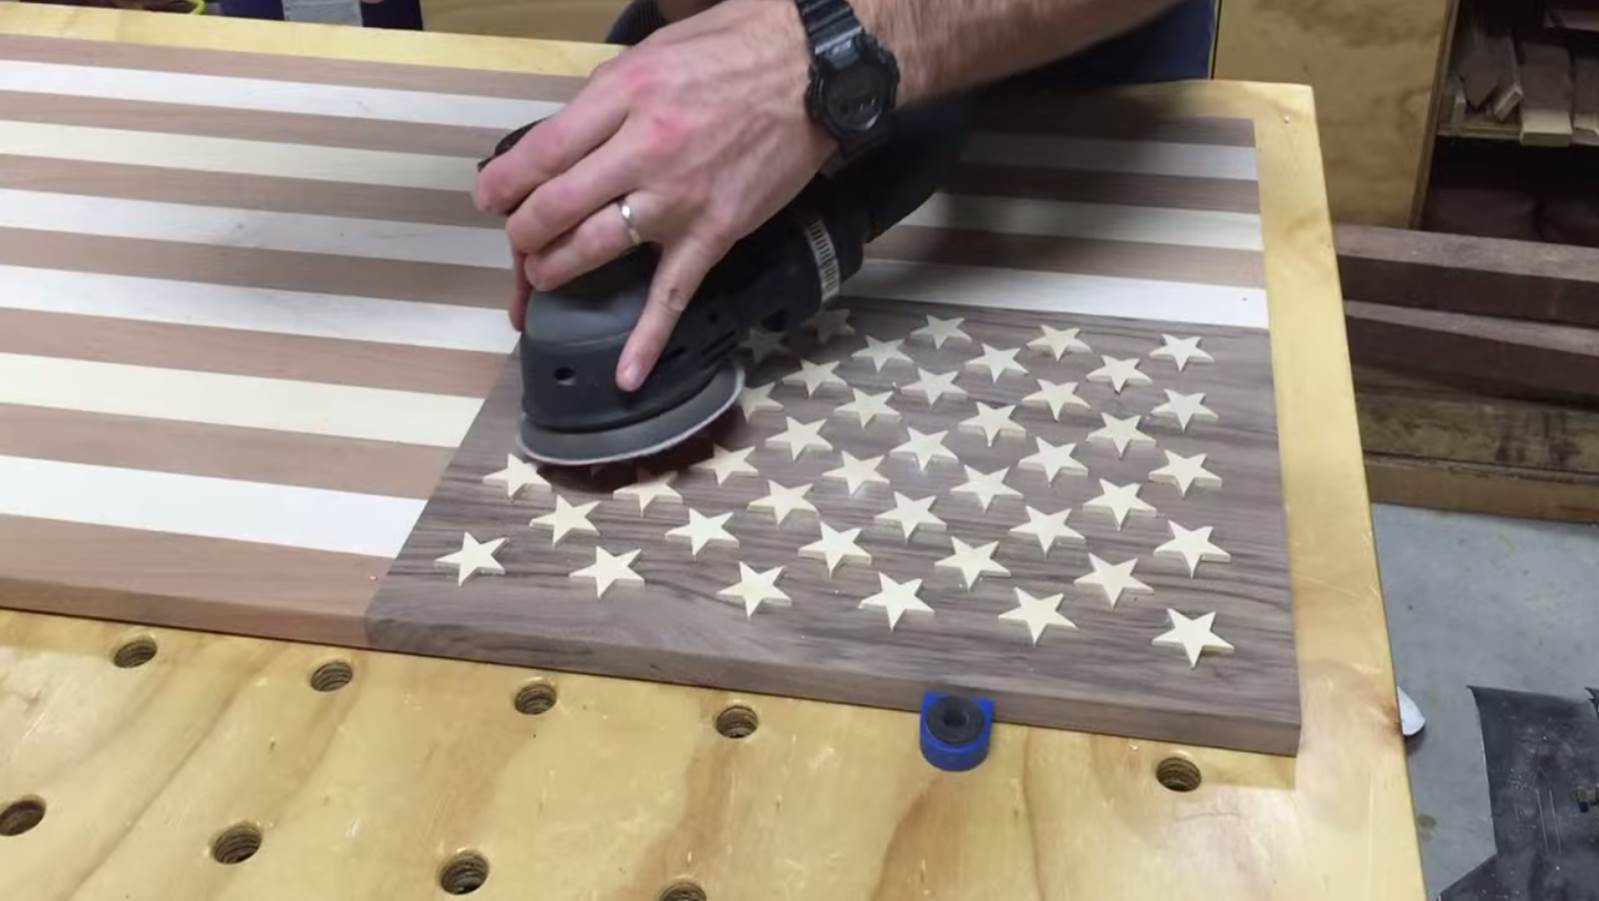
To align the stars I had to divide the available space and then make sure that they all lined up in their perspective rows. I shop calculator and a good ruler really came in handy here. Once I got them all lined up I glued them and pin nailed them in place. When the glued dried I sanded the points to all the stars down to give it a more three dimensional look.

To make this flag into a coin rack I make some maple trays that will be attached to the maple stripes. I use my router table to cut a 1/4 inch groove down the length of the board on either side of the board. This will allow me to rip down the center of the board and give me two trays. From there I round off all the edges and smooth the groove with a custom made sanding block.


To attach the coin trays I use a combination of wood glue, hot melt glue, and brad nails. The hot melt glue and brad nails just acts to hold the trays in place while the wood glue cures.


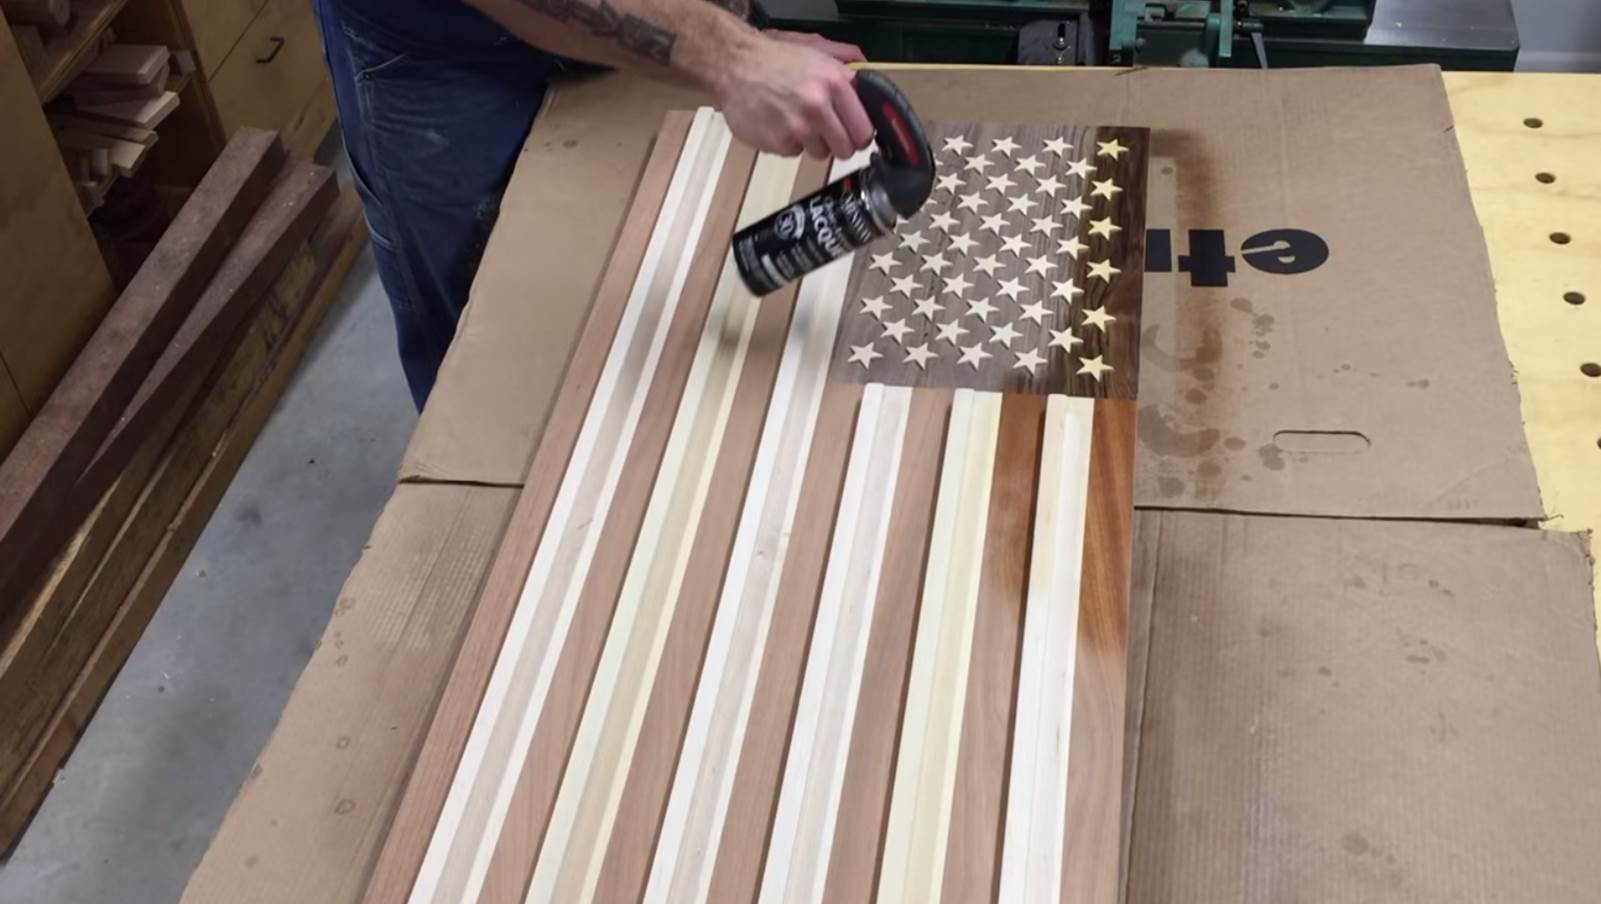
As the final step I apply several coats of spray lacquer to not only protect the coin rack but also to bring out all the colors in the wood and show the contrasts between them.


PR Smith
Jen
Kristy Foreman
Mike Merzke
Amber smith
Mike Merzke
Lisa Kieffer
Mike Merzke
Lane Hart
Mike Merzke
Gabriel Jimenez
Mike Merzke
Amanda Brandeburg
John Smith
Jason Roberts