
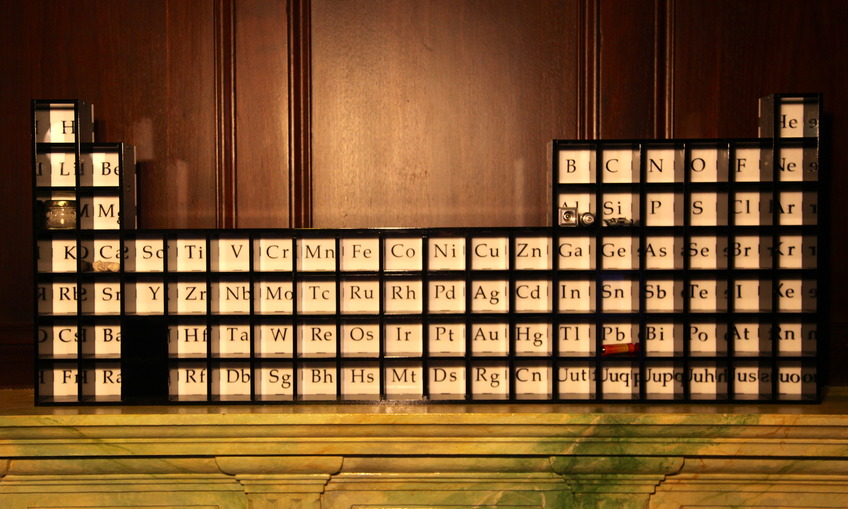
About 3′ × 2′ × 2″, this periodic table-shaped display cabinet is made of 1/4" thick high gloss black and white acrylic, and each element has its own cubby hole labeled with its chemical symbol. I plan to gather items from around the world and place them in the holes based on the elements in them.
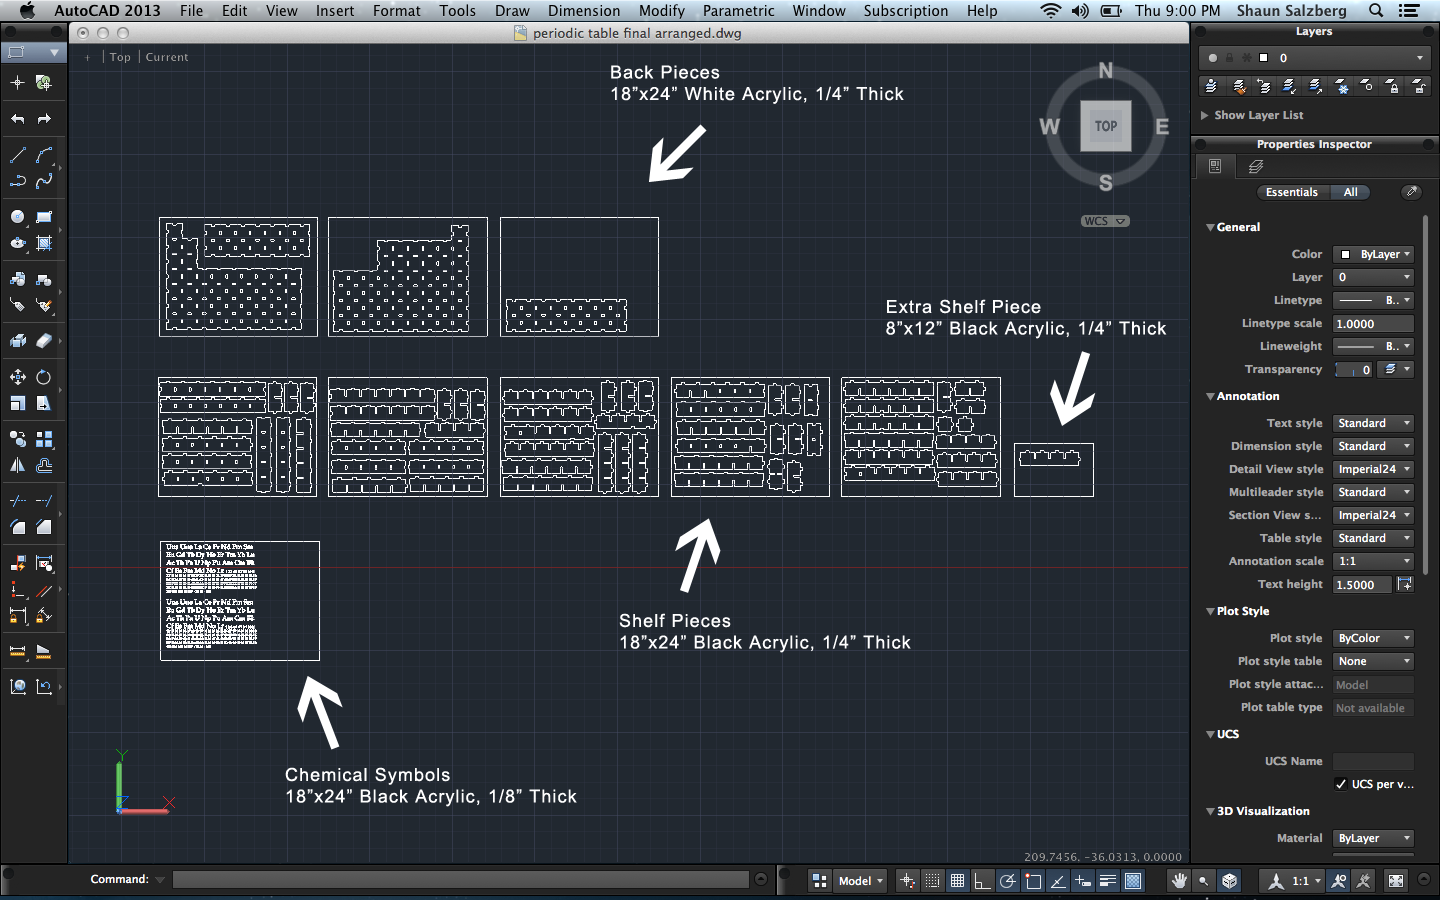
Download the periodtable.dwg CAD Design File associated with this project and open it up in AutoCAD or your favorite CAD program. Each rectangle in the file represents one sheet of acrylic, with the pieces to be cut out on that sheet with a laser cutter already arranged inside.
The top three sheets containing the back pieces are to be cut out on the 18″ × 24″, 1/4" thick white acrylic sheets.
The middle row containing the shelf pieces are to be cut out on the 1/4" thick black sheets. The extra shelf piece that didn’t fit on the other 18″ × 24″ sheets can be cut out on the extra 8″ × 12″, 1/4" thick sheet.
The letters at bottom are to be cut out on the 18″ × 24″, 1/8" thick sheet of black acrylic.
First, set up your laser cutter. This will be different for everyone depending on which laser you have, but the steps generally consist of cleaning the lens, calibrating the Z-axis, and resetting the X/Y origin to the upper left corner.
Using the software that comes with your laser cutter, set the speed and power level to the appropriate values for 1/4" thick acrylic. These settings will also be different on each laser cutter, so you should do a few test cuts before getting it right.
To do this, set your canvas size to 8″×12″ and draw a small shape, such as a circle in one corner. Put the 8″×12″ sheet in the laser cutter, and cut out the shape you just drew. Make sure the shape falls cleanly and easily out of the sheet after being cut, otherwise adjust your settings and try again until it does. Note the speed and power values that work well for 1/4" thickness.
Repeat this process for the 1/8" thick sheet, setting your canvas size to 18″×24″, and using the bottom right corner of the sheet as a test area. Note these speed and power values as well.

Set your laser cutter’s speed and power values to the levels that worked well for 1/4" thick acrylic.
Put a white sheet of 1/4" thick acrylic in the laser cutter and close the lid. Using the software that comes with your laser cutter, open the provided CAD file and copy over the first back piece sheet. Align the upper left corner of the bounding rectangle with the upper left corner of the canvas, and then remove the bounding rectangle. Cut out the pieces, and then repeat this process for all of the back pieces and shelf pieces, being sure to use the right color of acrylic for each sheet.

Set your laser cutter’s speed and power values to the levels that worked well for 1/8" thick acrylic.
As before, copy over the sheet containing the chemical symbols to your laser cutter’s software, align the pieces correctly within the canvas, then cut them out.
Be careful when removing the letters from the sheet after cutting — they’re very small and very fragile. The best way to remove them is to hold the sheet an inch above the table, and gently press down with the flat part of your thumb. You may also want to print a few extra i’s, j’s and other letters with small parts, because you’re bound to lose or break a few in the process. As you remove the letters, use a tweezer to transfer them to a long, wide strip of painter’s tape to secure them during transportation.

For this step, you’ll need a plastic solvent like this: http://www.amazon.com/Plastic-Weld-Cement-Merch-12/dp/B0006O09LA/ref=sr_1_1
Take a piece of sandpaper and lightly scruff up the centers of each cubby hole on the white acrylic. Don’t do it so hard that you see ugly scratch lines, but you need to do it hard enough to break through the glossy coating. This will ensure a good bond between the letters and the backing.
One by one, remove each chemical symbol with tweezers, rub the backs of them lightly on the sandpaper, place a drop or two of the solvent in the center of the corresponding cubby hole, and use the tweezer to position the letters. Hold them there for a second or two until they bond and then move on to the next cubby hole.
You’ll need a bit of patience as you do this for the whole cabinet.

Using the attached 3D Rhino model as a guide, assemble the display cabinet. Its important to assemble it in the proper order, otherwise you may get to a point where you can’t fit the next piece in. I unfortunately didn’t document what that order was, so you’ll just have to play around with it until you get it.
Assemble it and note the proper order without gluing anything in place. Once it all fits together, disassemble it, and use some sandpaper to scruff up the tabs on each shelf piece and the insides of the holes on the back pieces. One by one, in the order you discovered before, apply some solvent to the tabs on each shelf piece, and insert it into the backing, holding it for a few seconds before it sticks.
Once everything is assembled, you can either put the completed piece on a mantle or hang it on a wall with some non-damaging velcro picture hangers.
Enjoy!


James Rodovich
Shaun Salzberg
Matt Gornick
Jonathan Iles